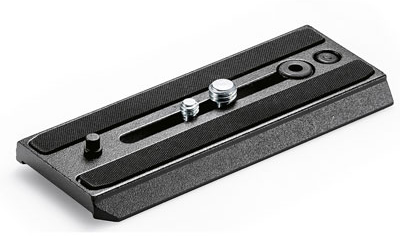
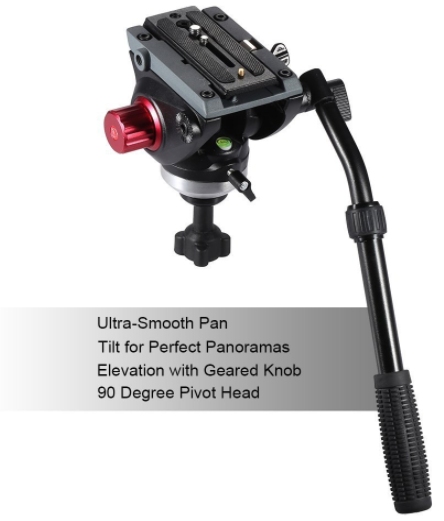
One slight personal niggle I have with my new Andoer tripod is the camera mount. It features a long camcorder format mount, like this...
Now, this is designed to complement the long narrow 'footprint' of camcorders, and is - in my opinion - overly large for the smaller format of DSLR or mirrorless cameras. Additionally, I find this sort of mount a bit of a pain to use, you have to screw the camera onto the mount so it isn't quick or easy to remove (you have to remember to keep a screw driver or coin on hand to unscrew the mount).
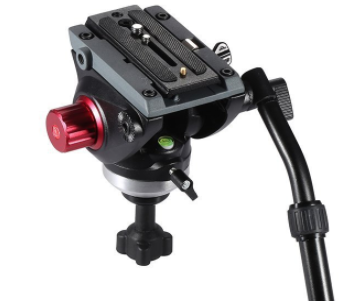
Left: My Andoer tripod head, showing the long type of mounting plate intended for camcorders.
Of course, you can detach the mounting plate and camera from the tripod head with relative ease...By unscrewing yet another screw catch to release the mount/camera!
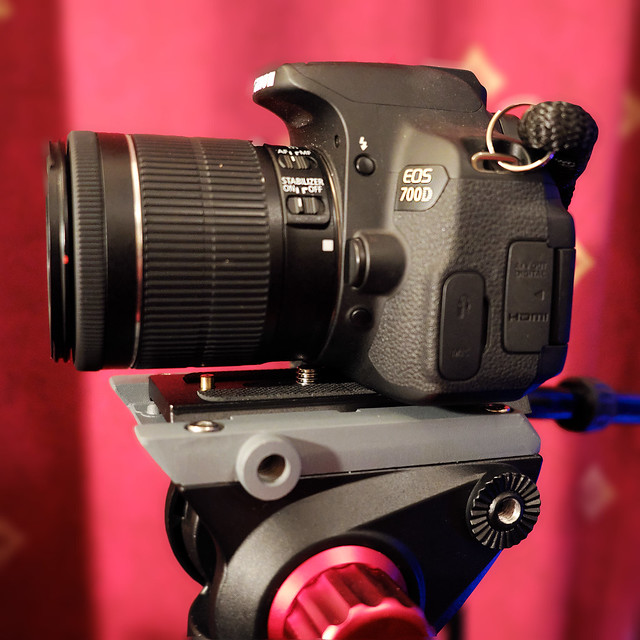
DSLR mounted on the long camcorder plate. While it actually
works perfectly well, it's a little ungainly.
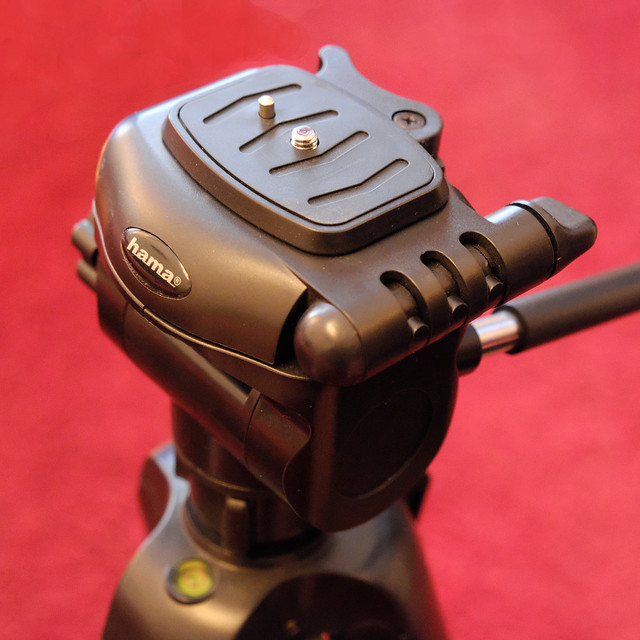
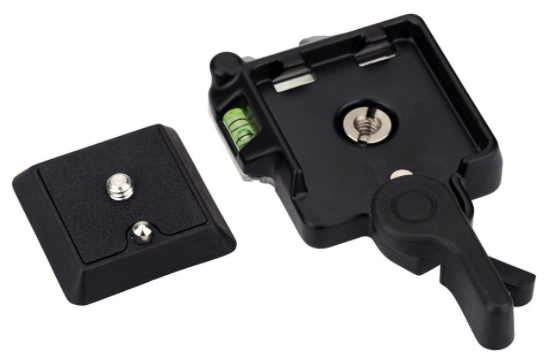
I much prefer a QR (quick release) type mounting plate which has been designed specifically designed for use with DSLR/mirrorless cameras...
The compact QR mounting plate of my light-weight tripod. The smaller size
of the mount is more suited to DSLR/mirrorless cameras than the long
camcorder mount, in my opinion.
This sort of mounting plate has a trigger release catch, making it fast and easy to detach the camera. Some tripods actually come with this sort of QR mount built in (as above), but my Andoer tripod doesn't. Pity.
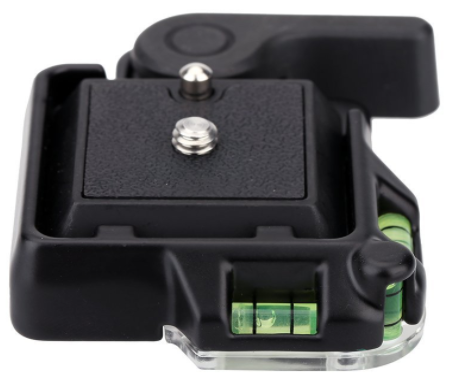
Luckily, you can buy the above type of mount as a separate unit which you can then attach to your longer camcorder mounting plate, killing two birds with one stone. You now have a smaller more compact mounting plate and also one which has a quick release catch. I bought one of these, which was also made by Andoer, their Compact Quick Release Assembly Platform Clamp + Quick Release Plate (£7.89)...
One aspect of this QR mount that I particularly like is the
'safety catch' on the 'trigger'. The trigger release catch cannot be
accidently knocked open without the additional 'safety' being
activated. That's really neat.
All I had to do, was attach this to the tripod's long mounting plate and then I had a smaller more compact mount for my camera that is also quick and easy to detach...
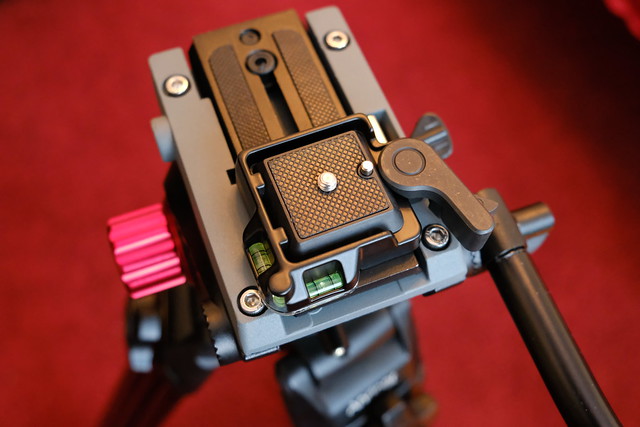
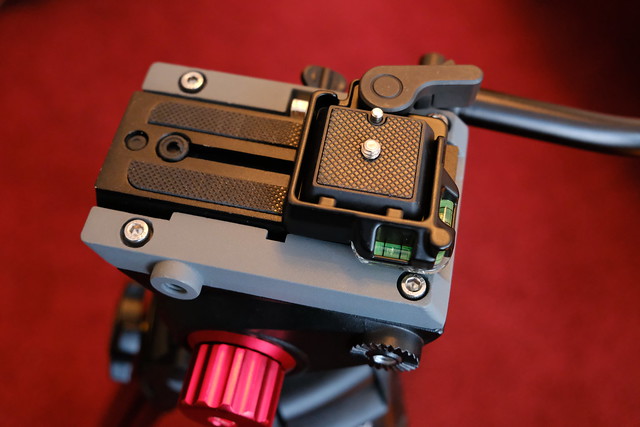
My Andoer QR Compact mount attached to my Andoer tripod's long mounting plate. I've mounted it with the trigger catch to the side and the bubble levels facing the rear. I can now attach and detach my camera quickly and easily.
The Andoer Compact Mount comes with integral bubble levels to help you ensure that you tripod head is perfectly level. This is very handy for me as one of the criticisms I have of my Andoer video tripod is that it's own single bubble level is not very easy to see, so having these extra levels, just under the camera, are perfect.
Finally, I find the little extra height that adding the compact QR mount gives you makes it slightly easier to manipulate the camera lens focus, aperture and zoom rings.
It's now been about four months since I did any proper, directed, film project. And while I now feel completely free to film what I want, not being controlled by a set brief (one set by someone else) does have it's down side. When you have no set brief, what exactly do you film?
Being assigned a filming brief may seem like a confining situation, one with limitations on your creativity but, in actual fact, it's the puzzle of making something creative from within the confines of someone else's concept that drives designers and artists to be at their most innovative (or that's the theory, anyway).
On the other hand, some creatives find the lack of third party interference - with the conceptual catalyst coming from 'inside' rather than from without - liberating. It does add an extra burden of having to come up with the original idea in the first place, which can be the hardest part.
This is the quandary I find myself in, now that I am out of a job just what do I film? KISS and make up
An added additional complication is that I am currently involved in learning how to use various items of video equipment, including a new camera. So, trying to undertake some sort of filmed 'masterpiece' while trying to fathom unfamiliar kit is probably adding too many potential pitfalls.
If my work experience taught me just one thing it was never, ever, attempt a live project with unfamiliar, untested equipment. Alway, do your learning and testing on a separate tailored - non-critical - project.
So, the moral is keep it simple, stupid!
“The man who chases two rabbits catches neither.” Confucius
Don't over-complicated matters, by trying to produce a clever movie, while trying to master clever equipment. Start small and simple. So, I began by looking for some simple ideas for film projects and found some on the Vimeo web site with their 'Easy Vimeo Projects'.
'5x5 Project: Garden drops' by Nicolai Amter
These small movie ideas are, on the face of it, uncomplicated concepts with which you can practise your elementary film making skills, but also do have the potential to be creatively challenging if you want to push yourself further.
First steps
Everyone is different, and because I am me - and a little quirky - I actually liked the idea of the 'One Minute Project'. This is really bare bones, but - to me - is also a little left field (but then I am a fan of David Lynch)...Others might find this boring.
In any case, such a simple format will allow me to focus my attention on the mechanics of my film making; exposure, focusing, composition and style.
Christmas has come early, thanks to my lovely wife who insisted I order my gift early to ensure I got it before the shopping mayhem begins in earnest this week! We made wish lists and we sat down and chose what I wanted, and I know that doesn't sound altogether Chistmassy, but we do buy each other little surprise gifts too.
Andoer Aluminum Video Tripod Panorama Fluid Head...Merry Christmas!
Anyway, the gift I chose was a nice, sturdy video tripod. While I did try to replace all the video equipment that I had at work before I left, my redundancy came a little sooner than I expected and I wasn't able to buy a few items before the paychecks came to an end. A good tripod was among these.
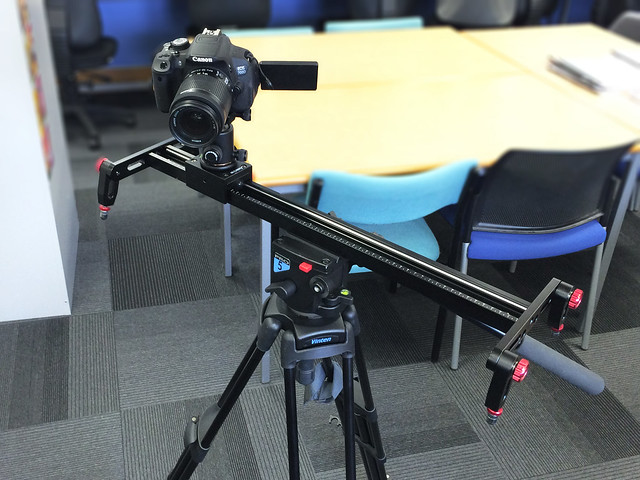
Now, my trusty work tripod had been a heavy-weight Vinten Pro-5 fluid head video tripod, wonderfully made, but a bit of a pain to lug about. Still, it was ideal for rock-solid shots, and particularly smooth when doing slow steady pans. It was, also, the ideal platform for my slider own it's own, with the slider attached centrally via the quick release - anything lighter than this weight of tripod means that you may have to resort to attaching two tripods, one at either end of the slider, for stability.
The solid Vinten Pro-5 heavy-weight video tripod, with my Koolertron 60cm
camera slider attached via the tripod's head.
Sadly, I am no longer in a position to be able to afford tripods of this type (which are about £350 or more if you go down the Manfrotto route), as I am out of work. So I did some research for budget equivalents and, for starters, here's good primer for what to look for in tripod features...
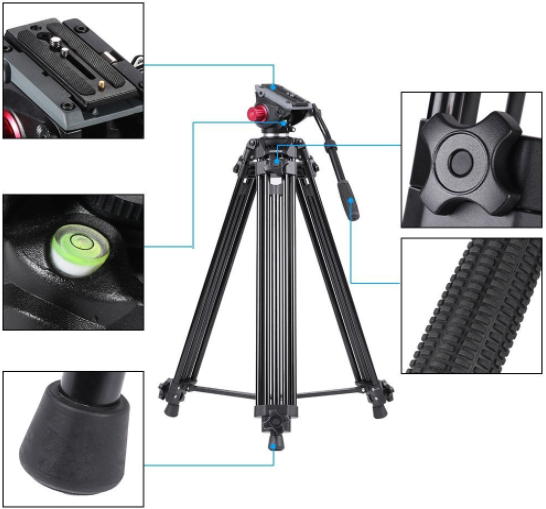
Now, the budget video tripod that keeps coming up as a recommendation (as in the above primer) is the Magnus VT-4000, and this would have been my first choice, but even at just £160 I could not justify this expense (especially as the wife and I put a £100 limit on presents to each other this year). So, the next best tripod, which was nearer my budget, was the Andoer Aluminum Video Tripod Panorama Fluid Head (£105).
Now, compared to the Magnus VT-4000 the Andoer is missing a couple of handy features - like the spiked feet (for outdoor shooting stability) and the counter-balanced, tension-controlled head. But, the Andoer still has very smooth, friction controlled pan and tilt head - the friction coming from screw nuts which you adjust the tightness - and thus the friction - of the head's movement.
I am fairly happy with the smoothness of the pan and tilt, plus the Andoer comes with a nice extra feature which the Magnus - nor my old Vinten - doesn't have, an extendable control handle...
The handle has a screw collar which can be loosened and then you can pull the arm out, which gives you a nice long length of handle, with which to smoothly control your pan or tilt movement. It's a simple feature but one that does actually help you perform these actions in the steadiest possible way. Somehow the longer handle makes these movements smoother and I am sure there is a logical explanation for this, but all I know is that it just works.
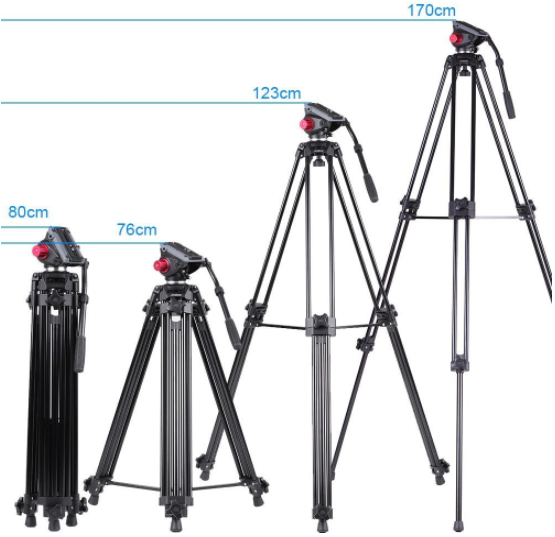
The Andoer unfolds to a very reasonable height, tall enough for me (at 6'4") to
have the camera's viewfinder at eye level. Obviously, the more one extends
the legs, the more unstable the tripod becomes.
The fluid head of the Andoer attaches to the tripod via a 'swing away' pivot (or 'ball') mount. Now these heads are far more effective for video work than other, so-called, fluid video heads which mount on ordinary photographic tripod bases by means of a simple screw attachment. The screw-tensioned ball mount allows you to quickly and easily find 'level' without going through that tedious shortening and lengthening of tripod legs that you have to do were the head attached via a fixed method.
And finally, the aluminium tripod legs are of tubular design (rather than the 'U' shaped alloy telescopic legs you find on some cheaper tripods), and while the diameter of the tubes isn't as large as my old Vinten, they are definitely sturdy enough to support my slider. Yes, the absence of spikes on the feet is a disappointment, but - thinking about it - I can't actually remember the last time I made use of the spikes in tripod (I think it was a few years back when I was filming some students playing football on a grass pitch). The rubber feet it does come with are perfectly adequate.
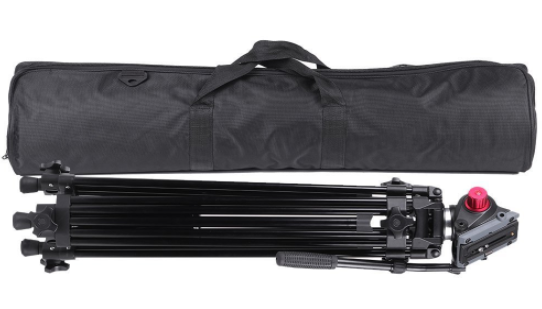
All in all, I am very happy with the Andoer tripod (thank you, Wife). It comes with a handy little bag, with a shoulder strap and is also - by the way - a very nice satin black colour that does, actually, make it look more expensive than it actually is!
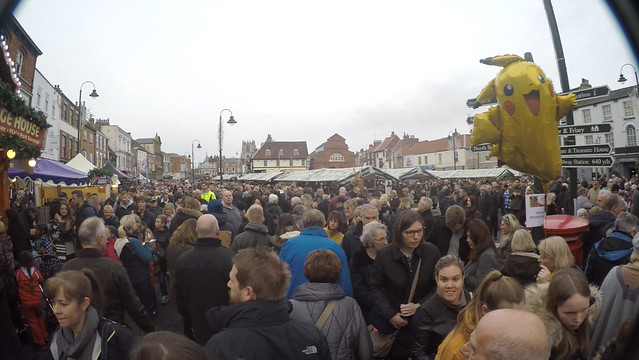
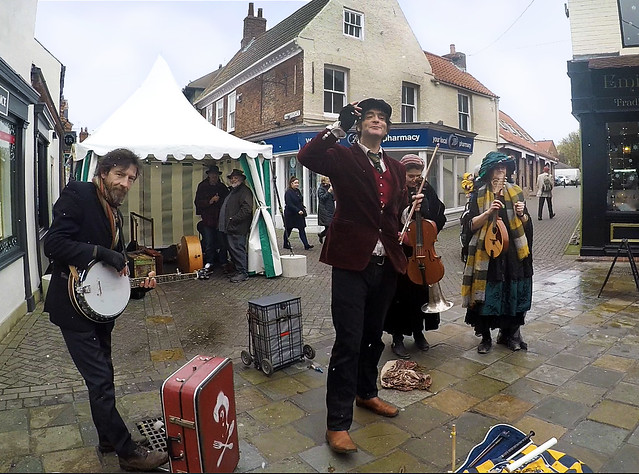
Above is a sample screen from the footage I took on Sunday with my GoPro. This is pretty much a typical example of the quality of exposure I got (4k, wide angle). Very disappointed - so didn't even bother to cut an edit - but I think I know what's wrong, so it's back to square one again.
To be fair, it was actually one of those miserable grey December days that we get in Yorkshire. The sky actually did look like that, and everything else did look a little bit flat as a result, but not this washed out!
Although you do expect to do some correction in post - mainly to compensate
for the 'GoPro bend' that the camera's extra wide angle lens produces the
vignetting caused by the filter is still a bit annoying.
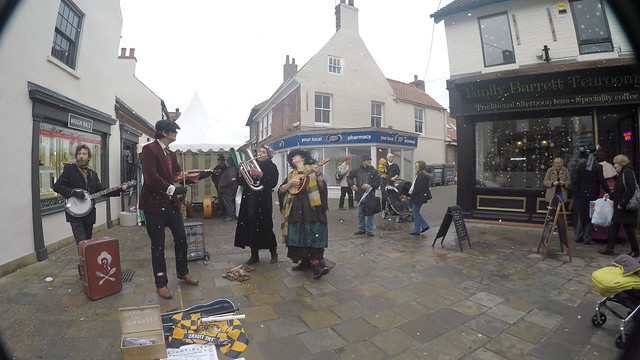
Here's a screen shot I took of one of the movie frames - which I colour adjusted
in Photoshop - to illustrate the sort of exposure and contrast (and perhaps sharpness)
I was actually hoping for. I know the GoPro is capable of this in the right
circumstances and with the right settings.
The problem seems to have been to do with some of the fiddling about I did in the GoPro's advanced settings (ProTunes), as I adjusted the ISO and the colour set-up in order to try and get a flat colour profile so I could grade the colour in post...But I didn't expect it to turn out this flat!
The other issue was the very obvious vignetting, which was caused by the 52mm filter adapter I added to the GoPro's lens. Unfortunately, in 4K mode you cannot adjust the lens mode to anything narrower than 'wide', which may account for it picking up the edges of the filter. I suspect this filter adapter was really made for 1080p footage (where you can set the 'lens'- field of view - to 'narrow').
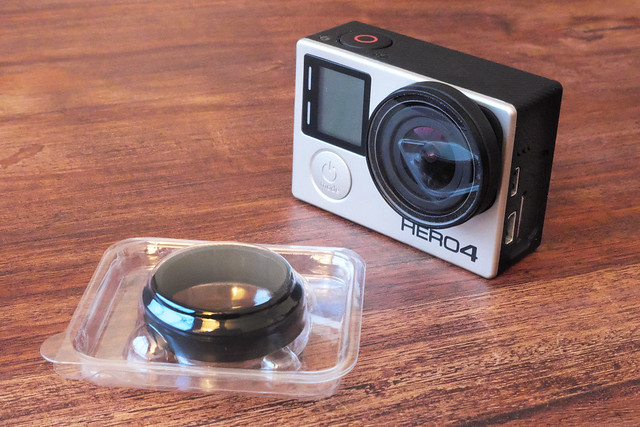
Not to be disheartened, I have readjusted the GoPro's settings and bought an alternative lens protector and I will try again. While there is nothing I can do about the miserable grey skies we are getting at the moment, I hope I can make the other colours - and contrast - in the movies look a little more vibrant in future.
The official GoPro Protective Lens. £20 for a pack of two from Amazon.
I'll try out the 52mm filter again in 1080p, just to see if it is the ultra-wide 4K that they are incompatible with. A bit annoying, but my fault for not researching the product thoroughly enough before buying it, Lesson learned.
Typical! Just getting all set for my first GoPro shoot for a long while and guess what? I couldn't remember the camera's WiFi connection password, Which I need to remotely view my footage!
Luckily, humans being humans, this is a common issue and so there is plenty of help available on YouTube. Here's a tutorial I found most helpful (there are a few that aren't so clear)...
...I get the feeling - knowing me - that this won't be the last time I need this, hence posting this up!
One other note - Since I first got my GoPro I have changed mobile phones. I no longer have an iPhone and now have a Samsung Android phone, so I was worried whether there was a comparable GoPro app for my new phone. Short answer: Yes, there is and it's as good as the iPhone version!
GoPro Hero 4 Black filming Settings
Having sorted that slight 'technical issue' I thought I'd double check my filming settings in the GoPro. I knew I wanted to shoot in 4K at 24 frames per second, but was unsure what other settings I could adjust. The good news is that the Hero 4 includes a range of advanced filming settings which it calls 'Protunes', these are things like ISO adjustment, sharpness and colour profiles. Again, I found a couple of videos that explains these settings...
There are actually a lot of similar videos like these on YouTube and I strongly suggest you watch four of five to get a feel for what will work for you. Filming settings are somewhat subjective, but you need to now what each will effect so that YOU can make an informed decision about where to start. Even then, only experience will tell you what will be YOU'RE preferred settings.
Finger's crossed for Sunday's shoot - just some family Christmas fun, but I desperately need to the practise with the camera.
This post is a little bit of a cheat, really. I actually bought these items at the beginning of September, however, due to my unexpected hospital stay and subsequent recovery period, I have only just gotten around to unboxing these gadgets!
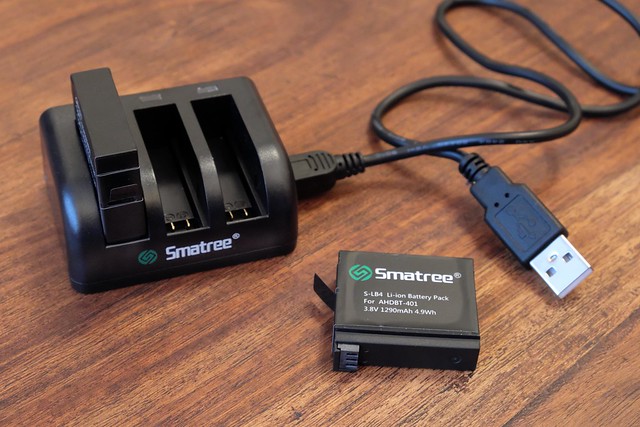
GoPro Hero 4 Black Batteries
I wanted some spare batteries for my GoPro, but didn't like the idea of paying the £15 a piece price tag of the official GoPro ones. So I read a few reviews of third party batteries and plumped for the Smartree alternatives...
For the very same price as just one official GoPro battery, you get two batteries and a three battery USB charger! These 3rd party batteries come highly recommended, some user's actually claim that they are superior to the original GoPro ones.
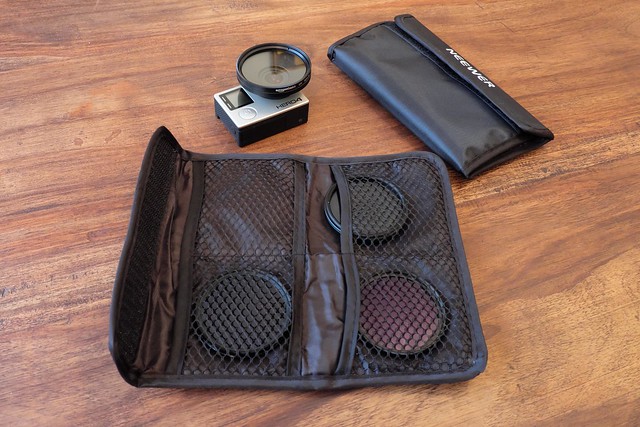
GoPro Filter Adapter and Filters
Because I sometimes like to use my GoPro without the accompanying clear plastic protective case (for example, mounted on my gimbal), I do worry about accidently scratching the GoPro's lens.
For this reason, I sought out a means to attach a UV filter - as I have done with my full sized cameras - to give the lens an extra pain of protective glass. I found Neewer 52mm Black Metal Filter Adapter and filter set on Amazon for just £11.09...
The set comes with the circular adapter which slips on to the GoPro lens plus a wallet containing a UV filter and selection of ND filters (very useful on very sunny days).
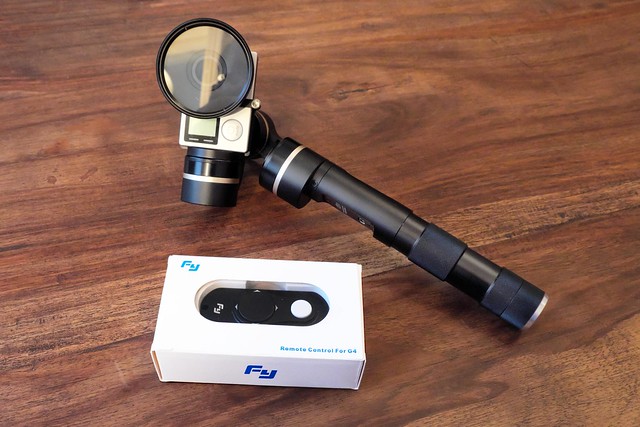
Remote Control for the Feiyu-Tech FY-G4 Gimbal
Although I principally want to use my gimbal as intended - as a handheld stabiliser for my GoPro - as there are a couple of scenarios where I may want to operate the gimbal remotely. Feiyu-Tech produces a couple of different remote control units, there is a wireless one (£25) and a wired version (£14). I chose to buy the wired one, as I am a fan of 'low-tech' for reliability reasons...
The remote allows you all the same movement options as the normal gimbal control, but also adds the ability for you to remotely pan and raise and lower the camera by means of a 'D pad' button. How this might be useful will become clear with the next addition to my inventory...
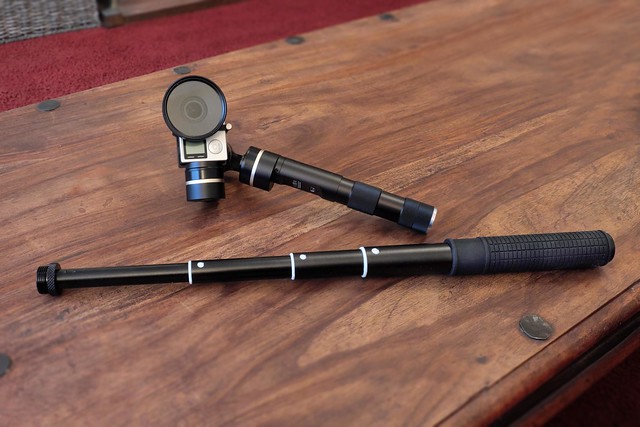
FY-G4 Gimbal Telescopic Extention Pole/Handle
A useful technique while filming with a gimbal is to be able to raise the camera up quite high, in this way you can achieve a sort of poor man's crane effect. Indeed, the Feiyu-Tech G4 Gimbal kit comes with a pair of carbon-fibre rods, which screw together and attach to the bottom of the gimbal to allow you to raise it to greater heights.
However, carting about a couple of short poles with your camera kit and then having to stop and assemble them is a wee bit of a pain. So, I found a Neewer 28"/70cm Handheld Telescopic Extension Rod (£6.99) that gives you that extra height when you want it, but then collapses down into a convenient handle accessory when you don't...
Now, here's where the remote control comes into play...
Unfortunately, the switch to turn the G4 gimbal on is located inside the base of its handle and this is where you screw on any extension pole - making it impossible to operate with a pole attached. And so, unless you turn the gimbal on before you attach the extension (and then keep it turned on), the remote control is the only way to get full control of your gimbal, including the ability to switch it on and off, with a pole in place.
I think that, if you have an extension pole then, the remote is practically a mandatory additional purchase.
I'll be testing all of these 'new' items over the next coming weeks.
Zed ProMedia have done an interesting video test of the X-T2's battery longevity when filming 4k video. It's the sort of methodical technical test that I find interesting so I am posting it up for reference...
When you start reading about mirrorless cameras and 4k video - whether they be Panasonic, Sony or whatever - it won't be long before you start hearing about overheating issues and the length of time that you can film before the camera cuts off. In fact, one of the criticisms that was levelled at the X-T2's specs was that it could only shoot 10 minutes of 4k video at a time (by adding the booster grip you can increase this to 30 minutes).
That this is being seen as a major issue by some people seems a little funny to me, as I rarely shoot sequences that go beyond a few minutes at a time, even when interviewing. Of course, there are times you may want to keep on rolling, but for very long sequences - certainly beyond 10 minutes - I prefer to use a video cam with an internal hard drive.
Anyway, that's an argument for another time...
What is pertinent - however you prefer to shoot - is battery longevity and whether overheating is a serious and persistent issue with the X-T2. This video seems to conclude that overheating isn't, but that there are some glitches with using multiple batteries together via the booster grip (hopefully, this will be addressed in a firmware update).
As for me, I am restricted to just the one battery at the moment (spares are at the top of my wish list), and until I buy a couple more using the booster grip isn't possible, so I can't confirm or replicate the findings of this video test. But what I will say is that during my recent tests with the X-T2, I have found it positively eats battery capacity, especially when you make use of the WiFi facility.
The final part of my video microphone and sound recoding test series isn't actually directly to do with the Fujifilm X-T2 camera. It is, however, about something which can have a big impact on the quality of your video production's sound and greatly improve the professionalism of your set-up...The digital audio recorder.
A lot of experienced DSLR/mirrorless camera videographers prefer to separate the audio recording part of their video production from the actual filming process. The main reason for this is the generally feeble sound recording abilities of these cameras (which were really never designed with high-fidelity audio in mind). Specialized external recorders, on the other hand, have a host of features which allow you to get a much-improved audio recording, equipped - as they are - with far more capable inputs (XLR) and sensitive circuitry.
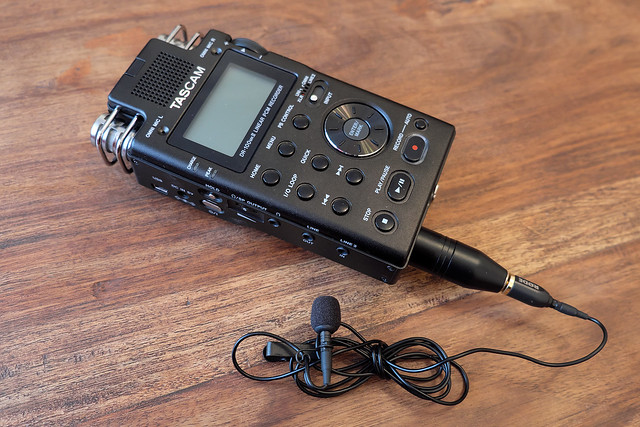
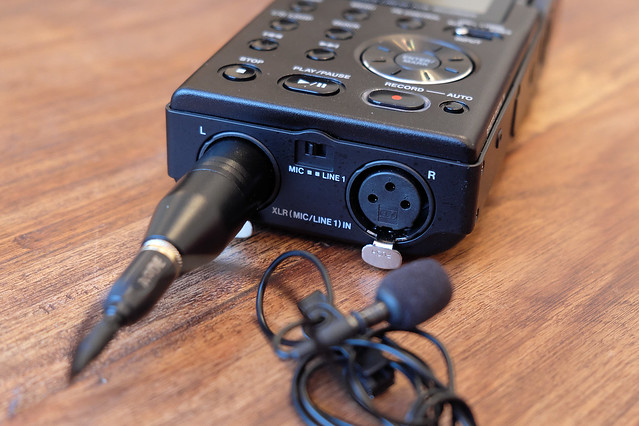
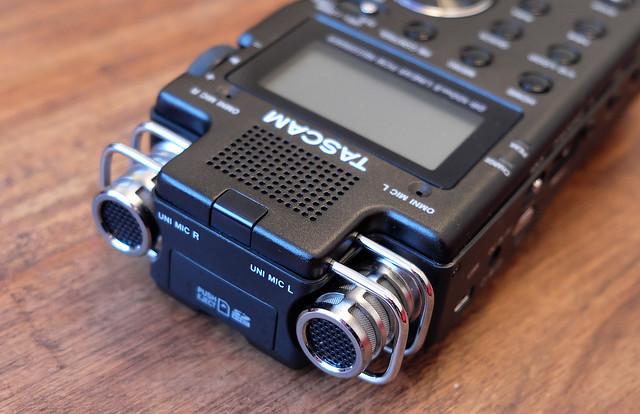
The DR 100 has a selection of microphone inputs,as well as its own integral mics.
It has stereo XLR inputs, so you can connect professional studio mics for 2x mono
interviews or for stereo recording of events or performances.
The other advantage to using a separate primary audio recorder is that - if you still use your camera's inbuilt audio recording facility - you will have the security of having a back-up of your sound recording, just in case (I've had a couple of occasions in my professional career where - through technical issues or equipment failure - this form of back-up has saved my skin).
The Tascam's integral stereo mics are very handy for off-the-cuff reporting-style
interviews (if you don't have time to set-up an external mic). They are of reasonable
quality and a nice option to have at hand.
When I decided to buy a digital recorder I originally wanted the same one that I used to use at my former place of work - a Marantz PMD 600. But these solid pieces of kit are out of production, so I had to look elsewhere, and I came across the Tascam DR 100 Mk II on eBay. It was the older model and has been superseded now, but at half the price of the DR 100 Mk. III (£350 new) I felt that I had a bargain.
The separate audio recording device offers you a unique logistical advantage in that it can be located at a great distance from your camera. Say, for example, you are filming a lecture or other stage presentation, it's likely your camera will be set up some distance from the subject and running a cable to them will not be practical. So, you can set-up your recorder on the podium, have your camera in the wings or on the floor of the hall for a wide shot and still be safe in the knowledge that you will still get good quality sound! (Another advantage of the digital recorder - in the above sort of scenario - is that you can hand the recorder over to a stage manager/AV Technician and they can plug it into their mixing desk, for the best possible quality audio signal.)
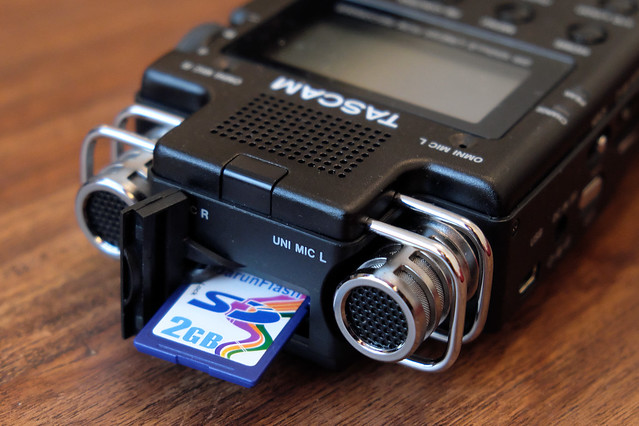
The DR 100 takes SD memory cards and can record to a variety of file formats
and file sizes/quality. The resultant file can then be taken into your preferred
editing software and synced with your video footage.
Finally, recorders like the Tascam can allow you to record a voice-over or commentary separately from your film shoot, or allow a talent to record a piece for you.
The TASCAM DR 100 audio recorder
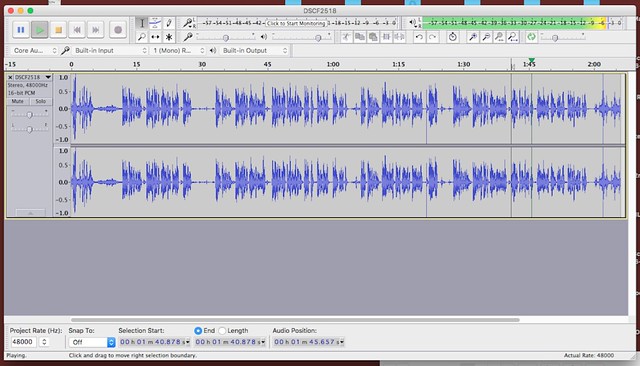
Here I illustrate the X-T2 camera's internal sound recording capabilities, or - rather - the lack of them. I recorded this test piece with the camera's internal mic settings at '10' (50%), just so you can get a feel for the weediness of it's pick-up. Then, in the second half of this clip, I amplified the volume and applied noise reduction in Audacity, before syncing the resultant .wav file...
Not great (you can hardly hear the dialogue in the first section)! I could have dialed the camera's pickup level to 75% or even 100%, but then you run the risk of the soundtrack being very noisy. But as it is, when I boosted the volume with Audacity - for the second half of the clip - that produced a little bit of distortion.
Just for comparison sake, here's a short movie illustrating various levels of the X-T2's audio level settings (from 50% to 100% pickup levels)...
To me, 4 feet between the camera and the interviewee seems a reasonable distance, though, obviously, the closer you go the greater the audio volume. But, there again, you don't really want to be so close that you are sticking your lens right in the face of your subject (hence, four feet). The camera's built-in audio pick-up struggles, and also, the more you increase the pick-up level the more you suffer from incidental 'hiss'.
And, finally, here is the original sequence with the TASCAM DR 100's audio applied...
This audio was edited using Audacity (to amplify the volume a tad and reduce some hiss). Even though my test samples weren't rigorous or scientific, I think it's clear that the TASCAM produces a better quality recording which is richer and has less distortion than the recording made by the camera.
(I had the DR100's pickup volume setting set at '5' - 50% - so I have plenty of room for boosting the recording levels if I want.)
I'm not competent in my use of the DR100 yet (by a long chalk), there are lots of recording options and variables that I haven't figured out yet. It's pretty certain that I could improve on the quality of my recording with a bit more experience.
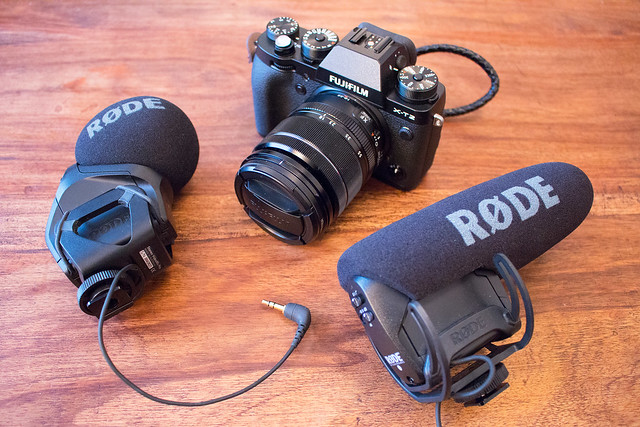
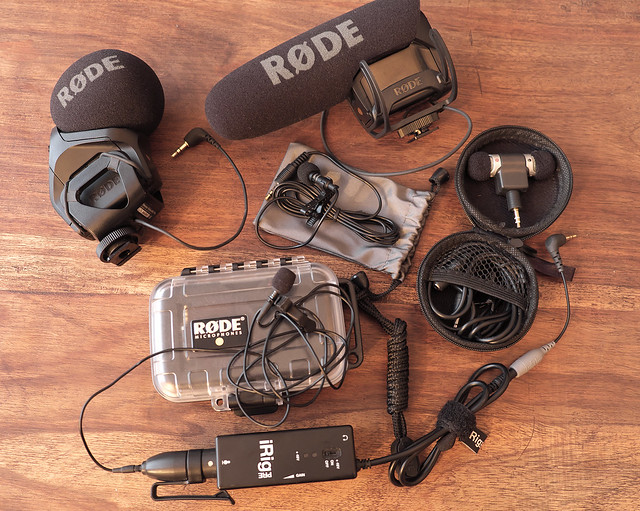
Rode VideoMic Pro and Stereo VideoMic Pro
Moving on from setting up and using a lapel microphone - which is great for set-piece interview situations - I now want to look at a couple of microphones that are ideal for fast-moving and minimal kit shoots (or 'run and gun' situations, as they are known).
An area of videography that interests me is the documenting of events, like conventions and festivals. These can be very challenging for the lone filmmaker as you have to minimise the amount of equipment that you are carrying so that you are mobile and responsive to the events around you - and bear in mind that you will likely working in the midst of crowds of people - but, at the same time, you have to carry the right equipment to capture what you need. A tricky juggling act.
Event and convention work can incorporate two quite different formats of filming, the capture of general ambience and the more focused interview. Trying to do this with, more or less the same kit (as you don't want to be continually unpacking and setting up new kit), is possible thanks to excellent quality compact gear like the Rode VideoMic series of microphones.
These mics are camera mounted - via the hotshoe - and are light-weight but have become something of an industry standard among DSLR/mirroless camera videographers.
The Rode Stereo VideoMic Pro
The stereo mic, as you can imagine, is (to quote Rode themselves) 'ideal for recording music, and the atmospheric ambience essential in building a realistic audio scene.' In other words, the SVMP is good at sucking in the atmosphere of a scene, giving your audience a sense of the excitement of a dynamic event.
This is very well illustrated by this video review of the SVMP which was done by Fenchel & Janisch...
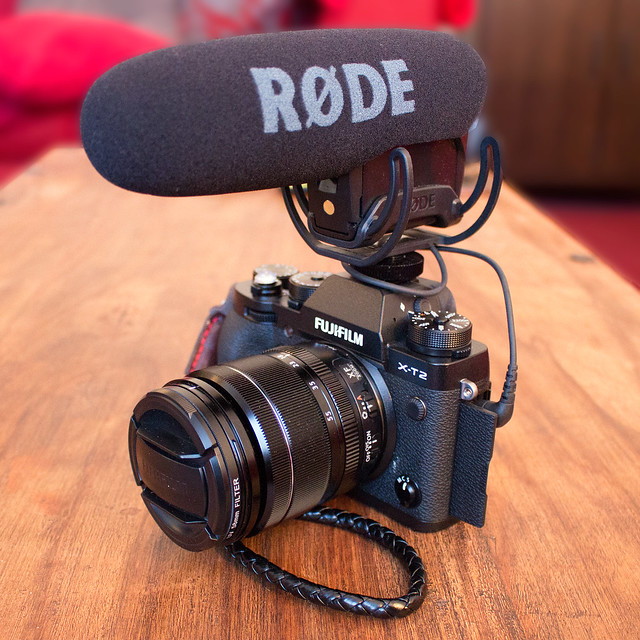
The Rode VideoMic Pro
While the SVMP is all about the general audio scene-setting, the VideoMic Pro is a more focused 'shotgun' type of microphone designed to capture a specific sound from a specific spot (like interview dialogue). While you can - as the above video illustrates - 'do' interviews with the SVMP (thus getting away with just the one mic) you have to be really close to your subject to get good quality dialogue, but you still pick up lots of incidental sound as well. The VMP is designed to cut out (or, at least, minimise) this incidental sound.
He's a little review of the VMP, along with an
As with the setup of the Lavalier mic & iRig Pre-Amp - which I covered in my previous post - there is a trick to getting the best quality sound and that is to minimise the in-camera recording volume while, at the same time, turning up the mic's 'boost' to enhance the signal. In effect, the VMP's built-in +20db 'boost' setting is doing the same job as the iRig Pre-Amp did with the Rode Lavalier microphone.
Here's an example of my set-up for the VMP, showing the quality of the sound in it's 'raw' format (straight from the mic and camera) and also an example of the same setup but with the audio further enhanced in 'post' (using Audacity software)...
Notes on audio test video
The above video sample was made under the following conditions and with these settings:
I find that 5 feet - or less - is roughly the optimal distance from camera to subject when using the Rode VMP. Also, for the best result in combination with your DSLR/mirrorless, you have to apply the +20db boost if you want an acceptable volume level to play with in your edit.
The quality of the recording via the VMP is, in my opinion, a tiny bit 'tinny' and even with the cameras audio levels reduced down to 5 (25%), there is some noticeable hiss - as you can hear in the first half of the sample. (I have knocked out the hiss in the second half, using Audacity.)
I undertook some very rudimentary sound editing in Audacity. I am told that
the ideal audio level from a recording should top out at about -6 to -3db top.
You can see the db level top right of this screen, and my max recording level
is just going into this range (yellow/orange).
I prefer a 'warmer' or slightly more bassy audio dialogue, but I guess I could rectify this were I a bit more experienced in audio editing in post. Still, I have heard worse (on some YouTube 'video experts' channels even)!
Still, while the result was not as good as the recording that I got from the Rode Lavalier mic, it is adequate - especially when you consider the convenience of having an all in one camera/mic package. This is ideal for a run and gun video shoot as you have no detached mics or wires (or wireless packs) to worry about or set up. You just frame your subject and go!
I'd also say that it is very much an improvement over the cameras feeble built-in microphone. It's also a terrific way to get a reasonable quality audio recording backup even if you are using a separate mic/sound recorder setup.
Which brings us to the subject of my next posting in this series - setting up and testing an external audio recorder (which is thpreferreded choise of many videographers).
[Preface: The majority of videographers prefer to use an external sound recorder to capture audio as they are generally better quality than the DSLR/mirrorless cameras audio capabilities. But I like to capture on both the camera and external recorder so that I have a back-up of the audio - just in case! Also, if you prefer minimal kit and like to 'run and gun', then having good quality sound from a camera mounted mic is essential.]
Today's project is all about getting good sound to go with my video. So I'm testing a variety of microphones with my X-T2, including a few lavalier mics and (in part 2 of this test) two Rode VideoMic Pros.
As I am particularly interested in interviewing, I have a couple of lavalier microphones (or lapel mics) I'd like to get working with my Fuji camera. Now, this isn't quite as simple as just plugging them into the camera's 3.5mm as you shall see...
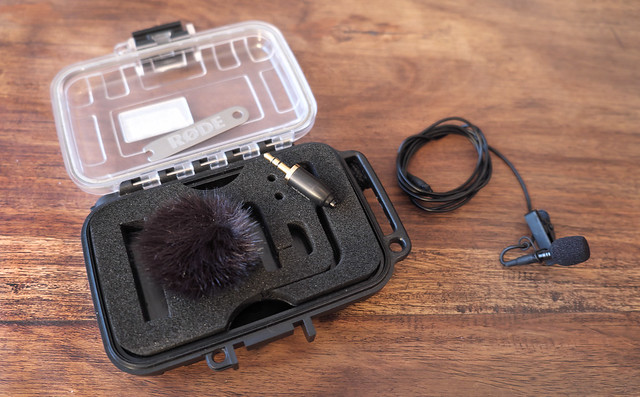
The RØDE Lavalier Microphone
If you are into video making using DSLR/mirrorless cameras, it's not long before you hear about RØDE and its products. Thier VideoMic Pro camera-mountable mini shotgun mic is damn near 'industry standard' (and, in fact, I will be setting one up in my next post). Thier products are generally held in high regard and are considered very high quality and innovative.
Because I am very interested in interviewing I bought some lavalier microphones - or 'lapel mics' as they are also known - as, for the greatest clarity, it's best to get the microphone as close to your subject as you can. Chief among my purchases was the Rode Lavalier kit...
This is a superb kit that comes in its own sturdy box which contains the wired lavalier mic itself, plus a mini 'dead kitten' (for windy days), 3.5mm jack adapter and spanner for connecting the adapter, and a lapel clip.
Now, I would have preferred a wireless lav mic set but I couldn't afford one (like Rode's Filmmaker Kit) as a wired system tethers you to your subject and can get a little limiting and frustrating to set up (plus you have to remember to get your interviewee to remove the mic before they walk off otherwise they end up dragging your camera away with them)! But the wired system is a lot cheaper and there is technically less to go wrong with it (so it should be part of your kit even if you go to wireless as a reliable back-up).
However, wired lavalier mic do have one very big drawback and that is that they are - generally speaking - unpowered. This can seriously limit the amount of volume you can expect from them.
The Pre-Amp solution
While you can get hold of a few lav mics that come with a mini power pack, to help add some volume to their capture ability (usually driven by an AA battery), it's more usual that you will end up using a unpowered lav in combination with a more sophisticated pre-amp.
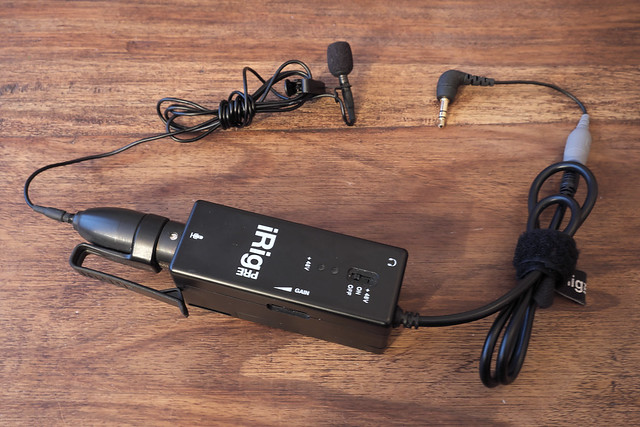
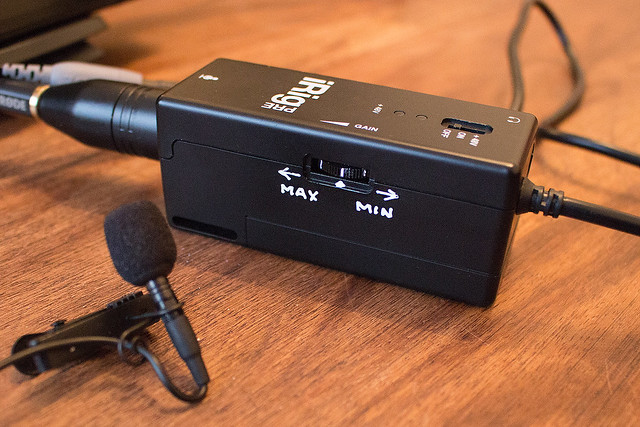
Essentially, a pre-amp is - again - a battery-driven power pack that allows you to increase the level of the input (or 'gain'), but it usually has more sophisticated controls, mic inputs, and options with which you can maximise the volume levels and capture ability. A budget pre-amp solution is the IK Multimedia iRig...
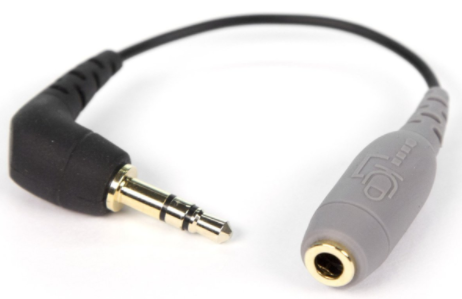
While the iRig is a fairly cost effective pre-amp solution it does have a couple of slight drawbacks - as it's name suggests it is actually intended to work with Apple's iPod or iPhone gadgets. This means that it's 3.5mm jack input is specifically designed to work with these products and will not work with any other standard 3.5mm-based recording, so you have to buy a special adapter...
3.5mm trrs (iPod/iPhone) to trs (standard 3.5 input) adaptor for smartlav
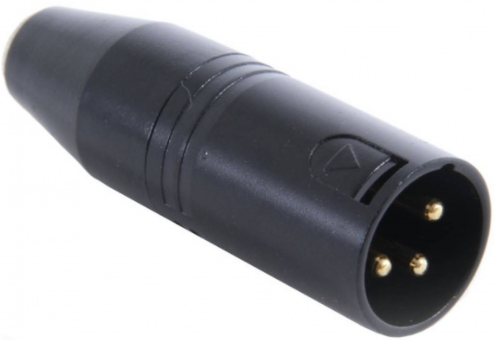
Also, the iRig is actually intended to allow you to use big professional-quality XLR mic inputs. So, once again, you need an adapter gadget to convert the big XLR input into a standard 3.5mm input so you can attach the lavalier microphone!
Right: The Rode VXLR Stereo 3.5MM Min Jack to XLR converter.
However, despite these added extras the complete iRig package still represents a relatively inexpensive entry-level pre-amp solution for your camera. (A more expensive Saramonic SmartRig2 option, which already has the appropriate 3.5mm jacks built in, is £99.)
This video explains the budget pre-amp solution, using the £24 Saramonic SmartRig (a knock-off of the IK iRig)...
Testing the lavalier mic on the Fujifilm X-T2 camera
Having assembled all the various components I needed to get my iRig to work with my X-T2, it was time to test the microphone and determine the most efficient settings for it.
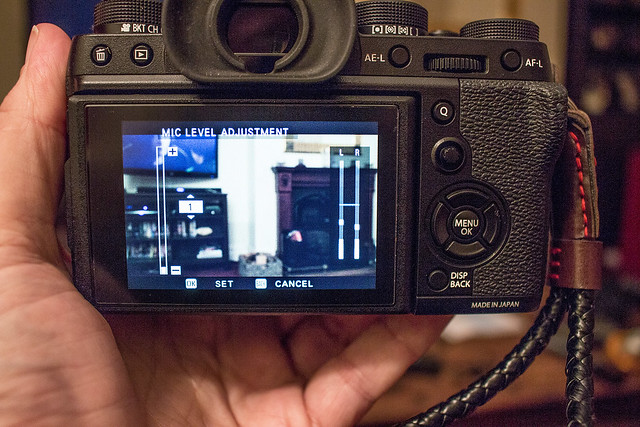
This is a sort of methodical 'trial and error' experiment, involving lots of quick movie sound tests. The goal is to vary the pre-amp 'gain' and camera sound input volume in order to minimise 'hiss' in the final recording. Now, for starters, the usual trick for minimising hiss is to set the audio input levels in your camera quite low...
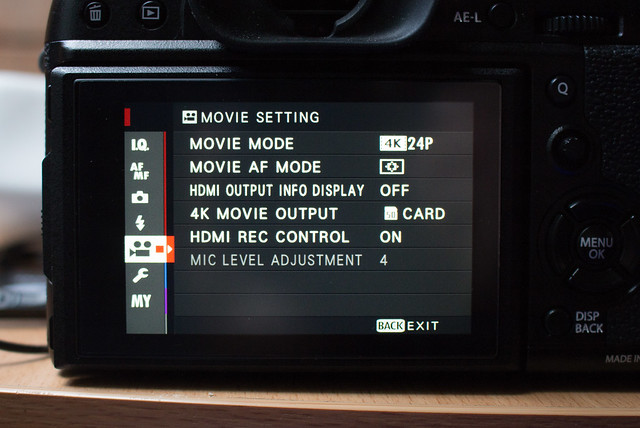
The X-T2's Mic Level Adjustment screen. I have lowered the mic level all the
way down to '1' (left) and I can monitor the effect this has when I plug in the mic
via the stereo level bars (right).
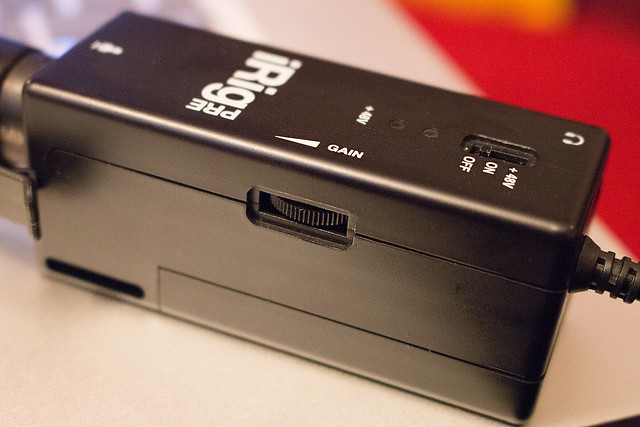
And then, on the pre-amp, set the gain levels somewhere from 50 to 75% to boost the signal (here's where you have to experiment, adjusting either setting until you achieve an acceptable audio recording with the minimum of background hiss). I *believe* this is because the camera's inbuilt audio capability is only so-so and generally quite 'noisy', so you have to compensate with the help of the pre-amp (which boosts the signal at the source)...Or that's my theory anyway!
The iRig's 'gain' dial (on the side). This is one of the flaws in this device, not
only is it hard to use - being as recessed as it is - but there is no visual clue as
to the exact level settings. No 'Min' or 'Max' and no increments denoting the
level of gain at which you have the dial set! Not helpful.
Here's a quick'n'dirty test video example, using the above formula...
It's an acceptable result. But I think I have to practice a bit more with some different subjects to get a variety of voice volumes to be sure. I also have to get a bit more experience with the audio editing software I am using (but more on that another time).
I used a permanent marker to write on some make-shift volume indicators!
For now, I have a sort of baseline setup for my lavalier microphones, I am sure I will refine my settings as I go along. But, now I have tested my lavalier microphones, it's onto my Rode camera-mounted VideoMic Pros - but I'm hoping they won't be as fiddly to set up.
I had to force myself to post this first video test of my Fuji X-T2 as I am far from proud of this initial attempt at filming. Everything that could have gone wrong did go wrong on this shoot and, basically, I discovered that I hadn't recovered from my illness as much as I thought I had - my heart (and body) just wasn't in it and I was forced to give up after just 15 minutes.
However, there is some learning value to the few useable clips I did shoot, so I relented and decided to post the clip. It's definitely not a particularly interesting clip, and neither is it well shot (my hands were shaking like leaves in the wind throughout the shoot) but it does serve as useful reference for some things I thought I'd try out...
A positive note: I should add some positives here, as this all sounds a bit negative. I actually did get a couple of things out of this experiment; it was great to actually have some pieces of raw 4K footage to practice my editing workflow with and I was also pleased with my ISO camera settings. I simply left the camera's ISO dial on'A' (Automatic) and it did a very good job, the video you see above is a pretty true reflection of the natural light on that day as it was gray and overcast. Normally I would choose a manual ISO setting, but the auto setting impressed me (so it's not all bad)!
Footage Notes
Equipment:Fujifilm X-T2 mirrorless camera and Rode Stereo VideoMic Pro. No tripod. Location notes: Peasholm Park, Scarborough, Weather was overcast.
Purpose of shoot: To test and practice 4K filming process and workflow and to try out a simulated 'flat' colour profile setting. I also wanted to see what handheld footage would look like and how much the Fuji's lens stabilization would assist me to take steady footage.
Microphone settings: No 'dead cat' attached (despite it being a windy day) so turned on the high-pass filter and set the gain setting to +20dB boost. I also set the Fuji's in-camera audio levels to about 25% so that - in combination with the mic's gain boost - I would (hopefully) minimise hiss.
Camera settings: Basic camera settings for 'film look' video were - Shutter speed 1/50th, frames per second 24, ISO auto. I used auto-focus ('S') on the X-T2 rather than manual, just for simplicity sake.
X-T2 tip: Some people have been scratching their head and wondering how to set 1/50th fps using the shutter speed dial (as the settings on the dial go ...15...30...60...125..., etc). First, select '15' on your dial, then use the back command dial wheel to adjust the fps up to '50'. Yes, I wish Fuji had included a 50fps setting on the main dial too!
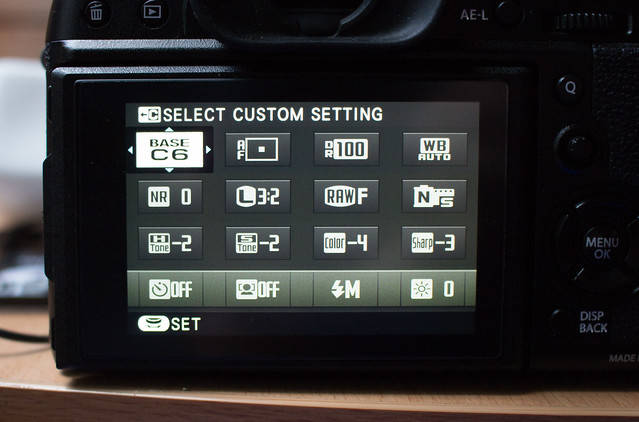
Simulating a 'Flat' colour profile: In its review of the X-T2 DSPhotoBlog.com suggests a method of creating a sort of faux-FLOG using custom settings: "Without the FLOG you can still get a pretty flat looking video. You switch to the Pro Neg Hi Std Film simulation and set the shadows and highlights to -2, color to -4 and sharpness to -3 or -4."
Post edit software: CyberLink PowerDirector 14 on Windows 10 PC.
File information: Format - MP4 (.mp4). Resolution - 4K, 4096 x 2160. Size - 576MB.
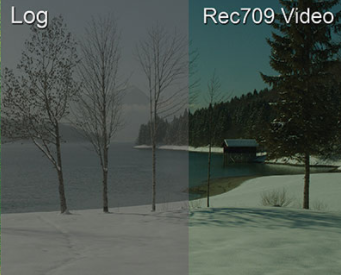
Postscript - why a 'flat' colour simulation?
I mention that I one of my goals for the shoot was to try and create a faux-FLOG, to understand why it helps to understand what FLOG (Fuji's version of LOG) is:
"In a nutshell, recording using a LOG picture profile or curve preserves more of your image’s dynamic range and tonality by redistributing the digital exposure value representations over the entire value set using a preset logarithmic function." [BHPhotovideo.com]
Er, or, simply put, it's all about preserving as much exposure information as you can in your footage so you can play around with exposure and colour grading in post without losing detail. It's kind of like a video version of still photography's RAW file format.
For example, if you shoot a piece of footage that is too contrasty (blowing out highlights) you can never recover any detail in those highlights in post. LOG footage is often called 'flat' or 'neutral' and looks a bit wishy-washy and grey, that is because it tries to retain detail information in all areas - shadows. midtones and highlights - so you can access those details later when editing and correcting colour and exposure.
"Log isn’t Raw; it’s video. However, it’s a special way of capturing that maximizes the tonal range of a sensor." [Blog.abelcine.com] Now, unfortunately, the Fujifilm X-T2 cannot record LOG internally* - you have to record Fuji's LOG format to an external recorder via the HDMI output. This is a wee bit expensive to do at the moment and I can't afford one of these external recorders, so I am having to cheat and simulate a 'poor man's' flat file.
My test video above show the result of this attempt, which is another reason that it looks a little 'grey' and washed out. I used some settings suggested in a post on DSPhotoblog.com to sort of buff up the detail in shadows and highlights. It's not the same as a proper LOG recording, but it will allow me some latitude when trying to colour grade and adjust exposure in post.
*There are a lot of rumours that Fuji might add internal LOG recording to the X-T2 via a firmware update at some point.
It's been very slow progress as I familiarise myself with my new Fuji camera due to my continuing ill health. The main problem being that I still can't walk far, so I can't get to any my favourite local photogenic spots (like the nearby park or the beach).
So, I've been concentrating on the basic operation of the camera and working my way through all the X-T2's many menus and settings. I've also run through Fuji's 'manual' which is really no more that a reference guide to where each feature/setting might be found and what adjustment options you have. As a brand new camera model, there's been a lack of any YouTube tutorials but - finally - Tony Northrup released a video overview of the X-T2 last week...
Having, now, a very loose grasp of the fundamentals, I began to plan my first photographic sojourn. I'd love to do some test shots and footage down at the seashore but thoughts of taking my new (expensive) outside got me thinking about adding some practical accessories.
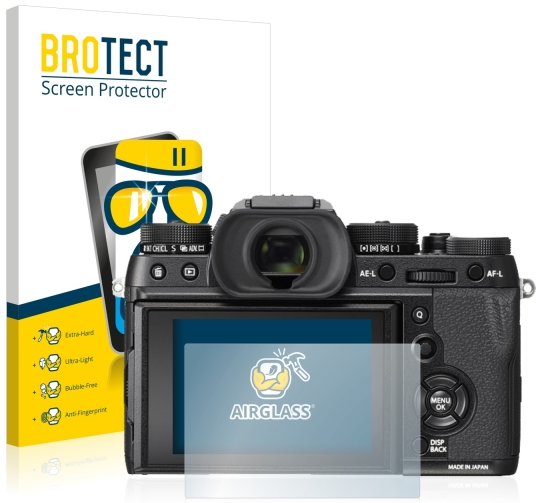
My main concern was the 3 inch LCD display. The X-T2's screen is not fully articulating - unlike my old Canon 700D - and the screen cannot be turned completely around to protect it when not in use. The screen is always exposed and that makes me worried about scratches, so the first job was to buy a decent screen protector...
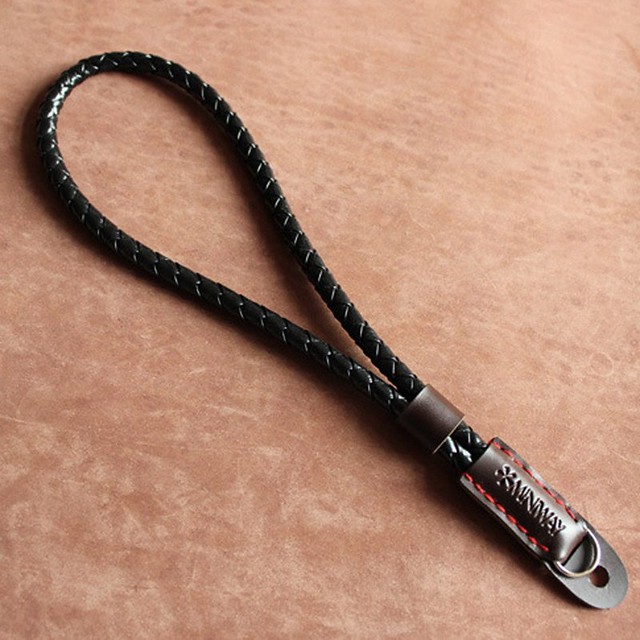
The next thing that I wanted was a camera strap. I'd tried out several on my Canon 700D and wasn't really happy with any of the shoulder/neck straps I bought. I work mainly with my camera mounted and long straps just tend to get in the way, plus I never liked having a camera hanging around my neck. Then I saw wrist straps...
SHETU Digital Camera Carry Wrist Strap, a nice traditional looking faux-leather
strap. It has a sliding loop which allows you to tighten the strap around your wrist
for extra security. A great way of carrying your expensive camera on holiday.
These appeal to me as they are more flexible and allow me the security of being attached, but not too long that it gets in the way when the camera is mounted. Long neck straps can get in the way plus - because I am more of a videographer - they were not always convenient given the amount of accessories you'd attach to your camera for filming (like microphones, pull-focus attachments, etc).
Additionally, the wrist strap works well with my little camera bag/holster, which has it's own long carrying strap.
The last little accessory I bought was a tiny soft button. The X-T2 comes with a traditional style shutter release button with a screw fitting so you can attach an old-school shutter-release cable. This makes the button a little uncomfortable to use, so you can screw on a little third-party button to make the shutter-release a little softer and the process of taking a picture a little smoother...
Right, so I'm all prepared now. I have a basic understanding of my new camera - enough to get me going (and learn by doing) - and I have added some accessories to make it more convenient and safer to use outdoors. My only misgiving is that I only have one battery at the moment, so I have limited 'endurance' (I do have some good SD cards, though, so that's not an issue). I have read that the X-T2 batteries are fairly short-lived, particularly when shooting video, but we shall see.
My Fujifilm X-T2, ready to go!
All that's left now if for me to work out how to get to my chosen location. But even if I have to use a taxi I am determined to get some test footage done this week. Fingers crossed.
Now I am recovering from my illness I am turning my attention back to all those projects I had on the go before my unexpected visit to hospital! Chief among those was starting to learn about my new Fujifilm X-T2 mirrorless camera.
One of the problems I am having as someone who is new to the Fujifilm 'ecosystem' is that, because the X-T2 is so new, there aren't a lot of YouTube tutorials regarding 'set ups' (I guess everyone is in the same boat at the moment and just finding their way about). I hope tat will change, but in the meantime, I am having to rely on X-T1 tutorials to give me information on some of the control fundamentals.
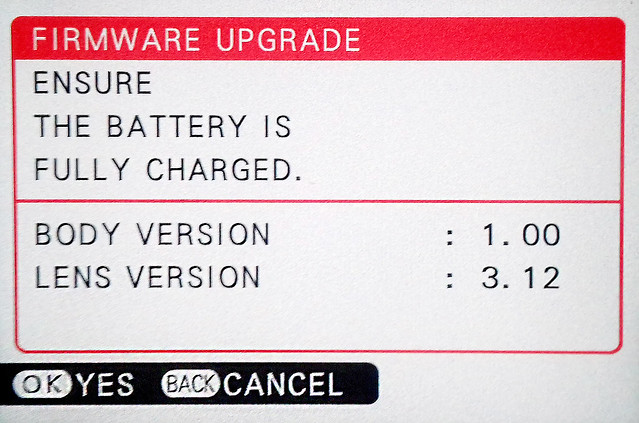
The first thing I wanted to learn about was how to check and update my new camera's firmware. As a newly released camera I can imagine there may be an initial flurry of firmware updates as user feedback highlights any issues with the new camera, so I thought it best to be prepared. Luckily, there is a very informative YouTube tutorial by JC Photography which takes you through the Fuji firmware update process...
I couldn't actually find this process mentioned in the X-T2 manual, so this video is very welcome even if it is intended for the XE-1/X-T1 Fuji cameras. I next checked on the Fuji firmware site to see if there is an update available, but my firmware version (1.00) is the current release. You can check your Fuji camera version availability here: Fujifilm Global - Digital Camera Firmware.
My current X-T2 firmware menu looks like this...
I did some searching and, apparently, there is rumoured to be a firmware update release on the 8th of November (1.10), so I will let you know how I got on then (fingers crossed).
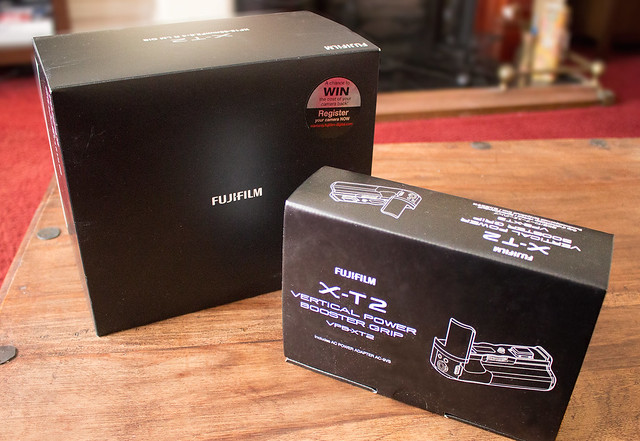
Won't make much of this other than to mention that, after all the excitement of waiting for the release of the Fujifilm X-T2 camera on the 8th of September I was rushed into hospital on the very same day and have only now recovered enough to feel like opening my purchase!
I went for the X-T2 'kit' set plus the vertical power grip - which I felt was indispensable if you are serious about making video with the X-T2. The kit consists of the camera body and XF18-55mm 'kit' lens. Now I emphasise the word 'kit' because the term has all sorts of perceived implications for photographers, not all of which are usually good.
The term 'kit lens' seems to have come to imply some sort of compromise or skimping on equipping one's self, the included kit lens usually being had at a discount and usually considered to be a budget 'starter lens', included just to get the ball rolling. And yes, cost was a consideration in my case because I was right on the outer edge of my budget (I had originally wanted to buy an additional Fujinon prime lens).
But, as it turns out, the reviews of the Fijinon XF18-55mm Lens have been mainly positive, with many commenting that it is one of the best 'kit' lenses on the market. Here's a comprehensive review of the lens by Ken Rockwell: Fuji XF 18-55mm f/2.8-4 OIS
Now, at this point, having just cracked open the box I don't feel I can write any sort of meaningful 'first impressions' - as this would involve some intensive testing - but what I wanted to say even at this early point is some comments on quality and feel.
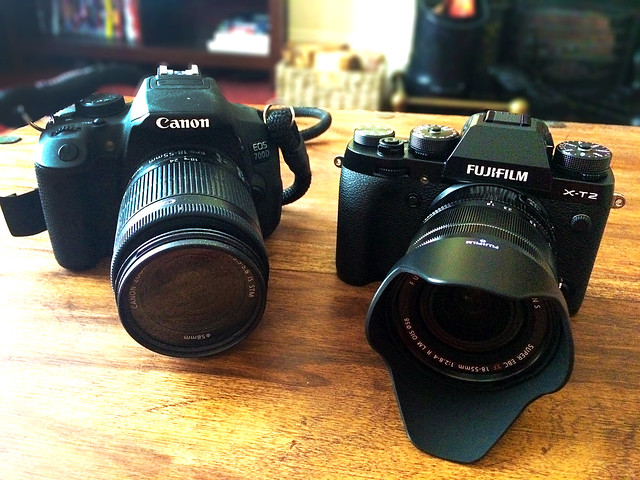
Now, my start in the world of DSLRs was with the wonderful Canon 700D 'entry level' camera and I cannot praise it highly enough, it allowed me to do things that my work's very expensive dedicated video camcorder couldn't do. From vastly improving the quality of my video footage, to opening the door to the 'cinematic look' and excellent low-light performance the 700D has been a revelation.
But, as an entry level camera my Canon camera had it's limitations (which were very quickly reached). But aside from technical limitations the camera itself is plastic and doesn't inspire a lot of confidence when used in professional situations. I was ready - I felt - for something that not only included a brace of advanced video-making features but that was also a lot more solid.
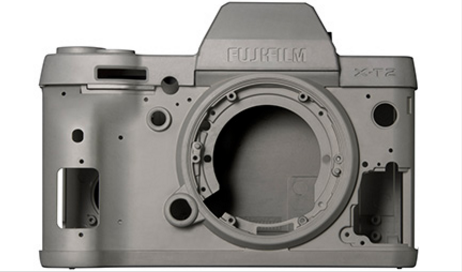
Right out the box I am convinced that the Fuji X-T2 is that camera. The build quality is impressive, being constructed from magnesium alloy, and it exudes the impression of what I imagine a 'professional' camera should feel like. This feeling of solidity was further reinforced when I handled the 18-55mm kit lens, it made my Canon's equivalent kit lens feel like a toy!
This all adds up to a good start as far as I am concerned and not just because - as a Scot - I feel like I have gotten my money's worth (how many times have we bought expensive gear and then found our stomachs sinking as we have felt that flimsy and insignificant touch of plastic), but because the heft of this camera makes me feel I have reached a new level in my videographic experience...Play time is over.