Today's project is all about getting good sound to go with my video. So I'm testing a variety of microphones with my X-T2, including a few lavalier mics and (in part 2 of this test) two Rode VideoMic Pros.
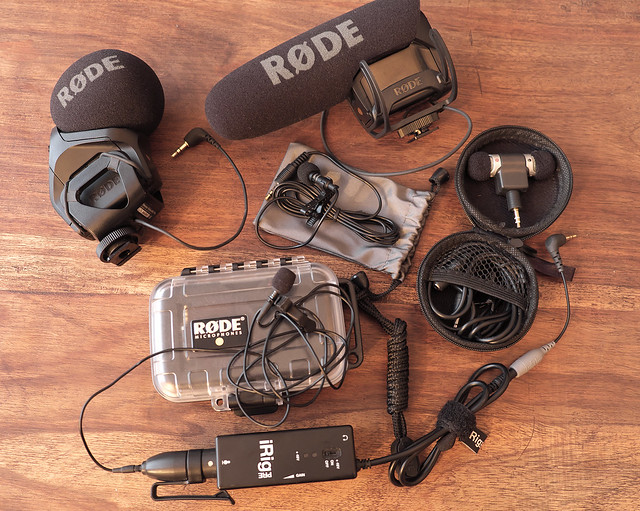
As I am particularly interested in interviewing, I have a couple of lavalier microphones (or lapel mics) I'd like to get working with my Fuji camera. Now, this isn't quite as simple as just plugging them into the camera's 3.5mm as you shall see...
The RØDE Lavalier Microphone
If you are into video making using DSLR/mirrorless cameras, it's not long before you hear about RØDE and its products. Thier VideoMic Pro camera-mountable mini shotgun mic is damn near 'industry standard' (and, in fact, I will be setting one up in my next post). Thier products are generally held in high regard and are considered very high quality and innovative.
Because I am very interested in interviewing I bought some lavalier microphones - or 'lapel mics' as they are also known - as, for the greatest clarity, it's best to get the microphone as close to your subject as you can. Chief among my purchases was the Rode Lavalier kit...
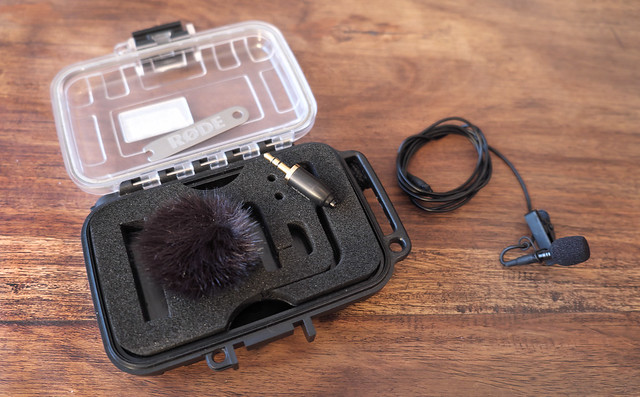
This is a superb kit that comes in its own sturdy box which contains the wired lavalier mic itself, plus a mini 'dead kitten' (for windy days), 3.5mm jack adapter and spanner for connecting the adapter, and a lapel clip.
Now, I would have preferred a wireless lav mic set but I couldn't afford one (like Rode's Filmmaker Kit) as a wired system tethers you to your subject and can get a little limiting and frustrating to set up (plus you have to remember to get your interviewee to remove the mic before they walk off otherwise they end up dragging your camera away with them)! But the wired system is a lot cheaper and there is technically less to go wrong with it (so it should be part of your kit even if you go to wireless as a reliable back-up).
However, wired lavalier mic do have one very big drawback and that is that they are - generally speaking - unpowered. This can seriously limit the amount of volume you can expect from them.
The Pre-Amp solution
While you can get hold of a few lav mics that come with a mini power pack, to help add some volume to their capture ability (usually driven by an AA battery), it's more usual that you will end up using a unpowered lav in combination with a more sophisticated pre-amp.
Essentially, a pre-amp is - again - a battery-driven power pack that allows you to increase the level of the input (or 'gain'), but it usually has more sophisticated controls, mic inputs, and options with which you can maximise the volume levels and capture ability. A budget pre-amp solution is the IK Multimedia iRig...
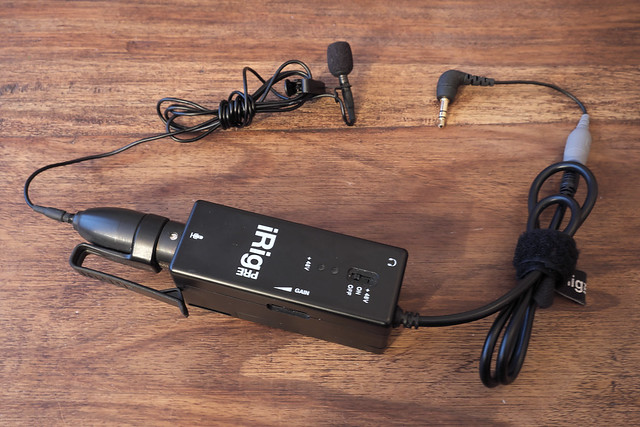
While the iRig is a fairly cost effective pre-amp solution it does have a couple of slight drawbacks - as it's name suggests it is actually intended to work with Apple's iPod or iPhone gadgets. This means that it's 3.5mm jack input is specifically designed to work with these products and will not work with any other standard 3.5mm-based recording, so you have to buy a special adapter...
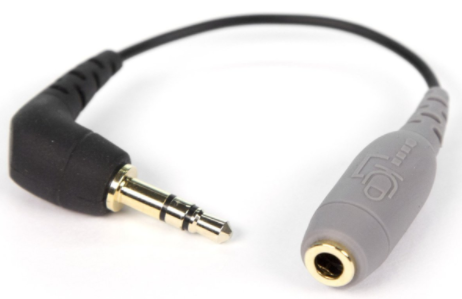 |
| 3.5mm trrs (iPod/iPhone) to trs (standard 3.5 input) adaptor for smartlav |
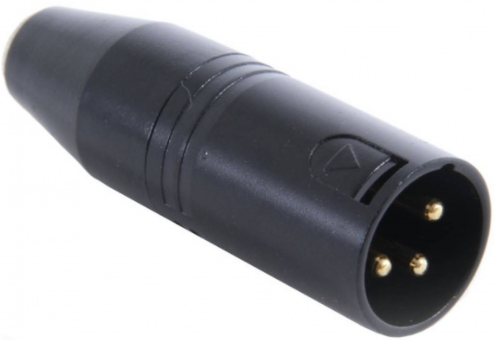
Right: The Rode VXLR Stereo 3.5MM Min Jack to XLR converter.
However, despite these added extras the complete iRig package still represents a relatively inexpensive entry-level pre-amp solution for your camera. (A more expensive Saramonic SmartRig2 option, which already has the appropriate 3.5mm jacks built in, is £99.)
Budget Pre-amp Component list:
• IK iRig Pre Universal Microphone Interface for iPhone/iPod Touch/iPad: £34.99
• RØDE VXLR 3.5mm Minijack to Male XLR Adapter: £9.00
• RØDE SC3 (3.5mm jack converter) iPhone Accessory: £10.98
Total cost: £54.97
(Alternatively, you could substitute the iRig with a Saramonic SmartRig, which will save you £10.99.)
This video explains the budget pre-amp solution, using the £24 Saramonic SmartRig (a knock-off of the IK iRig)...
Having assembled all the various components I needed to get my iRig to work with my X-T2, it was time to test the microphone and determine the most efficient settings for it.
This is a sort of methodical 'trial and error' experiment, involving lots of quick movie sound tests. The goal is to vary the pre-amp 'gain' and camera sound input volume in order to minimise 'hiss' in the final recording. Now, for starters, the usual trick for minimising hiss is to set the audio input levels in your camera quite low...
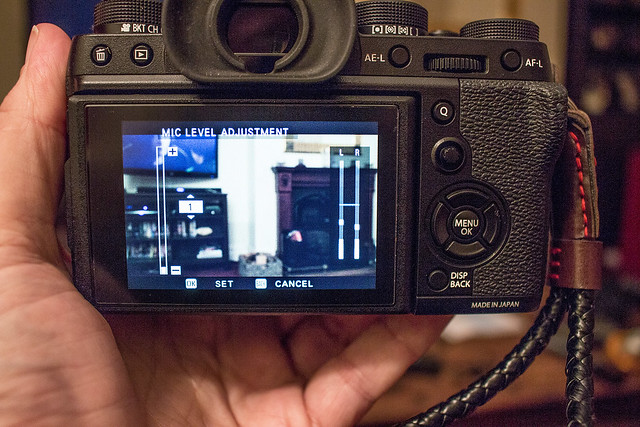 |
| The X-T2's Mic Level Adjustment screen. I have lowered the mic level all the way down to '1' (left) and I can monitor the effect this has when I plug in the mic via the stereo level bars (right). |
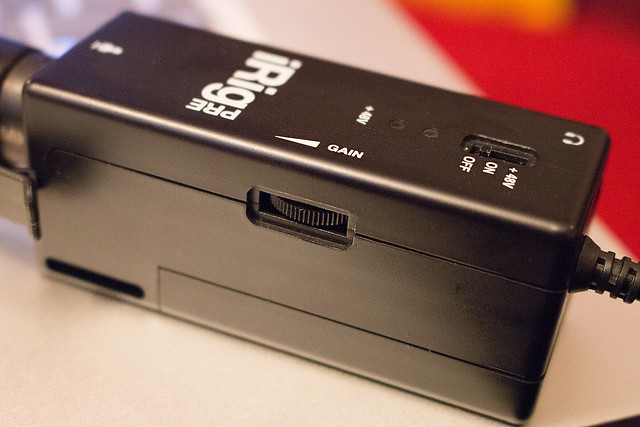 |
| The iRig's 'gain' dial (on the side). This is one of the flaws in this device, not only is it hard to use - being as recessed as it is - but there is no visual clue as to the exact level settings. No 'Min' or 'Max' and no increments denoting the level of gain at which you have the dial set! Not helpful. |
It's an acceptable result. But I think I have to practice a bit more with some different subjects to get a variety of voice volumes to be sure. I also have to get a bit more experience with the audio editing software I am using (but more on that another time).

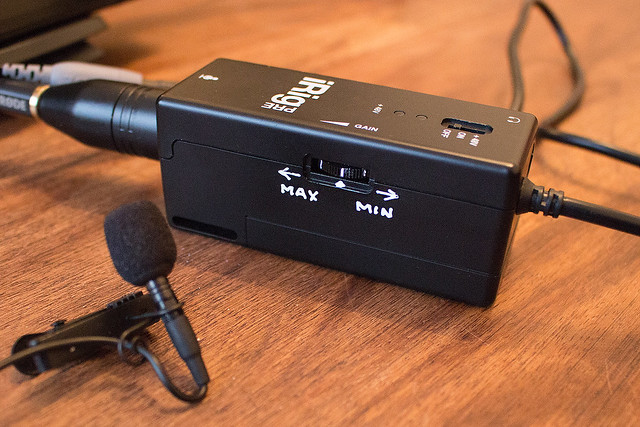 |
| I used a permanent marker to write on some make-shift volume indicators! |
No comments:
Post a Comment