Showing posts with label test. Show all posts

Wednesday, 8 August 2018

Tabletop Filming Redux - Part 2

Before I get down to the actual DIY bit of my Overhead Camera Frame I have to do some tests to establish dimensions for the frame (appropriate minimum height from table) as well as getting some ideas about camera settings and lighting.

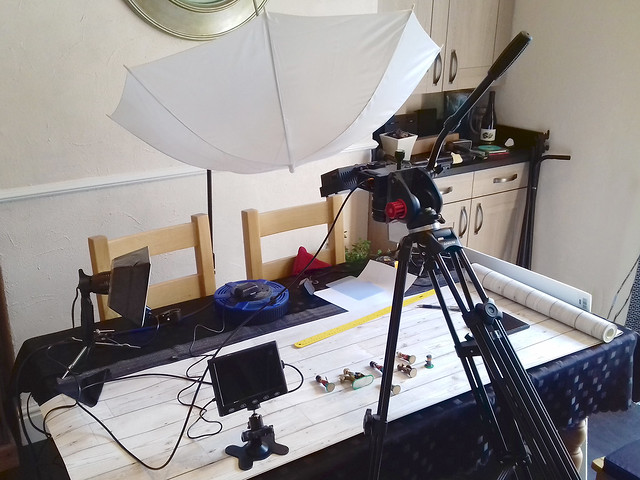
To do this I will lash up a make-shift camera rig using my tripod and other bits and bobs - just so I can work with the various bits of equipment and work out the ideal arrangements for the final frame layout. For this test I requisitioned the wife's dinning room table (temporarily - I was told)...
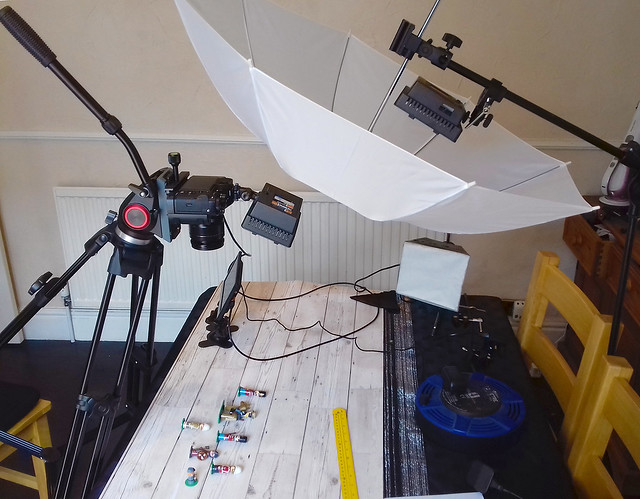

Excuse the shoddy snap, hopefully you can make out what's going on here. I've just tipped up my video tripod so that I get a top-down perspective with my camera and set up various types of lighting to try out.

One lesson learned straight away even at this early stage was the benefits of having some form of field or preview monitor so you can keep an eye on camera settings, focusing and framing.

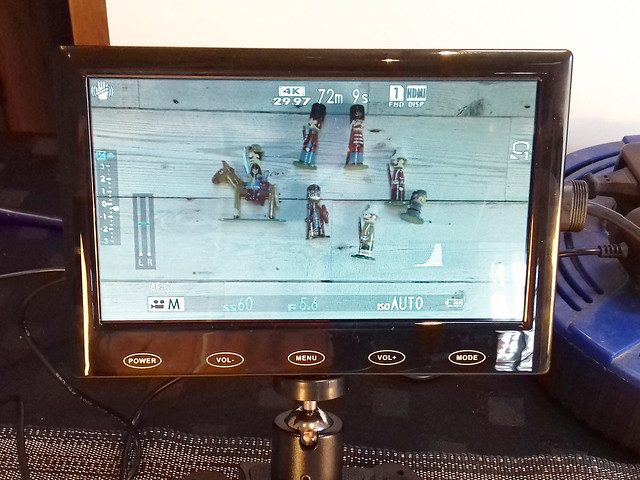
Even if my Fuji XT-2 had a flip and swivel screen it wouldn't be entirely suitable for monitoring tabletop tutorial filming and so a separate preview monitor is recommended. A proper video feed monitor - with all it's bells and whistles - is probably overkill in this situation (although good to have if you can afford one) so I bought a very cheap (£30) 7 inch LCD HDMI monitor for the job.

The addition of a preview monitor means I can sit down - as I would be in a filmed tutorial situation - and work with my tabletop objects with the monitor still in my line of sight, but just out of frame.

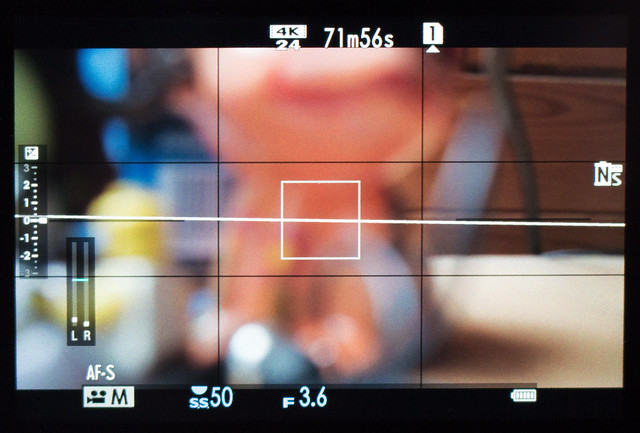
This little screen still shows me my cameras main settings - including histogram - and is just sharp enough so I can check focusing. The downside is that colour rendition isn't accurate and it doesn't have the focusing and hand other assist features that a real field monitor would. But, for £30 I'm not complaining.

Conclusions
Despite the messy lashed together set-up, I had a very productive session and made lots of notes. My dinning room 'video lab' also had the added benefit of being right next to our kitchen so I was able to replenish my mug of tea without going to far!

1. Camera Height: The first issue I got to grips with was the camera height. I decided to stick with my Fujinon 18-55mm zoom to give me some flexibility in framing shots and testing relative proximities between subject and lens.

In the end I settled on my camera being about 1.5 feet (44cm) from the table - to lens - and my zoom set around 20mm.

2. Focus Setting: Because I will be shooting tabletop tutorials and, so, move from wide shots to closeups quickly I decided to set my camera to continuous auto-focus with the point of focus centre biased using the zone AF mode. Yes, there will be a little focus searching when I move from table distance to 'close-up' (about 7 inches from the lens), but this is the least 'fussy' way of doing things to begin with.

3. Lighting: You can never have enough light, and although I think my test proves this point it also proved that it's a particular sort of light that I am short of.

Because my models are glossed - with varnish - strong harsh lighting is not helpful as it produces very aggressive reflections. I, therefore, need defused lighting so as not to create too many bright highlights on my subjects and by doing so lose detail.

My current problem is that I only have one LED lamp which can generate enough illumination when defused - my Neewer 304 LED lamp (and I had that turned up to max) - so I will have to buy another so I have the level of control that I am after.

I used a umbrella to create the soft light I wanted, but this is also a problem as this is far too large and cumbersome to be suitable for my overhead table frame concept. I may, therefore, have to make some sort of compact soft box and try that out (more experiments)!

4. Camera settings: Funnily enough, my shooting settings were perhaps the least of my problems as the XT-2 is such a great camera that it didn't take long to settle on some working settings (although that isn't to say they won't be modified as I gain more experience).

The one thing that did have me scratching my head was what video recording mode to shoot in; FHD (1080) or UHD (4K)? And, also, what flavour of either of these resolutions - 24fps, 30fps or 60fps.

Although I am aiming at 1080HD output for YouTube, I did - initially - fancy FHD 60fps for reasons of detail, but then decided upon 4K and downscaling to FHD so I have the flexibility to crop, zoom and animate within my editing software.

Result...


A wee bit soft and a touch dim causing the loss of some of the details
in the shadow areas...More light needed!

-------------

Anyway, this was all very sloppy and a lot of 'guesstimation', but it got me a starting point. I can refine my technique with practice. Most importantly, I have the data I need to start making my overhead camera frame.

Monday, 3 July 2017

Shooting practise...Freehand.

I'm trying to build up a momentum and get as much practice with my X-T2 as I can. I don't have a firm plan for a set project yet, but I need as much camera time as I can get and I need footage to practise editing so - at the moment - I just need to get out there and shoot anything.

Aside from gaining familiarity with the camera I also want to practise some freehand shooting, filming without setting up a static tripod rig. Most of the filming I have done in the past has been of the fairly static interview format, so I haven't had a lot of experience filming hand-held.

I thought I would prepare for my next outing with some video tips...


And if all else fails, there is software stabilisation.

So, I trotted down to the harbour and snapped some handheld sequences. I tried my best to keep the clips as steady as I could - following some of the tips from the above video tutorial - but I obviously need more practice and ended up applying stabilisation in PowerDirector...


It was a bit of a dull, grey day so I probably over-compensated in my colour adjustments. But I'm still enjoying the novelty of playing with PowerDirectors settings.

I'm not entirely happy with software stabilisation, occasionally it can be a bit glitchy and jerky when you add it to a sequence that includes a pan or tracking movement. So the moral of the story is, try and take as steady footage as you can so you don't have to add stabilisation.

One other thing I noticed was how the wind affected my audio track. I hadn't thought it was that windy, so left off my Rode mic and it's windshield, trusting to the X-T2's integral microphone. The wind buffeting was noticeable when I got my footage into the editing software, so I had to remove the soundtrack.

From now on, if I'm doing any outside work, I'll fit the Rode mic and windshield by default.

Friday, 16 December 2016

GoPro Test Fail!

Well, that didn't work!


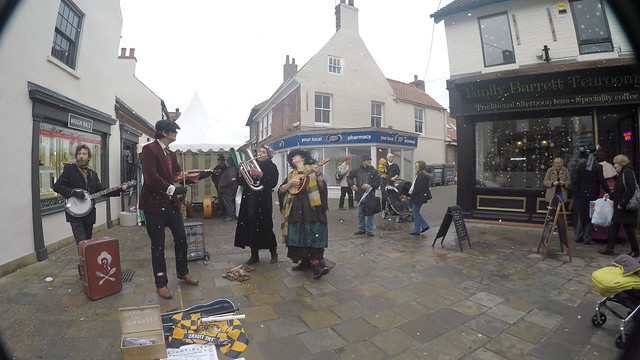
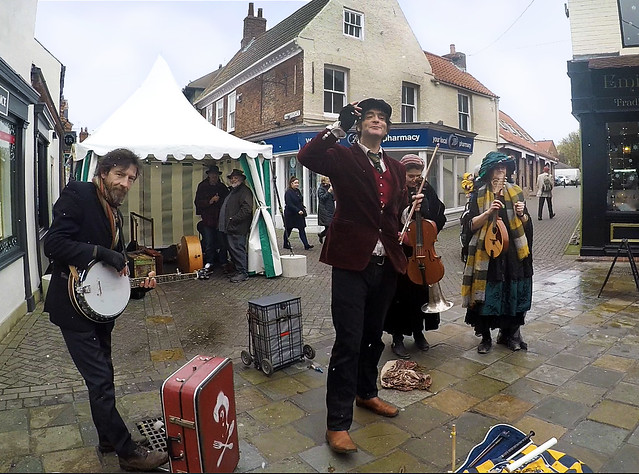
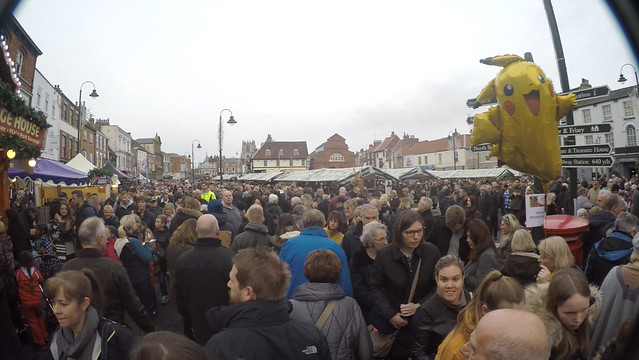
Above is a sample screen from the footage I took on Sunday with my GoPro. This is pretty much a typical example of the quality of exposure I got (4k, wide angle). Very disappointed - so didn't even bother to cut an edit - but I think I know what's wrong, so it's back to square one again.

To be fair, it was actually one of those miserable grey December days that we get in Yorkshire. The sky actually did look like that, and everything else did look a little bit flat as a result, but not this washed out!

Although you do expect to do some correction in post - mainly to compensate
for the 'GoPro bend' that the camera's extra wide angle lens produces the
vignetting caused by the filter is still a bit annoying.
Here's a screen shot I took of one of the movie frames - which I colour adjusted
in Photoshop - to illustrate the sort of exposure and contrast (and perhaps sharpness)
I was actually hoping for. I know the GoPro is capable of this in the right
circumstances and with the right settings.
The problem seems to have been to do with some of the fiddling about I did in the GoPro's advanced settings (ProTunes), as I adjusted the ISO and the colour set-up in order to try and get a flat colour profile so I could grade the colour in post...But I didn't expect it to turn out this flat!

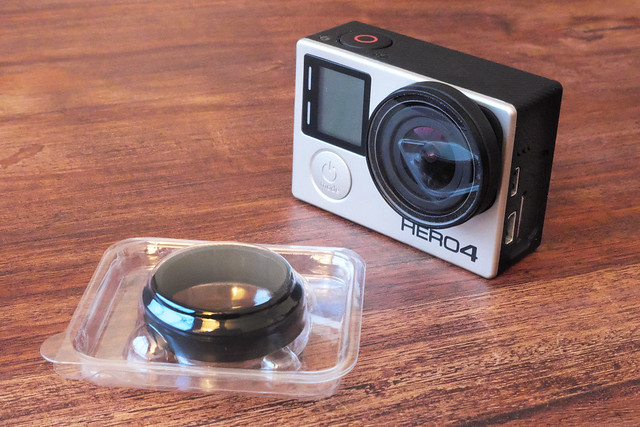
The other issue was the very obvious vignetting, which was caused by the 52mm filter adapter I added to the GoPro's lens. Unfortunately, in 4K mode you cannot adjust the lens mode to anything narrower than 'wide', which may account for it picking up the edges of the filter. I suspect this filter adapter was really made for 1080p footage (where you can set the 'lens'- field of view - to 'narrow').

Not to be disheartened, I have readjusted the GoPro's settings and bought an alternative lens protector and I will try again. While there is nothing I can do about the miserable grey skies we are getting at the moment, I hope I can make the other colours - and contrast - in the movies look a little more vibrant in future.

The official GoPro Protective Lens. £20 for a pack of two from Amazon.
I'll try out the 52mm filter again in 1080p, just to see if it is the ultra-wide 4K that they are incompatible with. A bit annoying, but my fault for not researching the product thoroughly enough before buying it, Lesson learned.

Thursday, 1 December 2016

Fujifilm X-T2 battery & overheating tests

Zed ProMedia have done an interesting video test of the X-T2's battery longevity when filming 4k video. It's the sort of methodical technical test that I find interesting so I am posting it up for reference...


When you start reading about mirrorless cameras and 4k video - whether they be Panasonic, Sony or whatever - it won't be long before you start hearing about overheating issues and the length of time that you can film before the camera cuts off. In fact, one of the criticisms that was levelled at the X-T2's specs was that it could only shoot 10 minutes of 4k video at a time (by adding the booster grip you can increase this to 30 minutes).

That this is being seen as a major issue by some people seems a little funny to me, as I rarely shoot sequences that go beyond a few minutes at a time, even when interviewing. Of course, there are times you may want to keep on rolling, but for very long sequences - certainly beyond 10 minutes - I prefer to use a video cam with an internal hard drive.

Anyway, that's an argument for another time...

What is pertinent - however you prefer to shoot - is battery longevity and whether overheating is a serious and persistent issue with the X-T2. This video seems to conclude that overheating isn't, but that there are some glitches with using multiple batteries together via the booster grip (hopefully, this will be addressed in a firmware update).

As for me, I am restricted to just the one battery at the moment (spares are at the top of my wish list), and until I buy a couple more using the booster grip isn't possible, so I can't confirm or replicate the findings of this video test. But what I will say is that during my recent tests with the X-T2, I have found it positively eats battery capacity, especially when you make use of the WiFi facility.

Wednesday, 30 November 2016

Fujifilm X-T2 and microphones Pt.3


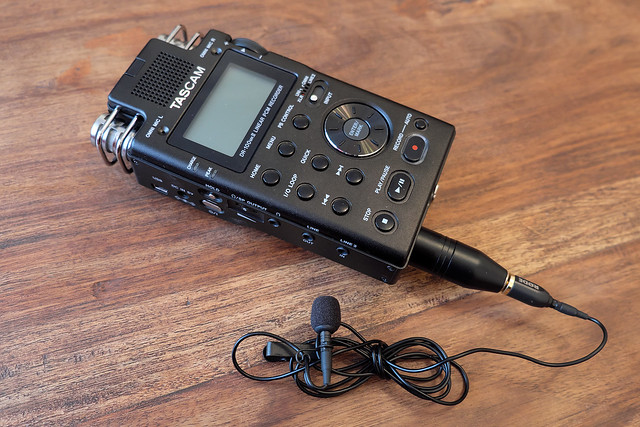
The final part of my video microphone and sound recoding test series isn't actually directly to do with the Fujifilm X-T2 camera. It is, however, about something which can have a big impact on the quality of your video production's sound and greatly improve the professionalism of your set-up...The digital audio recorder.

A lot of experienced DSLR/mirrorless camera videographers prefer to separate the audio recording part of their video production from the actual filming process. The main reason for this is the generally feeble sound recording abilities of these cameras (which were really never designed with high-fidelity audio in mind). Specialized external recorders, on the other hand, have a host of features which allow you to get a much-improved audio recording, equipped - as they are - with far more capable inputs (XLR) and sensitive circuitry.

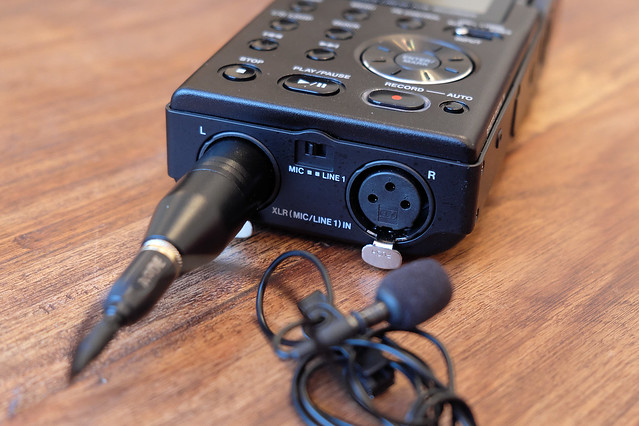
The DR 100 has a selection of microphone inputs,as well as its own integral mics.
It has stereo XLR inputs, so you can connect professional studio mics for 2x mono
interviews or for stereo recording of events or performances.
The other advantage to using a separate primary audio recorder is that - if you still use your camera's inbuilt audio recording facility - you will have the security of having a back-up of your sound recording, just in case (I've had a couple of occasions in my professional career where - through technical issues or equipment failure - this form of back-up has saved my skin).

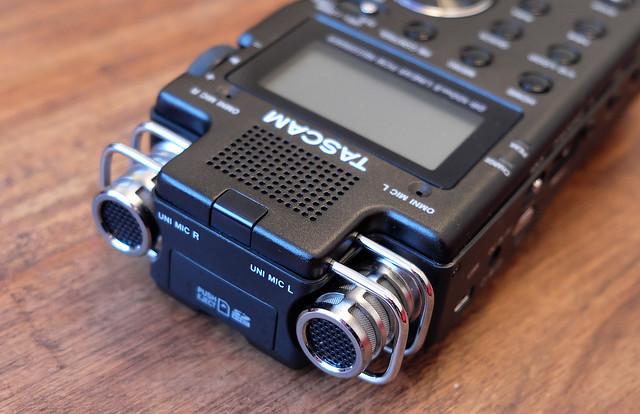
The Tascam's integral stereo mics are very handy for off-the-cuff reporting-style
interviews (if you don't have time to set-up an external mic). They are of reasonable
quality and a nice option to have at hand.
When I decided to buy a digital recorder I originally wanted the same one that I used to use at my former place of work - a Marantz PMD 600. But these solid pieces of kit are out of production, so I had to look elsewhere, and I came across the Tascam DR 100 Mk II on eBay. It was the older model and has been superseded now, but at half the price of the DR 100 Mk. III (£350 new) I felt that I had a bargain.

The separate audio recording device offers you a unique logistical advantage in that it can be located at a great distance from your camera. Say, for example, you are filming a lecture or other stage presentation, it's likely your camera will be set up some distance from the subject and running a cable to them will not be practical. So, you can set-up your recorder on the podium, have your camera in the wings or on the floor of the hall for a wide shot and  still be safe in the knowledge that you will still get good quality sound! (Another advantage of the digital recorder - in the above sort of scenario  - is that you can hand the recorder over to a stage manager/AV Technician and they can plug it into their mixing desk, for the best possible quality audio signal.)

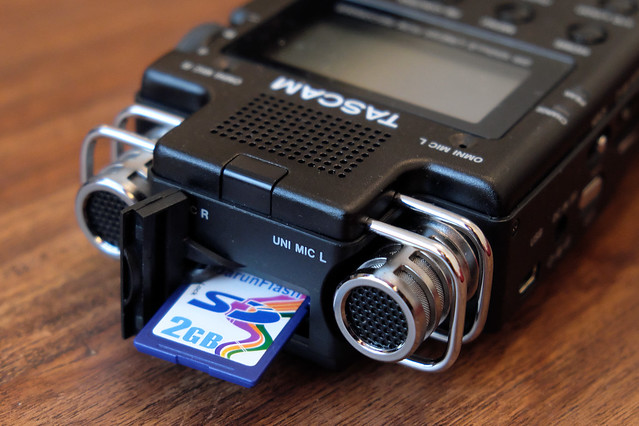
The DR 100 takes SD memory cards and can record to a variety of file formats
and file sizes/quality. The resultant file can then be taken into your preferred
editing software and synced with your video footage.
Finally, recorders like the Tascam can allow you to record a voice-over or commentary separately from your film shoot, or allow a talent to record a piece for you.                    

The TASCAM DR 100 audio recorder
Here I illustrate the X-T2 camera's internal sound recording capabilities, or - rather - the lack of them. I recorded this test piece with the camera's internal mic settings at '10' (50%), just so you can get a feel for the weediness of it's pick-up. Then, in the second half of this clip, I amplified the volume and applied noise reduction in Audacity, before syncing the resultant .wav file...


Not great (you can hardly hear the dialogue in the first section)! I could have dialed the camera's pickup level to 75% or even 100%, but then you run the risk of the soundtrack being very noisy. But as it is, when I boosted the volume with Audacity - for the second half of the clip - that produced a little bit of distortion.

Just for comparison sake, here's a short movie illustrating various levels of the X-T2's audio level settings (from 50% to 100% pickup levels)...


To me, 4 feet between the camera and the interviewee seems a reasonable distance, though, obviously, the closer you go the greater the audio volume. But, there again, you don't really want to be so close that you are sticking your lens right in the face of your subject (hence, four feet). The camera's built-in audio pick-up struggles, and also, the more you increase the pick-up level the more you suffer from incidental 'hiss'.

And, finally, here is the original sequence with the TASCAM DR 100's audio applied...


This audio was edited using Audacity (to amplify the volume a tad and reduce some hiss). Even though my test samples weren't rigorous or scientific, I think it's clear that the TASCAM produces a better quality recording which is richer and has less distortion than the recording made by the camera.

(I had the DR100's pickup volume setting set at '5' - 50% - so I have plenty of room for boosting the recording levels if I want.)

I'm not competent in my use of the DR100 yet (by a long chalk), there are lots of recording options and variables that I haven't figured out yet. It's pretty certain that I could improve on the quality of my recording with a bit more experience.

Friday, 25 November 2016

Fujifilm X-T2 and microphones Pt.2

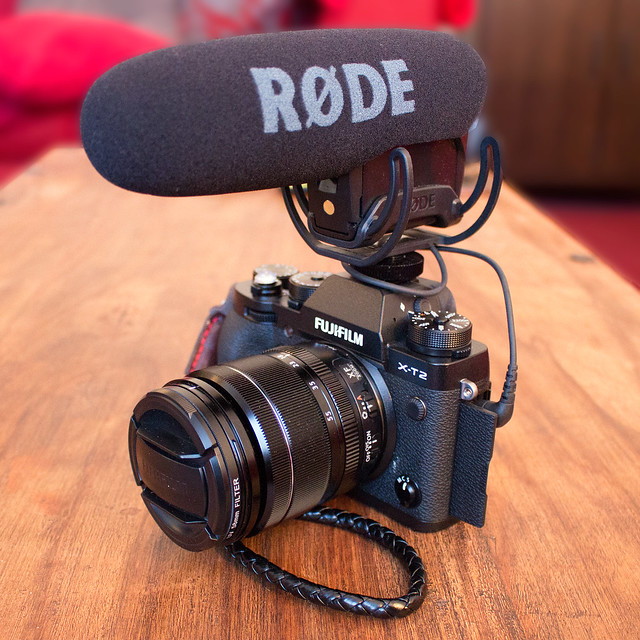
Rode VideoMic Pro and Stereo VideoMic Pro
Moving on from setting up and using a lapel microphone - which is great for set-piece interview situations - I now want to look at a couple of microphones that are ideal for fast-moving and minimal kit shoots (or 'run and gun' situations, as they are known).


An area of videography that interests me is the documenting of events, like conventions and festivals. These can be very challenging for the lone filmmaker as you have to minimise the amount of equipment that you are carrying so that you are mobile and responsive to the events around you - and bear in mind that you will likely working in the midst of crowds of people - but, at the same time, you have to carry the right equipment to capture what you need. A tricky juggling act.

Event and convention work can incorporate two quite different formats of filming, the capture of general ambience and the more focused interview. Trying to do this with, more or less the same kit (as you don't want to be continually unpacking and setting up new kit), is possible thanks to excellent quality compact gear like the Rode VideoMic series of microphones.


These mics are camera mounted - via the hotshoe - and are light-weight but have become something of an industry standard among DSLR/mirroless camera videographers.

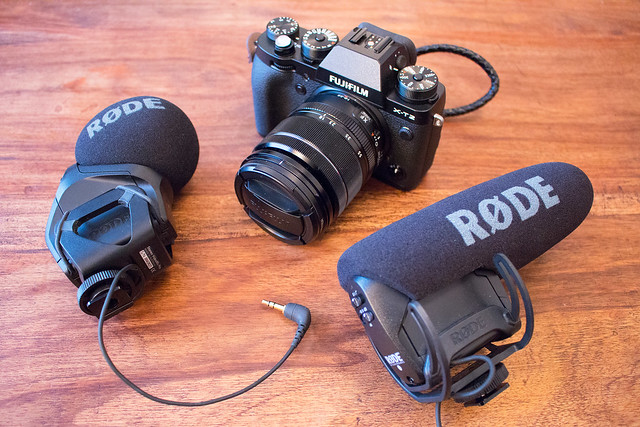
The Rode Stereo VideoMic Pro
The stereo mic, as you can imagine, is (to quote Rode themselves) 'ideal for recording music, and the atmospheric ambience essential in building a realistic audio scene.' In other words, the SVMP is good at sucking in the atmosphere of a scene, giving your audience a sense of the excitement of a dynamic event.

This is very well illustrated by this video review of the SVMP which was done by Fenchel & Janisch...


The Rode VideoMic Pro
While the SVMP is all about the general audio scene-setting, the VideoMic Pro is a more focused 'shotgun' type of microphone designed to capture a specific sound from a specific spot (like interview dialogue). While you can - as the above video illustrates - 'do' interviews with the SVMP (thus getting away with just the one mic) you have to be really close to your subject to get good quality dialogue, but you still pick up lots of incidental sound as well. The VMP is designed to cut out (or, at least, minimise) this incidental sound.

He's a little review of the VMP, along with an


As with the setup of the Lavalier mic & iRig Pre-Amp - which I covered in my previous post - there is a trick to getting the best quality sound and that is to minimise the in-camera recording volume while, at the same time, turning up the mic's 'boost' to enhance the signal. In effect, the VMP's built-in +20db 'boost' setting is doing the same job as the iRig Pre-Amp did with the Rode Lavalier microphone.

Here's an example of my set-up for the VMP, showing the quality of the sound in it's 'raw' format (straight from the mic and camera) and also an example of the same setup but with the audio further enhanced in 'post' (using Audacity software)...


Notes on audio test video
The above video sample was made under the following conditions and with these settings:

• Distance from camera/mic to subject: 5 feet
• Rode VMP boost setting: +20db
• Fuji X-T2 internal audio level setting: 5

I find that 5 feet - or less - is roughly the optimal distance from camera to subject when using the Rode VMP. Also, for the best result in combination with your DSLR/mirrorless, you have to apply the +20db boost if you want an acceptable volume level to play with in your edit.

The quality of the recording via the VMP is, in my opinion, a tiny bit 'tinny' and even with the cameras audio levels reduced down to 5 (25%), there is some noticeable hiss - as you can hear in the first half of the sample. (I have knocked out the hiss in the second half, using Audacity.)

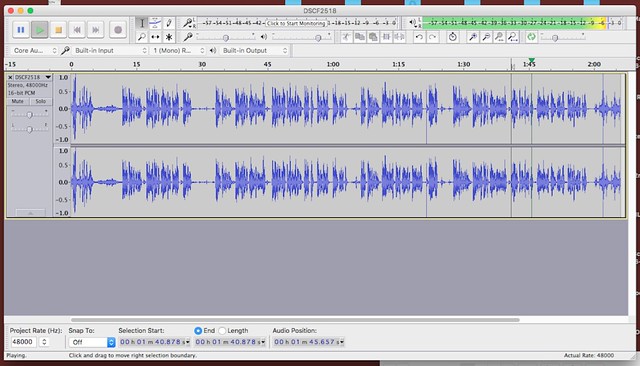
I undertook some very rudimentary sound editing in Audacity. I am told that
the ideal audio level from a recording should top out at about -6 to -3db top.
You can see the db level top right of this screen, and my max recording level
is just going into this range (yellow/orange).
I prefer a 'warmer' or slightly more bassy audio dialogue, but I guess I could rectify this were I a bit more experienced in audio editing in post. Still, I have heard worse (on some YouTube 'video experts' channels even)!

Still, while the result was not as good as the recording that I got from the Rode Lavalier mic, it is adequate - especially when you consider the convenience of having an all in one camera/mic package. This is ideal for a run and gun video shoot as you have no detached mics or wires (or wireless packs) to worry about or set up. You just frame your subject and go!

I'd also say that it is very much an improvement over the cameras feeble built-in microphone. It's also a terrific way to get a reasonable quality audio recording backup even if you are using a separate mic/sound recorder setup.

Which brings us to the subject of my next posting in this series - setting up and testing an external audio recorder (which is thpreferreded choise of many videographers).

Thursday, 24 November 2016

Fujifilm X-T2 and microphones Pt.1

[Preface: The majority of videographers prefer to use an external sound recorder to capture audio as they are generally better quality than the DSLR/mirrorless cameras audio capabilities. But I like to capture on both the camera and external recorder so that I have a back-up of the audio - just in case! Also, if you prefer minimal kit and like to 'run and gun', then having good quality sound from a camera mounted mic is essential.]

Today's project is all about getting good sound to go with my video. So I'm testing a variety of microphones with my X-T2, including a few lavalier mics and (in part 2 of this test) two Rode VideoMic Pros.


As I am particularly interested in interviewing, I have a couple of lavalier microphones (or lapel mics) I'd like to get working with my Fuji camera. Now, this isn't quite as simple as just plugging them into the camera's 3.5mm as you shall see...

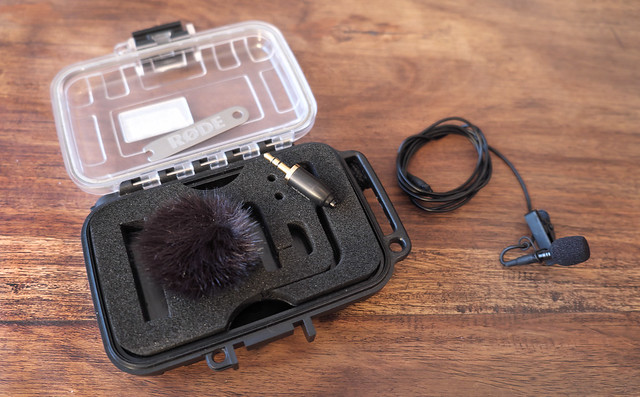
The RØDE Lavalier Microphone
If you are into video making using DSLR/mirrorless cameras, it's not long before you hear about RØDE and its products. Thier VideoMic Pro camera-mountable mini shotgun mic is damn near 'industry standard' (and, in fact, I will be setting one up in my next post). Thier products are generally held in high regard and are considered very high quality and innovative.

Because I am very interested in interviewing I bought some lavalier microphones - or 'lapel mics' as they are also known - as, for the greatest clarity, it's best to get the microphone as close to your subject as you can. Chief among my purchases was the Rode Lavalier kit...


This is a superb kit that comes in its own sturdy box which contains the wired lavalier mic itself, plus a mini 'dead kitten' (for windy days), 3.5mm jack adapter and spanner for connecting the adapter, and a lapel clip.

Now, I would have preferred a wireless lav mic set but I couldn't afford one (like Rode's Filmmaker Kit) as a wired system tethers you to your subject and can get a little limiting and frustrating to set up (plus you have to remember to get your interviewee to remove the mic before they walk off otherwise they end up dragging your camera away with them)! But the wired system is a lot cheaper and there is technically less to go wrong with it (so it should be part of your kit even if you go to wireless as a reliable back-up).


However, wired lavalier mic do have one very big drawback and that is that they are - generally speaking - unpowered. This can seriously limit the amount of volume you can expect from them.

The Pre-Amp solution
While you can get hold of a few lav mics that come with a mini power pack, to help add some volume to their capture ability (usually driven by an AA battery), it's more usual that you will end up using a unpowered lav in combination with a more sophisticated pre-amp.

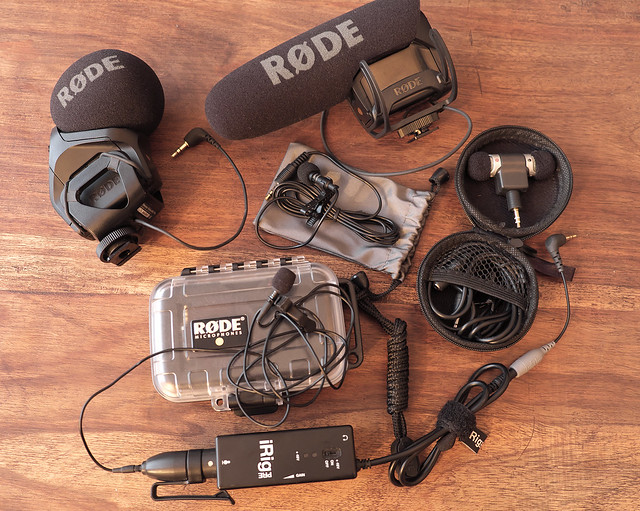
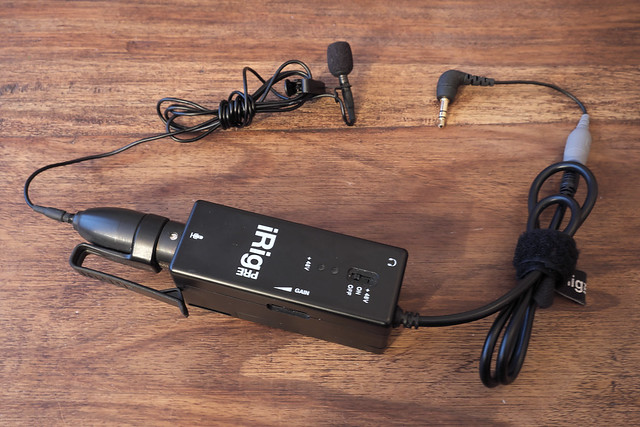
Essentially, a pre-amp is - again - a battery-driven power pack that allows you to increase the level of the input (or 'gain'), but it usually has more sophisticated controls, mic inputs, and options with which you can maximise the volume levels and capture ability. A budget pre-amp solution is the IK Multimedia iRig...


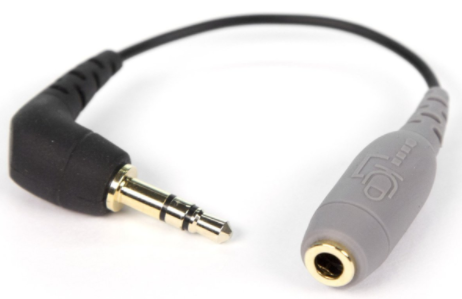
While the iRig is a fairly cost effective pre-amp solution it does have a couple of slight drawbacks - as it's name suggests it is actually intended to work with Apple's iPod or iPhone gadgets. This means that it's 3.5mm jack input is specifically designed to work with these products and will not work with any other standard 3.5mm-based recording, so you have to buy a special adapter...

3.5mm trrs (iPod/iPhone) to trs (standard 3.5 input) adaptor for smartlav
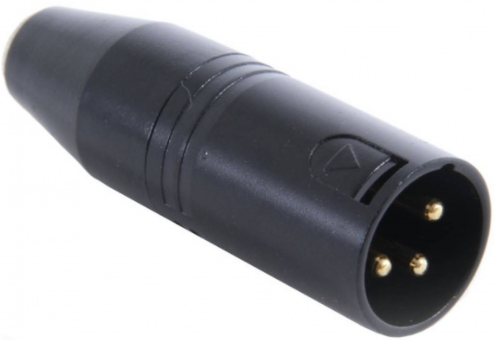
Also, the iRig is actually intended to allow you to use big professional-quality XLR mic inputs. So, once again, you need an adapter gadget to convert the big XLR input into a standard 3.5mm input so you can attach the lavalier microphone!

Right: The Rode VXLR Stereo 3.5MM Min Jack to XLR converter.

However, despite these added extras the complete iRig package still represents a relatively inexpensive entry-level pre-amp solution for your camera. (A more expensive Saramonic SmartRig2 option, which already has the appropriate 3.5mm jacks built in, is £99.)

Budget Pre-amp Component list:
• IK iRig Pre Universal Microphone Interface for iPhone/iPod Touch/iPad: £34.99
• RØDE VXLR 3.5mm Minijack to Male XLR Adapter: £9.00
• RØDE SC3 (3.5mm jack converter) iPhone Accessory: £10.98
Total cost: £54.97

(Alternatively, you could substitute the iRig with a Saramonic SmartRig, which will save you £10.99.)

This video explains the budget pre-amp solution, using the £24 Saramonic SmartRig (a knock-off of the IK iRig)...


Testing the lavalier mic on the Fujifilm X-T2 camera
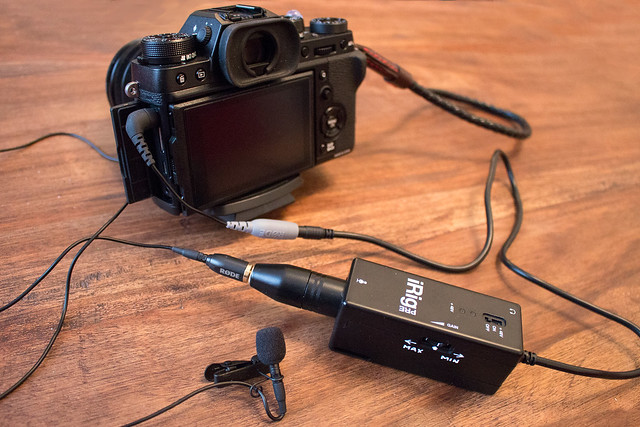
Having assembled all the various components I needed to get my iRig to work with my X-T2, it was time to test the microphone and determine the most efficient settings for it.

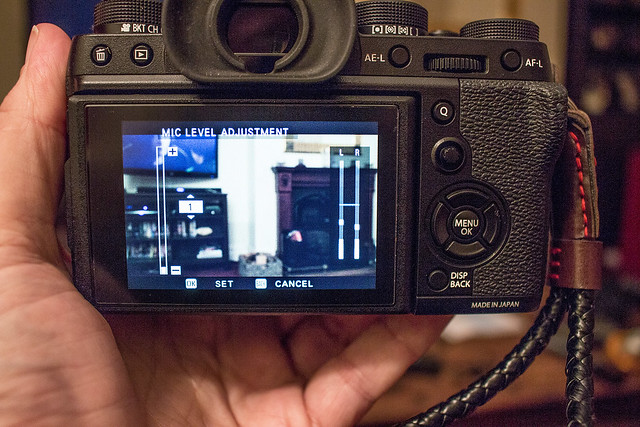
This is a sort of methodical 'trial and error' experiment, involving lots of quick movie sound tests. The goal is to vary the pre-amp 'gain' and camera sound input volume in order to minimise 'hiss' in the final recording. Now, for starters, the usual trick for minimising hiss is to set the audio input levels in your camera quite low...

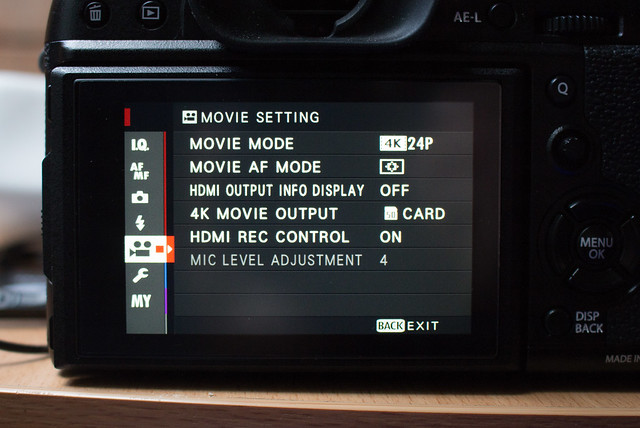
The X-T2's Mic Level Adjustment screen. I have lowered the mic level all the
way down to '1' (left) and I can monitor the effect this has when I plug in the mic
via the stereo level bars (right).
And then, on the pre-amp, set the gain levels somewhere from 50 to 75% to boost the signal (here's where you have to experiment, adjusting either setting until you achieve an acceptable audio recording with the minimum of background hiss). I *believe* this is because the camera's inbuilt audio capability is only so-so and generally quite 'noisy', so you have to compensate with the help of the pre-amp (which boosts the signal at the source)...Or that's my theory anyway!

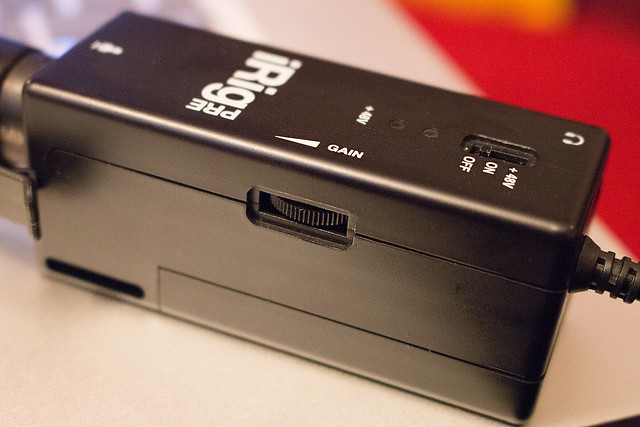
The iRig's 'gain' dial (on the side). This is one of the flaws in this device, not
only is it hard to use - being as recessed as it is - but there is no visual clue as
to the exact level settings. No 'Min' or 'Max' and no increments denoting the
level of gain at which you have the dial set! Not helpful.
Here's a quick'n'dirty test video example, using the above formula...


It's an acceptable result. But I think I have to practice a bit more with some different subjects to get a variety of voice volumes to be sure. I also have to get a bit more experience with the audio editing software I am using (but more on that another time).


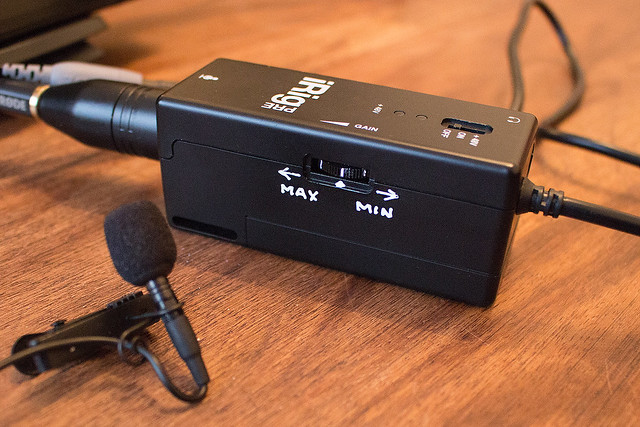
I used a permanent marker to write on some make-shift volume indicators!
For now, I have a sort of baseline setup for my lavalier microphones, I am sure I will refine my settings as I go along. But, now I have tested my lavalier microphones, it's onto my Rode camera-mounted VideoMic Pros - but I'm hoping they won't be as fiddly to set up.

Thursday, 17 November 2016

First Fuji X-T2 4K test

I had to force myself to post this first video test of my Fuji X-T2 as I am far from proud of this initial attempt at filming. Everything that could have gone wrong did go wrong on this shoot and, basically, I discovered that I hadn't recovered from my illness as much as I thought I had - my heart (and body) just wasn't in it and I was forced to give up after just 15 minutes.

However, there is some learning value to the few useable clips I did shoot, so I relented and decided to post the clip. It's definitely not a particularly interesting clip, and neither is it well shot (my hands were shaking like leaves in the wind throughout the shoot) but it does serve as useful reference for some things I thought I'd try out...


A positive note: I should add some positives here, as this all sounds a bit negative. I actually did get a couple of things out of this experiment; it was great to actually have some pieces of raw 4K footage to practice my editing workflow with and I was also pleased with my ISO camera settings. I simply left the camera's ISO dial on 'A' (Automatic) and it did a very good job, the video you see above is a pretty true reflection of the natural light on that day as it was gray and overcast. Normally I would choose a manual ISO setting, but the auto setting impressed me (so it's not all bad)!


Footage Notes

Equipment: Fujifilm X-T2 mirrorless camera and Rode Stereo VideoMic Pro. No tripod.
Location notes: Peasholm Park, Scarborough, Weather was overcast.

Purpose of shoot: To test and practice 4K filming process and workflow and to try out a simulated  'flat' colour profile setting. I also wanted to see what handheld footage would look like and how much the Fuji's lens stabilization would assist me to take steady footage.

Microphone settings: No 'dead cat' attached (despite it being a windy day) so turned on the high-pass filter and set the gain setting to +20dB boost. I also set the Fuji's in-camera audio levels to about 25% so that - in combination with the  mic's gain boost - I would (hopefully) minimise hiss.

Camera settings: Basic camera settings for 'film look' video were - Shutter speed 1/50th, frames per second 24, ISO auto. I used auto-focus ('S') on the X-T2 rather than manual, just for simplicity sake.


X-T2 tip: Some people have been scratching their head and wondering how to set 1/50th fps using the shutter speed dial (as the settings on the dial go ...15...30...60...125..., etc). First, select '15' on your dial, then use the back command dial wheel to adjust the fps up to '50'. Yes, I wish Fuji had included a 50fps setting on the main dial too!

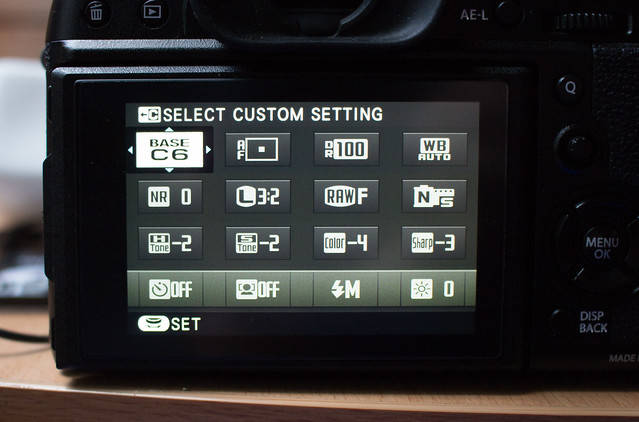
Simulating a 'Flat' colour profile: In its review of the X-T2 DSPhotoBlog.com suggests a method of creating a sort of faux-FLOG using custom settings: "Without the FLOG you can still get a pretty flat looking video. You switch to the Pro Neg Hi Std Film simulation and set the shadows and highlights to -2, color to -4 and sharpness to -3 or -4."


Post edit software: CyberLink PowerDirector 14 on Windows 10 PC.

File information: Format - MP4 (.mp4). Resolution - 4K, 4096 x 2160. Size - 576MB.

Postscript - why a 'flat' colour simulation?
I mention that I one of my goals for the shoot was to try and create a faux-FLOG, to understand why it helps to understand what FLOG (Fuji's version of LOG) is:

"In a nutshell, recording using a LOG picture profile or curve preserves more of your image’s dynamic range and tonality by redistributing the digital exposure value representations over the entire value set using a preset logarithmic function." [BHPhotovideo.com]

Er, or, simply put, it's all about preserving as much exposure information as you can in your footage so you can play around with exposure and colour grading in post without losing detail. It's kind of like a video version of still photography's RAW file format.

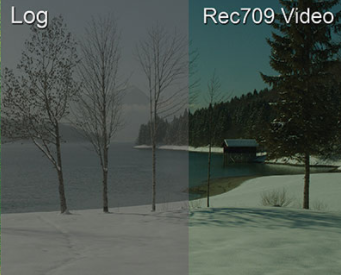
For example, if you shoot a piece of footage that is too contrasty (blowing out highlights) you can never recover any detail in those highlights in post. LOG footage is often called 'flat' or 'neutral' and looks a bit wishy-washy and grey, that is because it tries to retain detail information in all areas - shadows. midtones and highlights - so you can access those details later when editing and correcting colour and exposure.

Picture source: Blog.abelcine.com
"Log isn’t Raw; it’s video. However, it’s a special way of capturing that maximizes the tonal range of a sensor." [Blog.abelcine.com]

Now, unfortunately, the Fujifilm X-T2 cannot record LOG internally* - you have to record Fuji's LOG format to an external recorder via the HDMI output. This is a wee bit expensive to do at the moment and I can't afford one of these external recorders, so I am having to cheat and simulate a 'poor man's' flat file.

My test video above show the result of this attempt, which is another reason that it looks a little 'grey' and washed out. I used some settings suggested in a post on DSPhotoblog.com to sort of buff up the detail in shadows and highlights. It's not the same as a proper LOG recording, but it will allow me some latitude when trying to colour grade and adjust exposure in post.

*There are a lot of rumours that Fuji might add internal LOG recording to the X-T2 via a firmware update at some point.

Tuesday, 9 August 2016

First go with a gimbal!

Because I'm interested in covering events - particularly conventions - where you will be doing a lot of floor-walking and shooting on the hoof, I have invested in a handheld gimbal (a gyro/servo-stabilised hand-held camera mount).

I went with the Feiyu FY-G4 3 Axis Handheld Gimbal Brushless Handle Steadycam Steady Camera Mount for Gopro...


Now, I was thinking about buying the cheaper Osmo all-in-one camera and gimbal - which looks fantastic - but, at the end of the day, the GoPro Hero 4 Black camera is far superior quality (and more flexible in use) that the Osmo's built in camera. For me, it was worth the extra expense so that I could then be able to detach the camera and use it for other kinds of work.

Initial tests with the FY-G4 gimbal and GoPro
I need to put a disclaimer in here to make you aware that my impatience got the better of me! There is a certain amount of preparation, learning and practise one should do before the gimbal and camera are put into use...But I couldn't wait and did some testing straight 'out the box'! So please take this into consideration.

Important note: The gimbal needs to be calibrated in order to work as intended with your GoPro - I did not do this so the camera was not exactly balanced correctly in the following test videos.

Test 1: The difference a gimbal makes...
In this test, I just wanted to see how a gimbal like the FY-G4 smooths out hand-held filming while walking around. So, in this video, the first half is shot with me just holding the GoPro camera in my hand while walking and the second half of the video is footage with the gimbal attached...


Yes, this is a very quick and dirty experiment, but I think it demonstrates the difference between unstabilized footage and stabilised footage adequately enough. I was pleased.

Test 2: A longer example of the FY-G4 in use with added slo-mo
In this next clip, I tried some different movements - some pans and changes in height and orientation - just to see how smooth I could get the shots...


After doing these initial bits of filming you soon realise that there is a knack to using a gimbal (and how important proper calibration is). My first attempts to 'float' the shots were too fast and my changes in direction too sharp at times.

You have to train yourself to glide your arm movements and you must 'dampen' the beginning and ends of your movements so that your slowly increase your momentum into a movement and then decrease your momentum towards the end of a movement. In this way, you should get a smoother transition through the camera travel/sequence.

Like most things, practise makes perfect!

That said, I'm very pleased with these initial tests.

Friday, 22 April 2016

Yongnuo YN 50mm lens test

Managed to finally find time to do a very quick test of my new Yongnuo YN 50mm lens (for my Canon 700D DSLR). I also wanted to do a couple of exposure tests for a location that I would be using in some interviews soon...


For a first attempt, I am pretty pleased with the sharpness and the exposures. Believe it or not, this is actually a great improvement over the old video camera I had been using for interviews!

I stuck to manual settings, I didn't try auto-tracking focus using the Yongnuo's auto-focus as this is the weakest feature in the lens. To be honest, the auto-focus on this lens is horrendously noisy!

But that's not all...
As well as trying out my cheap Yongnuo lens I got to play with a couple of other items of equipment while shooting this short test. The first item of note was my Rode Smartlav+ Lavalier Microphone and the other bit of kit in use for the first time was a 52mm ND2 Neutral Density Filter.

I've never used a Lavalier (or lapel) mic before and had no idea what to expect from it. In the past, I have used a pretty expensive shotgun mic which plugged directly into my video camera via an XLR plug. To be honest, the lav mic was a little noisy compared to a full sized shotgun mic, and it gave me a bit f hiss. But this may have been due to my inexperience. We shall see.

The Neutral Density Filter is a small bit of kit but quite important. Simply put, it is like having sunglasses for your lens!

I have been quite amazed at the low light abilities of my DSLR and it's lens (particularly the 50mm f1.8), but this performance comes at a cost - particularly if you want to shoot on bright sunny days. The lens actually lets in too much light (never thought I'd complain about that) and so you have to bang on an ND filter to turn down the amount of light you let in for particular exposure and shutter settings.

Without the ND filter, my test subjects would have been grossly over-exposed!

(Big thank you to Katey for helping me out with my sound test!)

Saturday, 26 March 2016

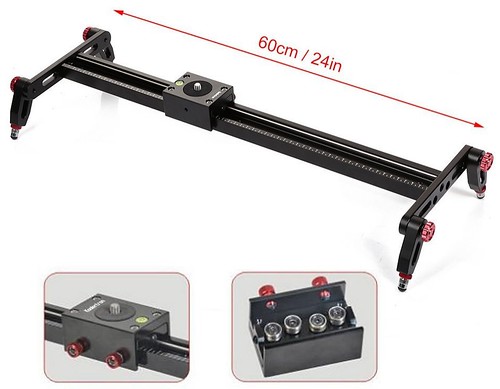
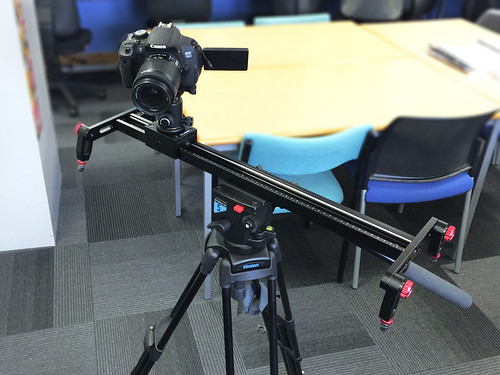
Koolertron 60cm Camera Slider


This was actually delivered a couple of weeks ago, but I've been playing with it so waited until I could produce something worthwhile before I posted up my thoughts.

Right off the bat I can say that a slider (a mini portable track for short dolly shots) is one of those items of equipment that you only really appreciate once you have one. After just a short time you wonder how you ever managed without one - they immediately raise your game.

Obviously, a tracking shot isn't everything, but as people get used to movement in sequences they find static scenes (or at least, cutaways or scenes with no dialogue) a little 'boring'. I literally had a client complain to me about some of my work being 'boring'. I guess this is all part of the modern expectations about always having something going on in the frame (naturally, within the limitations of the story you are trying to tell - movement isn't always an appropriate effect).

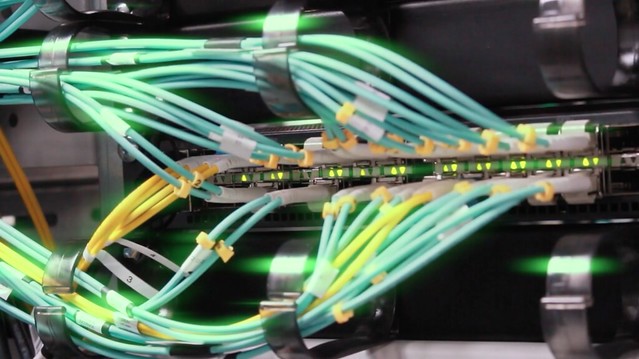
Anyway, I had the opportunity to use my new slider for a project I had to do on a computer data center. This was probably an ideal situation in which to apply some movement in the frame as - let's face it - a data centre is probably not the most interesting environment for a lot of people! Here's the result, but note that these are just some of the rushes and the voice-over hasn't yet been applied...


Above: My slider test reel. The opening sequence is a rather nice drone shot
done by Bakehouse of Hull.

I was really pleased with some of the effects, the shots 'sexy' up what are some pretty dry pieces of equipment. While I'm sure anyone 'into' servers will probably find them interesting, the lay-person will probably appreciate the little extra help to make a scene a little more palatable.

There are cons as well as pros to using a slider. The first is trying not to fall into the trap of using it for everything (which is hard when the novelty is still fresh). In my case, space to use the slider - even just a 60cm (two foot) one like mine - is a consideration, as I struggled a bit in the narrow isles between server cabinets.


You also have to think about the amount of kit you are carrying. As a 'lone gunman' I struggle at the best of times and while the Koolertron is made of (good quality) lightweight materials it does require a heavy-weight tripod to get the best use from it. Stability of mounting is everything, and you may even have to use two tripods - one at either end of the slider - to ensure a silky smooth tracking shot!

The quality of the Koolerton
Now this slider is - as is plain - an entry level manual slider. At £80 it isn't the cheapest, but I decided that the ball-bearing tracking mount that it has was worth the little extra money - rather than paying £40 for one of the bargain basement sliders which are simply metal 'sleds' on a metal track.

Friction - or lack of it - is the key to a smooth tracking shot. The Koolertron track mount runs beautifully smooth and has two 'friction knobs' which you can screw tighter or unscrew to vary the friction. This is essential to a nice 'glide'.

I was very impressed by the quality of the material and finish of the Koolertron, it all feel very well put together.


Obviously, this is just the first run on the ladder as far as sliders are concerned. As a manual slider - one I literally have to push along to get my tracking shot - there are issues of speed control and consistency in movement. It takes some amount of practice to get that perfectly moderated glide - in the beginning, you tend to have to do a shot again and again as you gauge your speed of movement.

The next step up would be perhaps to add some sort of pulley or gear system with a motorized system the ultimate guarantee of a smooth and consistently paced tracking movement. But, while I learn how best to utilize this piece of equipment a basic manual slider is fine (and it's good to have a bit of kit that doesn't require batteries or power)!

Monday, 21 March 2016

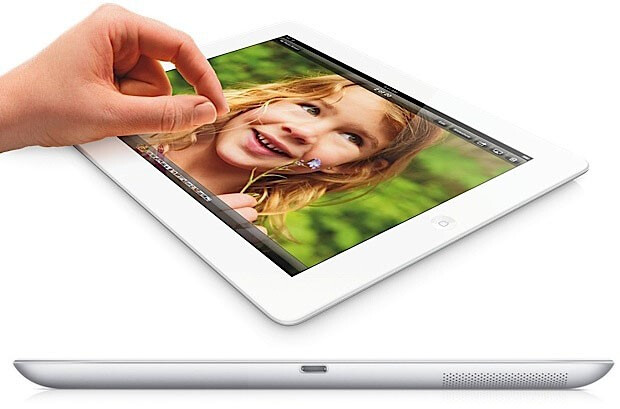
iPad (Gen 4) Movie Making tests - Part 1


Never having owned an iPad the idea of creating movies on a tablet was something of an anathema to me. They seemed too clumsy a device to be easy to use for capturing video and I had concerns about the size of the camera lens.

"...the iPad 4 (4th generation) supports “H.264 video up to 1080p, 30 frames per second..." Ipadwiki.com

Still, my casual experiences with shooting movies using my iPhone (5s) has taught me not to make assumptions. I have been pleasantly surprised with some of the shots I have managed to get with my smartphone and so I tried to have an open mind about the iPad.

First tests - exterior, subdued daylight
I knew I would have to do mt tests in two or maybe even three parts in order to appraise the iPad's abilities. Filming would have to include a variety of lighting situations, distances and static and moving subjects. So, for my first test, I did some filming at my local part, in the early morning, which would provide me with some subdued daylight with some patches of shaded areas...


In this test movement was kept to a minimum with no fast or abrupt camera movements. I also did not make use of the iPad's digital zoom. I quickly decided that this facility was not a viable option as the depreciation in picture quality is not

I did make some limited use of my new Koolertron 24"/60cm Ball Bearing Pro DSLR Camera Slider Dolly Track, but I kept the movement very slow.

Conclusion
Well, I was pleasantly surprised with my first attempts using the Gen 4 iPad. Obviously, as long as one is aware of the limitations of the technology then one can deliberately avoid highlighting it's limitations. And, in this case, the subject matter and lighting (and lack of movement) played to the devices 'strengths'.

I can see how, from my point of view, the output from the iPad might represent  a current 'minimum spec' for movie-making. But, still, it is watchable - within the limitations of how one might expect to deploy this sort of movie for general viewing (500 pixels wide within a web browser). I've yet to view this movie on a large TV screen, but I can imagine how the crispness one get's in this 'squeezed' 500px format will dissipate, soften and ultimately start to pixelate quite noticeable.

It (the iPad) is, after all, what it is.

One thing I should add, I was really impressed with how easy the iPad was to handle in hand-held situations. The size and shape were ideal for a two-handed grip, which made filming by hand quite steady and intuitive.

It was also very nice, as a camera user who has had to put up with little 4 inch LED screens on my other cameras, to have a luxuriously large preview screen! I can now see why so many DSLR and video camera users like to use large 'field monitors' - the extra screen really helps you to frame, check focus, identify small objects that you would have missed on small screens and give you a sharper window on your 'world'.

Useful link: iPad Generation 4 technical spec at Wikipedia

Next: I'll try the iPad out indoors in an interview situation, with particular attention to the quality of sound recording.