Sunday 29 October 2017

One Step Forward...

I finally managed to save the cash needed to buy the additional propriatory batteries required to run the Fuji X-T2's PoweGrip...


This really opens up my moviemaking and offers me new challenges. Although I could film in 4K before the limitations of just having one battery meant some very short outings (which very soon became a bit of a pain). The prospect of some longer experiments and learning sessions is quite exciting.

Ironically, while it's taken me quite a while to save up for these two extra Fuji batteries I had no sooner congratulated myself than I heard that Duracell has produced what are rumoured to be good quality alternatives to the Fuji NP-W126S shielded batteries at just £20 a piece!

Ah, well...I wouldn't be happy buying these alternatives until I read first-hand reports about their performance anyway. Still...Typical!

Monday 3 July 2017

Shooting practise...Freehand.

I'm trying to build up a momentum and get as much practice with my X-T2 as I can. I don't have a firm plan for a set project yet, but I need as much camera time as I can get and I need footage to practise editing so - at the moment - I just need to get out there and shoot anything.

Aside from gaining familiarity with the camera I also want to practise some freehand shooting, filming without setting up a static tripod rig. Most of the filming I have done in the past has been of the fairly static interview format, so I haven't had a lot of experience filming hand-held.

I thought I would prepare for my next outing with some video tips...


And if all else fails, there is software stabilisation.

So, I trotted down to the harbour and snapped some handheld sequences. I tried my best to keep the clips as steady as I could - following some of the tips from the above video tutorial - but I obviously need more practice and ended up applying stabilisation in PowerDirector...


It was a bit of a dull, grey day so I probably over-compensated in my colour adjustments. But I'm still enjoying the novelty of playing with PowerDirectors settings.

I'm not entirely happy with software stabilisation, occasionally it can be a bit glitchy and jerky when you add it to a sequence that includes a pan or tracking movement. So the moral of the story is, try and take as steady footage as you can so you don't have to add stabilisation.

One other thing I noticed was how the wind affected my audio track. I hadn't thought it was that windy, so left off my Rode mic and it's windshield, trusting to the X-T2's integral microphone. The wind buffeting was noticeable when I got my footage into the editing software, so I had to remove the soundtrack.

From now on, if I'm doing any outside work, I'll fit the Rode mic and windshield by default.

Wednesday 28 June 2017

Choosing a Fuji Film Simulation

I started to write this journal entry, but it turned into a long rambling discussion about F-LOG versus Film Simulations. (Spoiler alert...It's a case of horses for courses! But I will cover this in more depth later down the line.)

The position I find myself in at the moment is that I do not have an external 4K recorder (and cannot afford one), so I am limited to just recording vanilla unadulterated video or video treated with one of Fuji's integral Film Simulation modes (which can both be recorded onto an internal memory card).

As I said, it's a matter of personal preference as to which route you take, but in my case, the inclusion of Fuji's Film Simulation 'styles' was a principal reason I bought the X-T2. But, for those who are not familiar with Fuji's Film Simulations, they are 'what they say on the tin', they are digital simulations of analog film stock to give your digital photos or videos an analog 'look'...


See also, B&H's 'An Introduction to Fujifilm’s Film Simulation Modes'.

Although the above clip is principally aimed at stills photographers, these stylistic simulations are just as applicable to video recording. In fact, they take a lot off the shoulders of the videographer who likes to spend more time playing with his camera than they do in post fiddling about with colour grading (which is a bit dark art).

Certainly, this is why  I was attracted to the X-T2, I loved the look of some of the simulation modes and didn't (yet) want to caught up in the quagmire of tinkering for hours with software sliders.


Above: Some examples of the Fuji Film Simulations as used to film video. Here the
simulations are further tweaked in conjunction with the X-T2's internal settings to
make the end results even more unique.

So, Which Colour Simulation?
OK, having laid out my reasons for wanting to use Fuji's Film Simulations (with the caveat that once I'm a bit better off and a bit more experienced I would like to try out F-LOG via an external recorder and then applying LUTs in post) which simulation do I think is best? Well, once again, this isn't quite straight forward as Fuji never intended a photographer to just use one of its film types, you use which film type is most suited to your subject matter. And this is how it is with their film simulations too.

So, I tried out some experiments with the various types to see which suited my personal visual preferences - using some tips from other X-T2 videographers - and narrowed my initial favourite modes down to Classic Chrome, Pro Ned Standard and - as a wild card - Astia (which is a bit more saturated and pops the colours more).

Here are some screen grabs from the sequences I took in the three film simulation modes...


The differences are quite subtle but they are enough to have emotional relevance, creatively speaking. For example, I am drawn to Classic Chrome - it is slightly nostalgic in its colour reproduction reminiscent of Kodak's legendary Kodachrome (ironic that Fuji should reintroduce this film look).

For me, Kodachrome is indicative of my father's photos from my childhood holidays - which is probably why I am drawn to it, and I don't think I am the only one as the 60s and 70s 'look' of the film reproduction is a popular visual trope among the Hipster generation. Its retro slightly faded character exudes a comforting nostalgia...


As expected, Pro Neg Standard came in as a close second, which isn't very surprising as I did my homework first before I narrowed my interest down to the three film simulations that I tested.

The advantage that Pro Neg Std. has over Classic Chrome is that it appears to have just a little more dynamic range (there a little more information in the shadows and the highlights). This makes this simulation the closest - with a little tweaking of the camera settings - to a flat output suitable for further colour grading in an editor.

The 'Q' (Quick) menu custom function set I have for my 'Flat 2' profile. This
custom setup gives my Pro Neg Std (N-S) a little flatter look by toning down
the Highlights (-2), Shadows (-2) and Sharpness (-2).
Finally, Astia is a bit of fun. It's a bit too saturated for my tastes and as you can see from the above screen grab it's output is somewhat reminiscent of holiday postcards. I find it a little insincere and superficially 'pretty' (so we can knock that one off the list).

Conclusion
Well, as much as I favour Classic Chrome, I won't be using it for everything. But it may well be my default go-to mode. It's a rather nice feature of the Fuji system that I have several film 'looks' I really like baked into the camera by default, rather than me having to make these simulations up myself via long sessions of colour grading or by trawling the internet for an elusive LUT that does a similar job.


Above: Here's a very short example of how the Fuji Pro Neg Standard Film Simulation
footage I shot can be further modified using colour presets in PowerDirector 15. It's
sort of a poor man's instant color grading, but the end results are pleasing enough.

More time to film, less mucking about in post! (Though, in time, it will be interesting to see if the novelty of film simulations wears off and I whether I begin to find this system constricting. We shall see.)

Monday 27 March 2017

Videoing tabletop tutorials

Something I've been asked to do for one of my hobbies is to video some of the methods, to be exact - how I do some of my scale model making. But, I've been putting this off as I've never been quite sure how best to video some tabletop work - a la Blue Peter - given that a lot of my models are quite small.

But, I've decided it's best just to film some stuff and see what works. I can adjust my technique accordingly. So here's my first test footage...


Yes, it's all a bit thrown together, but this clip does give me some useful information.

EQUIPMENT: 

Camera - I'm using my fixed focus GoPro Hero 4 Black.
Stand - The GoPro is attached to a clamp with articulated 'gooseneck' arm (about a 30cm long).
Lighting - Just one small LED desk lamp.
Sound - Just the GoPro's internal mic (hence the hiss)!

Not very high-tech. But you have to start somewhere.

My goal was to find out how close the GoPro could focus - as it is a fixed focus camera - and to see if I could get it close enough so that the viewer could make out the small model parts that I work with.

Also, I wanted to experiment with the best angle and position for a single camera without it getting in the way of what I am doing. I thought the 3/4 view, looking down on my work area, would be best as I wouldn't block the view of the objects being worked on but this does mean I occasionally have to turn the objects if I want the viewer to get a clear view of the work.

GoPro 4 mounted on articulated 'Gooseneck' clamp.
At this point, I am not bothered about sound as I am undecided whether I shall add a voice over narrative in post. It might be easier that way so I can cut down mistakes and follow a script.

CONCLUSIONS
Well, it's not horrendous! The good thing about the GoPro 4 is I have several filming resolutions to choose from (including 4K if I want). The major downside is the fixed focus, the GoPro's minimum focus range is about a foot (30cm) and anything closer than that is blurry.

This is a bit of a pain as I may want closer shots to show some of the small components and assemblies (perhaps as close as 10-15cm). But, for a wider overview of my work area, the GoPro is adequate.

The other main concern is - as always with video - the lighting. I am going to have to set up something a bit more like a mini-studio, with at least two lamps giving even illumination from either side of the bench to eliminate any shadows.

OTHER OPTIONS
To focus in closer, I have the option of either using my main video camera - the Fuji X-T2 - or my little Logitech Web Cam. The Fuji might be a little overcomplicated, although the quality of footage would be superb, and it seems like a bit of a sledgehammer to crack a nut sort of solution.

The Logitech web camera seems a little more flexible and suited as it has a very good auto-focus system - that can focus very close to the lens - and wouldn't take a lot of space on my desk. Additionally, I would have the ability to monitor the footage via a computer screen, which would help to make sure I have small objects in focus.

I think my next test will be with the Logitech (and let's see if we can improve the lighting).

Tuesday 7 February 2017

New mid-range zoom for my Fuji X-T2

Goodbye Canon...Hello, Fuji!
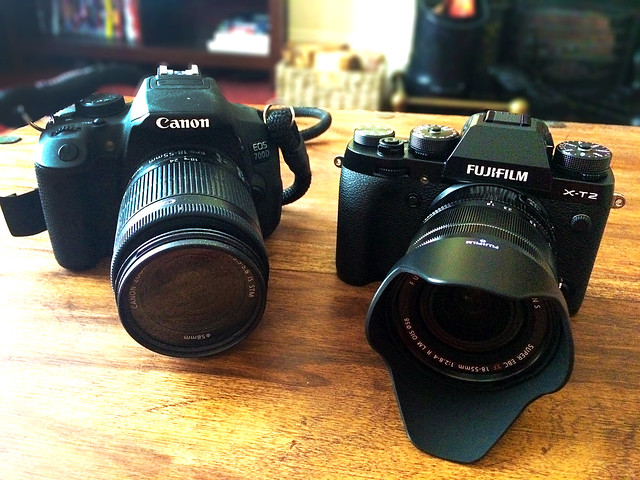
I finally twisted my own arm and forced myself to sell my 'old' Canon 700D. There was a bit of reluctance which wasn't just sentimental attachment but the desire to document my hobby with a decent camera. But, in the end, the fact that I had a couple of hundred pounds worth of equipment just laying around, and used only occasionally, wore me down and I decided to eBay it.

Amusingly, I first attempted to sell it at my local Jessops but the derisive offer I was given (£175) by them made me think again. But then, my daughter's boyfriend - who is a bit of a whiz on eBay - said he'd have a go and this time I netted a £296 offer. Bloody Jessops!

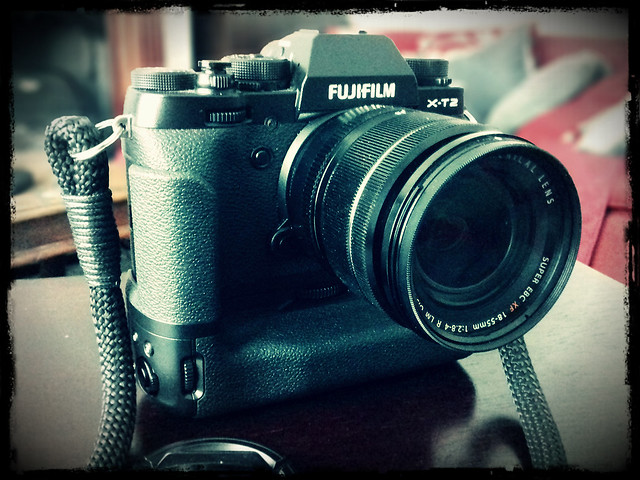
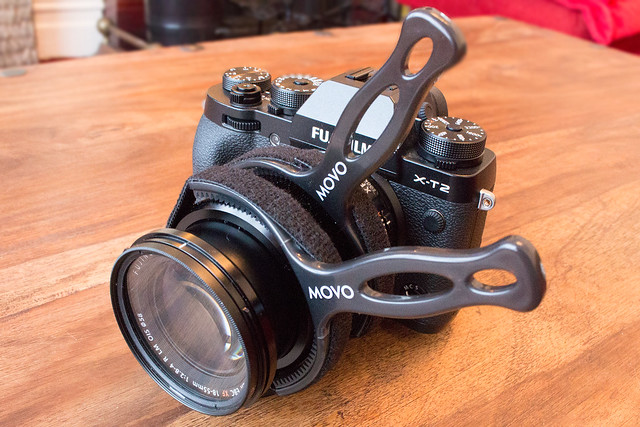
Anyway, the end goal of this sale was for me to be able to then buy myself a new lens for my X-T2 camera. I just have the kit lens at the moment and as good as it is I have already fallen foul of some of its limitation (zoom-wise). I had always intended to buy a second lens for my Fuji pretty soon after I got it but have been in two minds over which path to take - prime lens or zoom lens.

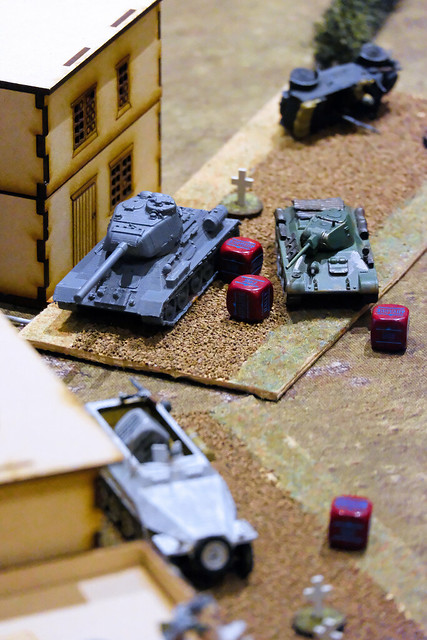
As it turned out, my need for a good mid-range zoom seems to be greater as I have started to document some of my local events. In particular, I have been attending my local tabletop games club (Scarborough Games Society) and I found that - due to the size of some of the game tables - I couldn't quite get close enough with my closeups of the action with my tidgy 18-55mm kit lens.

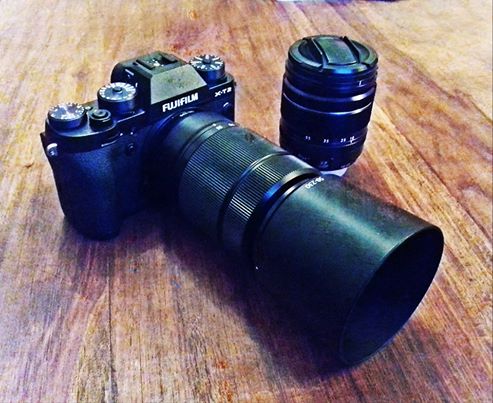
So, with the money from the sale of my Canon burning a hole in my pocket, I had my eye firmly on the Fujinon XC 50-230mm F4.5-6.7 OIS II lens (£240 new) which I reckoned was just the job for the ranges that I had in mind...


After a short wait, it was with great excitement that I snapped on my newly arrived Fujinon XC 50-230mm F4.5-6.7 OIS lens (£240 new) and I got to work banging away at the club, getting some nice closeups of the game I was involved with. Here are some examples...

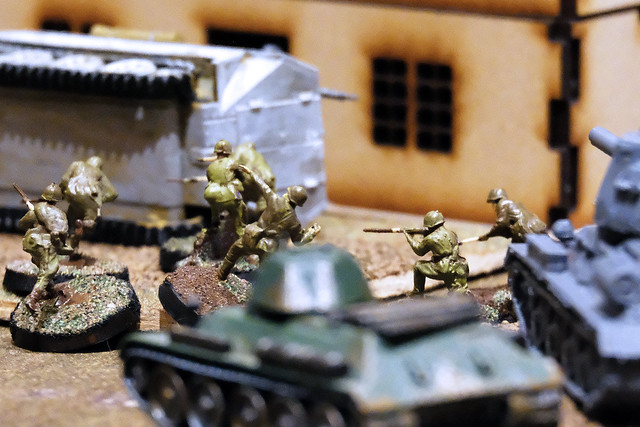
Picking out the action at the center of the table!
Another atmospheric closeup, impossible with my 18-55mm zoom.
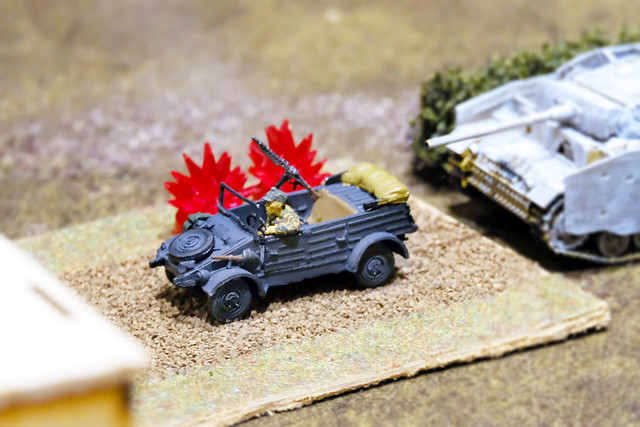
A closeup from all the way over on the other side of the table.


The greatest thing about my new 50-230mm zoom - aside from the ability to do extreme closeups from a distance - was that I could now take intimate shots and pick out tiny details without getting in players way or having to stop play so I could get myself close enough to the action. I actually found, on occasion, that I actually had to take a few paces back away from the table to focus on some objects!

Now, I could have bought this lens nearly a hundred pounds cheaper, but I would have had to have had it in silver. I know the colour of the thing makes no difference, but I really just couldn't stomach the idea of a silver lens on my camera. I know that sounds a bit daft, but I had the money so I paid the extra for exactly what I wanted, a black lens to match my all black X-T2.

Any downsides?
The XC 50-230mm zoom is Fuji's budget or ''entry level' X-mount zoom and as such there are some compromises, compared to the 'standard' Fujinon X lens.


To begin with, there's construction. Compared to Fujinon's XF 55-200mm f3.5-4.8 R LM OIS Lens, the XC 50-230mm lens, the outer 'tube' is made of plastic and not metal. But then, the XF 55-200mm is twice the price I paid for my XC zoom!

Even compared to my 18-55mm kit lens - which is also an 'XF' series lens - you can feel the weight difference between the plastic bodied XC series and the metal bodied XFs. My smaller XF zoom feels about twice the weight of my new zoom, even though it's about half the length.

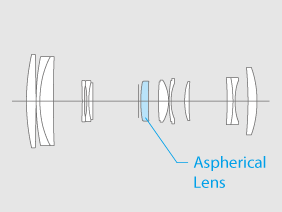
XC50-230mmF4.5-6.7 OIS II Lens construction. Source: Fuji
But, not that while the materials may be cheaper, the build quality is just what you expect from Fuji. The XC zoom is not only well put together, but the 'glass' is just the same quality as one might get in an XF lens. However, the XC series is not weather sealed.

What else? Well, the XC zoom has no aperture ring. You have to adjust your f-stop via the command ring on the front of the X-T2 (or whatever set-up you have on any other Fuji X camera). Some people make a lot of this, and I can understand why - it's not so intuitive. But, after using this system for changing my aperture during my first session, I actually got used to it - after all, the f-setting is available in the displays.

And finally, what about low light? The XC zoom is rated f4.5-6.7 variable and I have read that some reviewers feel that this is detrimental to its performance in low light situations. I've been exceptionally pleased with the results from my XF zoom lens (f2.8-4) in dimly lit environments so there was a bit of a worry as my focus is shooting at indoor events (which are almost always poorly lit).

But, looking at the results from my session at the Games Society I have little to complain about. And it's great not to have to resort to flash to get the shots, specifically because that would be exceptionally distracting for those at the event (indeed, some events and locations prohibit the use of flash altogether).

Conclusion
At the end of the day, the event's participants were pleased with the photos I took and that - to me - is the most important thing about documenting an occasion like this. I'm very pleased with the money I spent and at peace with myself for selling my Canon. The Fujinon XC 50-230mm F4.5-6.7 OIS II lens is an absolute bargain as far as I am concerned.

Here's a really interesting review of the Fuji XC 50-230: 'SIBLING RIVALRY: THE UNDERESTIMATED XC 50-230MM.'

Saturday 28 January 2017

Photokite Phi Tethered Drone Test


Time to try out my Fotokite - half drone, half kite, maybe - after all, I've had it long enough. But, before I attempt a full on outdoor filming test, there is the little matter of charging it, updating the firmware and learning the controls.

The charging of the 1300 mAh Polymer Li-ion battery can take between 1 and 3 hours. This is dependent on the charger used (say Fotokite), and by this I think they mean whether you plug the USB charger lead into something like a USB port on another device or directly into a USB wall plug or adapter. I opted to charge mine via a wall socket adapter and gave it a good three hours.

"Once you’ve plugged in the USB-C cable into your Phi, the LEDs will turn on and start blinking on a regular basis. The LED colors will go from a red/orange when the battery is almost empty to a green when it is almost full. You should also be hearing a clicking sound during the charging procedure. Once the battery is full, the LEDs will turn to a teal color." [Fotokite FAQ.]

I did have a little issue with their statement that the LED lights turn a teal colour when the Fotokite is fully charged. I could only ever seem to get the LEDs to flash green, no matter how long I left the Phi plugged in. Strange (I will email them about this).

Charging time = Flight time: Fotokite suggests that a full 3 hour charge should equate to 13 minutes flight time. This may seem short, but do remember that the battery is also powering the GoPro camera as well!

Anyway, charging done I moved onto updating the firmware. There is a new firmware update out already, which is good to know as it looks like the Fotokite people are pretty responsive to user feedback and include improvements based on those comments. The process is relatively fast and very easy and the updater software is available for both Windows and Mac OS (I'm pleased to say).


Anyway, to the main event, the first test flight! This was a very rudimentary test, I'm afraid, with nothing all that exciting going on and no filming with my GoPro camera (which I installed on the Phi). I just carried out some simple control tests - yaw, orbit, ascend and descend - so that I could gain some familiarity with the flight controls before I attempt an outdoors flight...


Outcome and First Thoughts
Well, I managed not to take out the lounge light or the TV so I think we can say that this was a success. :)

The method of controlling the Phi is a little quirky, it's done via the hand-controller but involves just two buttons which activate Phi orientation when pressed in combination with specific hand movements. It's easier to see than to describe, so pop over to the Fotokite 'Quick-start video guide' web page...


This will take a wee bit of getting used to and a lot of practice, but I picked it up (sort of) after 5 minutes or so. Though, only through repetition will I eventually master the Fotokite.

However, there were some very pleasing outcomes, I learned that you can point the GoPro in the direction you want (via the Orbit function), so you can have the camera pointing away from you. I'm really pleased about this as many of the promotional movies I have seen so far have featured the 'aerial selfie' mode where the camera is pointing back toward the user.

In the selfie mode you are able to see the tether, so, by pointing the Phi away from you, you can 'hide' the tether and film footage that looks very much like traditional drone footage.

What next?
Well, I'm going to have to make some notes of the various LED light functions as all communication with the Phi is done via the lights or the occasional vibration of the hand controller. There are no fancy visual instrumentation or an app, so you really have to be on the ball as to what the LED lights mean (especially the combination that tells you the battery is running low)!


It's all in the manual (which is available online at fotokite.com/phi-user-guide/), but I'm one of those people who doesn't take in information unless I've written it down.

Once I feel I have digested enough of the instructions, I can move on to my first exterior flight and also get some filming done. I'm keeping a close eye on the weather reports to see if there will be a suitable day to do this this week (fingers crossed).

Thursday 5 January 2017

Lightweight Pull-focus/zoom solution

One of the effects I liked to replicate in my DSLR movies was pull-focus, follow-focus and pull-zoom-focus. I used to achieve this when using my Canon DSLR with the addition of a cage and a large pull-focus wheel mechanism. Unfortunately, this added a lot of weight and made the camera almost unusable unless it was tripod mounted.


Since I got my Fuji X-T2 mirrorless camera I have sort of drifted toward a more light-weight style of camera-work and away from the use of a cage and lots of add-ons (when possible). But I was left with the problem of how to do pull-focus effects.

Then I came across the Movo Photo FF200 Manual Follow Focus / Zoom Control Lever Lens Clamp for DSLR Video Cameras. This is available from Amazon.co.uk for a very reasonable £8.95...


It's a very simple lever design which is attached to the camera's focus ring or zoom ring using a velcro strap. The great thing about it is that it's very quick and easy to attach and it fits a variety of sizes of lenses. I opted for two of these levers so I could control both my manual focus and my zoom smoothly...


It looks a bit weird but the levers work perfectly. They allow you to adjust focus/zoom from a more detached stance behind the camera (as opposed to the more 'connected' stance used by stills photographers, where they grasp both the camera and the lens). The long levers give you a nice smooth leverage over the speed of turning of the lens rings, and I find I can use these even if the camera is being used handheld.