Showing posts with label video. Show all posts

Wednesday, 28 June 2017

Choosing a Fuji Film Simulation

I started to write this journal entry, but it turned into a long rambling discussion about F-LOG versus Film Simulations. (Spoiler alert...It's a case of horses for courses! But I will cover this in more depth later down the line.)

The position I find myself in at the moment is that I do not have an external 4K recorder (and cannot afford one), so I am limited to just recording vanilla unadulterated video or video treated with one of Fuji's integral Film Simulation modes (which can both be recorded onto an internal memory card).

As I said, it's a matter of personal preference as to which route you take, but in my case, the inclusion of Fuji's Film Simulation 'styles' was a principal reason I bought the X-T2. But, for those who are not familiar with Fuji's Film Simulations, they are 'what they say on the tin', they are digital simulations of analog film stock to give your digital photos or videos an analog 'look'...


See also, B&H's 'An Introduction to Fujifilm’s Film Simulation Modes'.

Although the above clip is principally aimed at stills photographers, these stylistic simulations are just as applicable to video recording. In fact, they take a lot off the shoulders of the videographer who likes to spend more time playing with his camera than they do in post fiddling about with colour grading (which is a bit dark art).

Certainly, this is why  I was attracted to the X-T2, I loved the look of some of the simulation modes and didn't (yet) want to caught up in the quagmire of tinkering for hours with software sliders.


Above: Some examples of the Fuji Film Simulations as used to film video. Here the
simulations are further tweaked in conjunction with the X-T2's internal settings to
make the end results even more unique.

So, Which Colour Simulation?
OK, having laid out my reasons for wanting to use Fuji's Film Simulations (with the caveat that once I'm a bit better off and a bit more experienced I would like to try out F-LOG via an external recorder and then applying LUTs in post) which simulation do I think is best? Well, once again, this isn't quite straight forward as Fuji never intended a photographer to just use one of its film types, you use which film type is most suited to your subject matter. And this is how it is with their film simulations too.

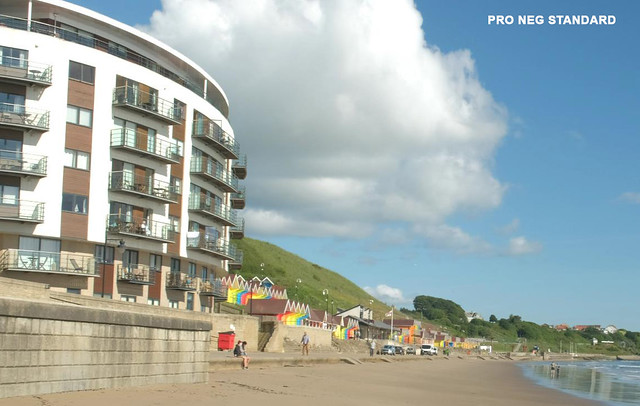
So, I tried out some experiments with the various types to see which suited my personal visual preferences - using some tips from other X-T2 videographers - and narrowed my initial favourite modes down to Classic Chrome, Pro Ned Standard and - as a wild card - Astia (which is a bit more saturated and pops the colours more).

Here are some screen grabs from the sequences I took in the three film simulation modes...
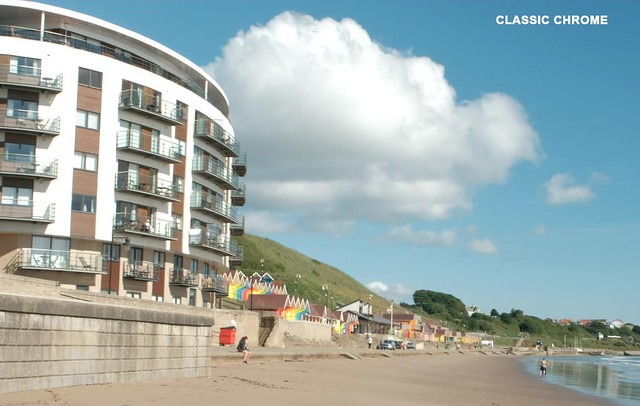


The differences are quite subtle but they are enough to have emotional relevance, creatively speaking. For example, I am drawn to Classic Chrome - it is slightly nostalgic in its colour reproduction reminiscent of Kodak's legendary Kodachrome (ironic that Fuji should reintroduce this film look).

For me, Kodachrome is indicative of my father's photos from my childhood holidays - which is probably why I am drawn to it, and I don't think I am the only one as the 60s and 70s 'look' of the film reproduction is a popular visual trope among the Hipster generation. Its retro slightly faded character exudes a comforting nostalgia...


As expected, Pro Neg Standard came in as a close second, which isn't very surprising as I did my homework first before I narrowed my interest down to the three film simulations that I tested.

The advantage that Pro Neg Std. has over Classic Chrome is that it appears to have just a little more dynamic range (there a little more information in the shadows and the highlights). This makes this simulation the closest - with a little tweaking of the camera settings - to a flat output suitable for further colour grading in an editor.
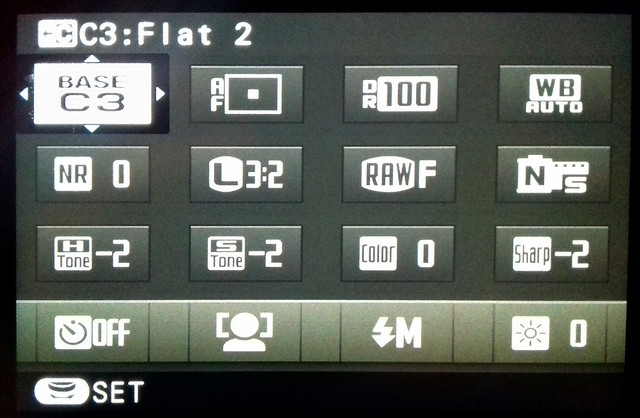
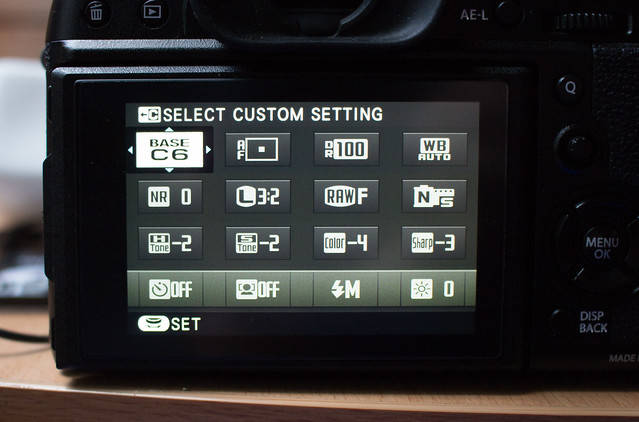
The 'Q' (Quick) menu custom function set I have for my 'Flat 2' profile. This
custom setup gives my Pro Neg Std (N-S) a little flatter look by toning down
the Highlights (-2), Shadows (-2) and Sharpness (-2).
Finally, Astia is a bit of fun. It's a bit too saturated for my tastes and as you can see from the above screen grab it's output is somewhat reminiscent of holiday postcards. I find it a little insincere and superficially 'pretty' (so we can knock that one off the list).

Conclusion
Well, as much as I favour Classic Chrome, I won't be using it for everything. But it may well be my default go-to mode. It's a rather nice feature of the Fuji system that I have several film 'looks' I really like baked into the camera by default, rather than me having to make these simulations up myself via long sessions of colour grading or by trawling the internet for an elusive LUT that does a similar job.


Above: Here's a very short example of how the Fuji Pro Neg Standard Film Simulation
footage I shot can be further modified using colour presets in PowerDirector 15. It's
sort of a poor man's instant color grading, but the end results are pleasing enough.

More time to film, less mucking about in post! (Though, in time, it will be interesting to see if the novelty of film simulations wears off and I whether I begin to find this system constricting. We shall see.)

Thursday, 17 November 2016

First Fuji X-T2 4K test

I had to force myself to post this first video test of my Fuji X-T2 as I am far from proud of this initial attempt at filming. Everything that could have gone wrong did go wrong on this shoot and, basically, I discovered that I hadn't recovered from my illness as much as I thought I had - my heart (and body) just wasn't in it and I was forced to give up after just 15 minutes.

However, there is some learning value to the few useable clips I did shoot, so I relented and decided to post the clip. It's definitely not a particularly interesting clip, and neither is it well shot (my hands were shaking like leaves in the wind throughout the shoot) but it does serve as useful reference for some things I thought I'd try out...


A positive note: I should add some positives here, as this all sounds a bit negative. I actually did get a couple of things out of this experiment; it was great to actually have some pieces of raw 4K footage to practice my editing workflow with and I was also pleased with my ISO camera settings. I simply left the camera's ISO dial on 'A' (Automatic) and it did a very good job, the video you see above is a pretty true reflection of the natural light on that day as it was gray and overcast. Normally I would choose a manual ISO setting, but the auto setting impressed me (so it's not all bad)!


Footage Notes

Equipment: Fujifilm X-T2 mirrorless camera and Rode Stereo VideoMic Pro. No tripod.
Location notes: Peasholm Park, Scarborough, Weather was overcast.

Purpose of shoot: To test and practice 4K filming process and workflow and to try out a simulated  'flat' colour profile setting. I also wanted to see what handheld footage would look like and how much the Fuji's lens stabilization would assist me to take steady footage.

Microphone settings: No 'dead cat' attached (despite it being a windy day) so turned on the high-pass filter and set the gain setting to +20dB boost. I also set the Fuji's in-camera audio levels to about 25% so that - in combination with the  mic's gain boost - I would (hopefully) minimise hiss.

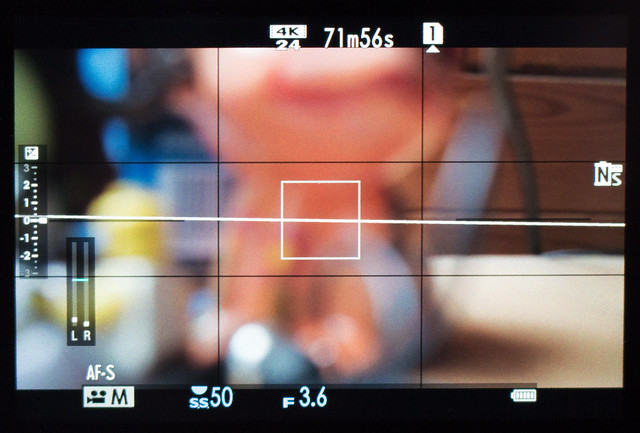
Camera settings: Basic camera settings for 'film look' video were - Shutter speed 1/50th, frames per second 24, ISO auto. I used auto-focus ('S') on the X-T2 rather than manual, just for simplicity sake.


X-T2 tip: Some people have been scratching their head and wondering how to set 1/50th fps using the shutter speed dial (as the settings on the dial go ...15...30...60...125..., etc). First, select '15' on your dial, then use the back command dial wheel to adjust the fps up to '50'. Yes, I wish Fuji had included a 50fps setting on the main dial too!

Simulating a 'Flat' colour profile: In its review of the X-T2 DSPhotoBlog.com suggests a method of creating a sort of faux-FLOG using custom settings: "Without the FLOG you can still get a pretty flat looking video. You switch to the Pro Neg Hi Std Film simulation and set the shadows and highlights to -2, color to -4 and sharpness to -3 or -4."


Post edit software: CyberLink PowerDirector 14 on Windows 10 PC.

File information: Format - MP4 (.mp4). Resolution - 4K, 4096 x 2160. Size - 576MB.

Postscript - why a 'flat' colour simulation?
I mention that I one of my goals for the shoot was to try and create a faux-FLOG, to understand why it helps to understand what FLOG (Fuji's version of LOG) is:

"In a nutshell, recording using a LOG picture profile or curve preserves more of your image’s dynamic range and tonality by redistributing the digital exposure value representations over the entire value set using a preset logarithmic function." [BHPhotovideo.com]

Er, or, simply put, it's all about preserving as much exposure information as you can in your footage so you can play around with exposure and colour grading in post without losing detail. It's kind of like a video version of still photography's RAW file format.

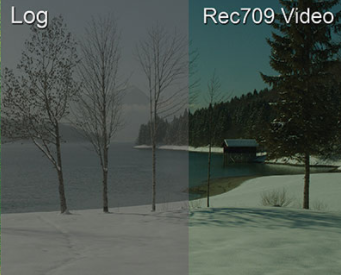
For example, if you shoot a piece of footage that is too contrasty (blowing out highlights) you can never recover any detail in those highlights in post. LOG footage is often called 'flat' or 'neutral' and looks a bit wishy-washy and grey, that is because it tries to retain detail information in all areas - shadows. midtones and highlights - so you can access those details later when editing and correcting colour and exposure.

Picture source: Blog.abelcine.com
"Log isn’t Raw; it’s video. However, it’s a special way of capturing that maximizes the tonal range of a sensor." [Blog.abelcine.com]

Now, unfortunately, the Fujifilm X-T2 cannot record LOG internally* - you have to record Fuji's LOG format to an external recorder via the HDMI output. This is a wee bit expensive to do at the moment and I can't afford one of these external recorders, so I am having to cheat and simulate a 'poor man's' flat file.

My test video above show the result of this attempt, which is another reason that it looks a little 'grey' and washed out. I used some settings suggested in a post on DSPhotoblog.com to sort of buff up the detail in shadows and highlights. It's not the same as a proper LOG recording, but it will allow me some latitude when trying to colour grade and adjust exposure in post.

*There are a lot of rumours that Fuji might add internal LOG recording to the X-T2 via a firmware update at some point.

Monday, 21 March 2016

iPad (Gen 4) Movie Making tests - Part 1


Never having owned an iPad the idea of creating movies on a tablet was something of an anathema to me. They seemed too clumsy a device to be easy to use for capturing video and I had concerns about the size of the camera lens.

"...the iPad 4 (4th generation) supports “H.264 video up to 1080p, 30 frames per second..." Ipadwiki.com

Still, my casual experiences with shooting movies using my iPhone (5s) has taught me not to make assumptions. I have been pleasantly surprised with some of the shots I have managed to get with my smartphone and so I tried to have an open mind about the iPad.

First tests - exterior, subdued daylight
I knew I would have to do mt tests in two or maybe even three parts in order to appraise the iPad's abilities. Filming would have to include a variety of lighting situations, distances and static and moving subjects. So, for my first test, I did some filming at my local part, in the early morning, which would provide me with some subdued daylight with some patches of shaded areas...


In this test movement was kept to a minimum with no fast or abrupt camera movements. I also did not make use of the iPad's digital zoom. I quickly decided that this facility was not a viable option as the depreciation in picture quality is not

I did make some limited use of my new Koolertron 24"/60cm Ball Bearing Pro DSLR Camera Slider Dolly Track, but I kept the movement very slow.

Conclusion
Well, I was pleasantly surprised with my first attempts using the Gen 4 iPad. Obviously, as long as one is aware of the limitations of the technology then one can deliberately avoid highlighting it's limitations. And, in this case, the subject matter and lighting (and lack of movement) played to the devices 'strengths'.

I can see how, from my point of view, the output from the iPad might represent  a current 'minimum spec' for movie-making. But, still, it is watchable - within the limitations of how one might expect to deploy this sort of movie for general viewing (500 pixels wide within a web browser). I've yet to view this movie on a large TV screen, but I can imagine how the crispness one get's in this 'squeezed' 500px format will dissipate, soften and ultimately start to pixelate quite noticeable.

It (the iPad) is, after all, what it is.

One thing I should add, I was really impressed with how easy the iPad was to handle in hand-held situations. The size and shape were ideal for a two-handed grip, which made filming by hand quite steady and intuitive.

It was also very nice, as a camera user who has had to put up with little 4 inch LED screens on my other cameras, to have a luxuriously large preview screen! I can now see why so many DSLR and video camera users like to use large 'field monitors' - the extra screen really helps you to frame, check focus, identify small objects that you would have missed on small screens and give you a sharper window on your 'world'.

Useful link: iPad Generation 4 technical spec at Wikipedia

Next: I'll try the iPad out indoors in an interview situation, with particular attention to the quality of sound recording.