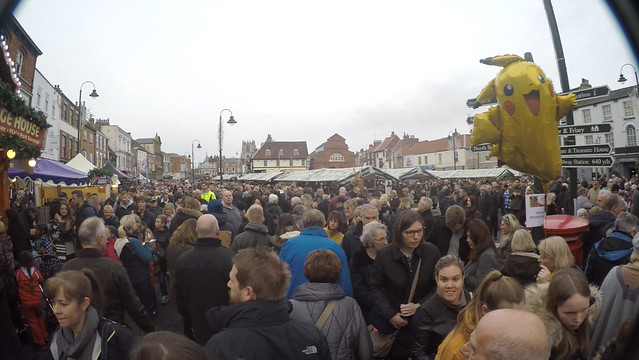
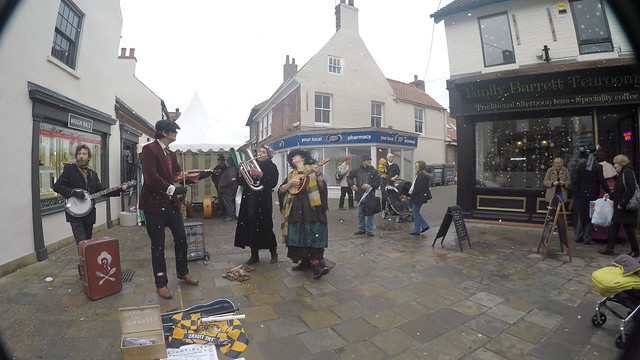
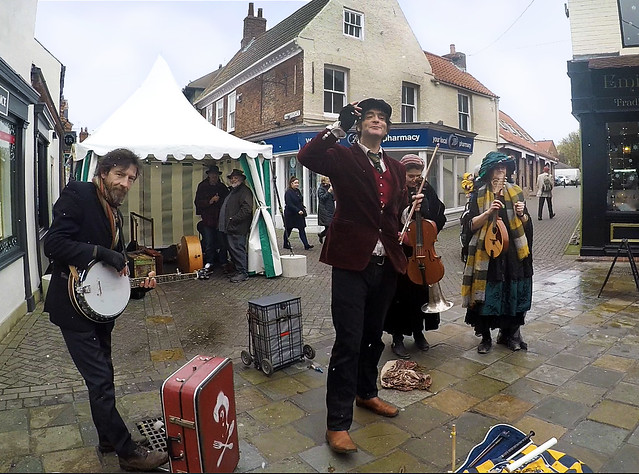
I got a chance to pop out and take some footage with my GoPro mounted directly to my backpack, without the aid of a stabilising gimbal. This gives me some clips that I can directly compare with one-another to see just how effective my FeiyuTech G4 gimbal is.
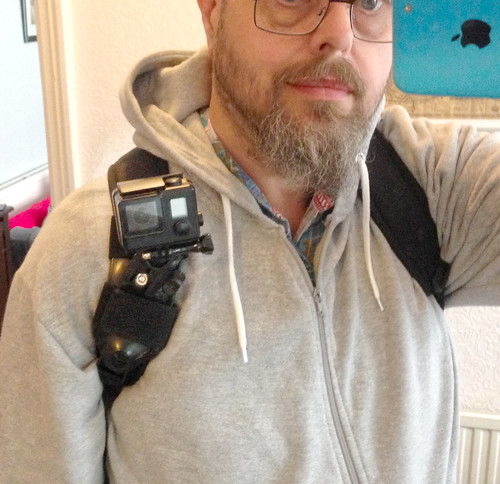
The GoPro was attached to my backpack strap using the Stuntman Pack Mount. In this configuration the camera is a lot more discreet and less cumbersome than it is when mounted on a gimbal...BUT...Just how shaky will the footage be now, without any stabilisation?
Here's the result of my little test, and note that I also took the opportunity to try out recording the audio on my Tascam DR-10L recorder with a 'dead cat' fluffy windshield attached to the lav mic. This way I can test out two things at the same time...Back to the cliffs (guaranteed breezy gusts from the sea)!
And here's my FeiyuTech G4 gimbal stabilised footage, once again, for comparison...
Well, there you go...The gimbal wins out! No question about there being a noticeable difference.
[Note, in the first movie, how more difficult it was to ensure that the GoPro - directly mounted to the shoulder - was precisely level! I should really have checked using the GoPro's wireless viewing app. Of course, you don't have to worry about that when you use the gimbal as it sorts out levelling.]
On the Audio...
As you can hear, this location is particularly gusty which means lots of buffeting of the GoPro's mic. While the wind noise was also apparent on the Tascam recording, it was less aggressive and didn't have the 'banging' that is displayed in the goPro's audio.
(Note that, neither audio was edited or otherwise corrected - denoised using software - so there's a possibility I could have even improved upon the Tascam recording even further.)
So, I think I will defiantly use the Tascam for my GoPro audio in future.
Having, earlier, worked out how to mount my gimbal/GoPro combo onto my backpack - in order to get a Point of View perspective in some of movies - I moved on to filming a little test using the rig.
However, one thing I had not talked about much is the backpack that I have mounted the camera and gimbal to. This is a recent addition to my equipment and is yet another attempt for my to find the 'perfect' camera bag (if such a thing actually exists...I'm on my forth attempt)!
I am trying out the Lowepro Tahoe BP150 Backpack (£50), a compact and lightweight day-pack more conducive to a minimal 'run & gun' equipment load-out. Here's the review that convinced me that this backpack was perhaps the bag I was looking for...
To be honest, I was a bit surprised just how 'compact' (small) the Tahoe was when it arrived. I'm a big bloke and this does kinda make me look like I've borrowed a kids school backpack! Still, I got it because I wanted something small and easy to tote about and the Tahoe certainly fits that bill.
Anyway, here just a reminder of what the GoPro/gimbal look like when attached to the backpack via the Stuntman Pack mount...
I sorted out the gimbal's lean to the left - caused by how the pack's straps naturally sit on your shoulders - by twisting it in it's mount, reseating it's orientation so that the camera now faces directly forward. Now, let's take it for a little walk...
Not silky smooth. But, as this is supposed to be a POV view (seeing what I am seeing) then a little movement motion is natural looking and desirable...I don't want to appear like I am floating around! :)
The Good and the Bad...
Generally I'm pleased, the set-up did what I wanted it to - it gives the viewer a view of the world as if through my eyes. And it's stabilised enough that it's not too jerky but - as I said - still gives a sense of my walking around without being too distracting.
The backpack mount itself is rock steady and feels trustworthy - by that I mean I do not feel like it will slip or give way at all. I did think, before shooting, that perhaps the constant up and down movement of walking might eventually cause the rig to creep and droop - but it didn't.
The reason I worried about 'droop' was because once I had my GoPro/gimbal/mount rig all together, and I put the backpack on, I became aware of the not insignificant weight of the contraption. And it bothered me that I found it noticeable, because I wanted the setup to be 'invisible' and something I wouldn't be thinking about as I walked around.
Instead, I was kind of aware of the lump of tech on my left shoulder (particularly as I had no counterweight on the right), and it's weight pulled slightly on the backpack's strap and there were a couple of occasions I felt like readjusting the pack's straps. I read somewhere that to help stabilise this sort of mount you should either use a backpack that has an integral chest strap or you can buy a separate strap that can be added to your backpack to aid stability. Hmmm...
The Wisdompro Backpack Chest Strap (£10) can be attached to any backpack. It adds stability and ensures you don't have to constantly reseat you pack when it has a full load.
...So 'fixable', but, there was a also a slight noise as something in the setup clicked and squeaked - perhaps I hadn't tightened all of the various screws that hold my cobbled together rig? I shall check that everything is tightly screwed together before I try again. Maybe I was just hypersensitive about possible problems? Anyway...
Pros:
- It worked
- It was stable enough
- It's sturdy
Cons:
- It's heavy enough that it's noticeable
- It's not exactly compact
- It's not discrete
If I had to give it rating - because, why wouldn't I - I'd give it a 7/10.
Maybe I will get used to the setup, I've only used it the once after all; I'll give it a chance. The other alternative would be to mount the GoPro without the gimbal, lighting the rig but at the expense of stability. I'll try that out just to compare how shakey it would be without the gimbal...
One area of video production I have not yet explored is POV filming, where - for example - I attach a GoPro to myself in order to give my audience a simulated 'first person' view of what I am seeing and experiencing (er, that sounds a bit dodgy - but it's not, honest).
The head mount is a cheap and cheerful way to get 'eye level' perspective footage of what you are seeing. It has it's uses, as long as you don't mind looking a bit silly (plus it's a bit wobbly)...
The reason I would find this useful is because I have an interest in filming my museum visits or documenting holiday activities from my Point of View. It's a very common filming technique and you can see example all over YouTube and it's all the more common these days because of the popularity of small, wearable action cameras like the GoPro. Helpfully, there are actually a good number of specialised mounts that allow you to attach a GoPro to your body to get POV footage...
LOL... Probably the most niche and extreme POV GoPro mount! The SP Gadgets Mouth Mount, for that 'see what I see' footage! Er, no thanks. This mount was specifically designed with swimmers in mind, where there is no practical other place to mount a camera!
Basically, I'd like my audience to see what I am seeing so that they get a slightly more immersive experience and feel that they are visiting the places that I visit. This is usually achieved by mounting the camera either close to the head so they get the 'wearer's eye view' or by mounting the camera on the back so that the audience gets an 'over the shoulder' view.
A GoPro 'Over-the-shoulder' mount. This on's a bit over the top...Get it? :)
If you just want to mount your GoPro this is a pretty straight forward process as a large number of mounts are available off-the-shelf to allow you to do this...BUT (there's always a 'but' when I do things)...I would like to negate some of the inherent camera shake that goes with wearing a camera by attaching the camera mounted on my FeiyuTech G4 gimbal! Not so many mounts available for this, in fact I have only found one - the GoPro Karma Mounting Ring (which, as the name implies, isn't actually for the FeiyuTech, but rather the Karma gimbal, but it fits).
...However...This ring mount is over £30 (yeah, for a small plastic ring mount - and that's supposing you can find it) so I did a search round YouTube for a cheaper DIY option and bingo...
Now, the above movie shows the gimbal mount attaching to a chest harness, but I want my gimbal/GoPro combo to attach to a backpack shoulder strap instead (giving that head-view feel). Luckily, there are several specific mounts available to do that; I went for the STUNTMAN Pack Mount - Shoulder Strap Mount for Action Cameras...
So, now I have both the backpack mount AND a way to attach my camera rig to the mount. Sorted.
Making my DIY Gimbal Rig Following the instructions given in the video I've included above I proceed to modify my GoPro bar mount. These are dead cheap and I think came free with my original GoPro purchase anyway, so no great loss (I've never actually used it before)...
Step One - Modify the GoPro Bar Mount
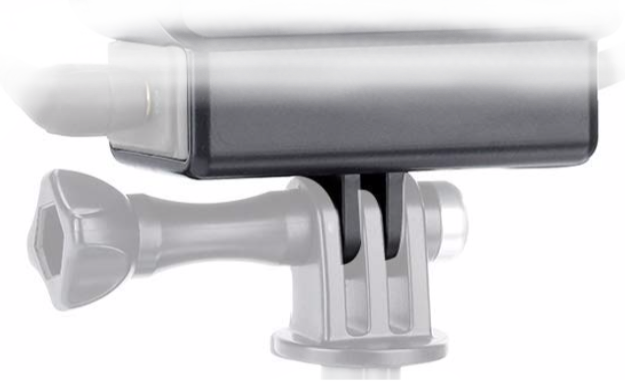
The GoPro Handlebar Mount does exactly what you might expect, it allows you to attach a GoPro to the handlebar of a bike or any other horizontal bar for that matter. But in this case we want to reverse it's use, we want to use it to hold the gimbal handle and attach the mount to the backpack mount. This raises a little problem related to the GoPro attachment system...
GoPro attachment prongs.
GoPro mounts use little prongs to interlock with each other, these prongs come in two type which I will can 'male' and 'female' for ease of identification. The 'male' attachment point has two prongs and they insert into the 'female' three prong arrangement, you then screw the attachment screws through the hole in all these prongs to tighten the joint. Following so far? :)
Well, if we reverse the use of the bar mount we would be trying to attach a 'female' point to another 'female' point which won't work because of the integrated locking nut. So, we have to remove one of the prongs (the one holding the nut) so that it becomes a 'male' attachment point!
Result...My bar mount with a sex change! ;)
Step Two - Attach the Gimbal to the Bar Mount
First things first, I had to find a GoPro mount for a backpack shoulder strap, as mentioned above - after a spot of research - I went for the Stuntman Pack Mount. At £30 it's not the cheapest but it was highly recommended and especially rated for it's sturdiness...
The mount attached to my Lowepro Tahoe BP150 backpack strap very easily and I was very please with how secure the mount seemed to be (the velcro fixing straps seem to have a non-slip rubber material which grips the strap nicely). I mounted the pack mount on the left strap as I am right handed so thought this would mean that the camera would not be jostled as much...
There is plenty of articulation so I can adjust how close of far, high or low, the camera and gimbal is on my chest and - of course - I also have the option to mount the GoPro without the gimbal to make the whole thing more compact if I wish.
Having tested the attachment of the bar mount to the pack mount it's time to try fitting the gimbal to my contraption...
It fitted nicely and was tight and secure...I like it when a plan comes together! I guess the only downside is that you have to unscrew the whole thing if you then want to use the gimbal as normal (would have been great to have had some sort of 'quick mount' system which unclipped quickly, but you can't have everything).
So, all that's left is for me to reattach the bar mount and gimbal back on the backpack and put the backpack on to see how comfortable it is to wear with the extra weight on the left hand strap...
...OK, not the best photo, but I'm not used to trying to take a selfie! :)
Right away, I noticed that the gimbal want to try and point slightly to the right, so I will have to turn it slightly to the left in the mount to compensate. The tilt doesn't matter - of course- because the gimbal will self level itself.
I will have to experiment with the best mode to set the gimbal to in this arrangement, whether that be 'fixed forward' looking or 'follow me' tracking, etc. But that will be the next stage in this experiment, a live test.
Filming with the Default Factory Settings
Well I'm back - after a huge hiatus (life stuff) - so in a way I'm starting from square one again as I've forgotten so much. Today I'm dusting off my GoPro Hero 4 Black - yes, I know, that is so 'old' now!
In 2016 this was cutting edge...
Things move so fast in the work of action cameras, GoPro has advanced to the HERO 7 and you can now even get a 'cheap' GoPro clone as good as my Hero 4 (actually better, really, as you can get in-built stabilisation) for just over £100...And if stabilisation doesn't worry you then you can get a comparable action cam for just £60.
In 2019 this EKEN H9R Ultra does everything my GoPro 4 Hero Black does, but for the price of just £54! Technology marches on.
But, let's begin with my Hero 4 as it's still a nice wee camera. Today I'm doing some sunny day filming with the camera's default factory settings so I can create some 'control' footage. I'll be using this to compare with subsequent footage using any modified settings.
A Walk in the Park?
We took the dog out to one of the little wildlife reserve parks on the outskirts of our town, a good opportunity for me to capture my base-line footage. It was a particularly sunny day so I was already prepared for some overexposure when filming into the sun and some unpredictable levels of exposure as I went abruptly from bright sunshine to dark shade as we passed though shaded wooded areas.
Aside from this, I didn't really know what to expect, so lets see some of the raw footage...
Lessons Learned...
While it's annoying having to learn all this stuff all over again, I was glad that the few problems I came across were minor 'niggles' and easily fixable. Here's a little list of things that I think need to be 'fixed' in my next test GoPro movie:
Stability: (Not strictly a GoPro problem, but...) The FeiyuTech G4 gimbal I used needs recalibration in order to get the horizontal axis level. There's about -3.5 degrees tilt on the left, though this can be corrected in post I suppose.
Audio: There is very obvious wind noise (rumble) throughout this test, I didn't think it was that windy on the day but this just goes to show how sensitive the GoPro's built in mic is. The solution would either be to cobble together a windshield mod to fix over the GoPro's mic OR I could use a better quality external microphone which has a proper windshield ('dead cat').
Colour Rendition: The GoPro's default colour and exposure settings are acceptable, but the advanced user may wish to experiment with the cameras custom settings, called 'ProTune Controls'. In future, I will be utilising these controls in order to produce 'flat' colour profile footage which I can then colour correct in post.
There are many tutorials on YouTube which suggest alternative settings which can get the best out of the GoPro, so I will try some of these out in my next test.
A 'Quick Fix'...
As a bit of a learning exercise I thought I would do some minor post-editing to 'fix' at least a couple of the above issues using Power Director 17 (my editing software of choice) before attempting a 'hard' fix with another GoPro test.
First of all, I dealt with the offset horizon issue by rotating my clips -4 degrees to the left. Having rotated the footage, I then had to resize the clips to fill the frames. Luckily - because I shot in 2.7K (2704x1520) - I had some latitude to resize my footage without significantly affecting the final quality of my output, particularly as I eventually downsized my final output to 1080p.
Next, I experimented with colour correction in the software. After tinkering with some manual corrections, I eventually tried out Power Director 17's newly added ability to apply LUTs (colour 'Look Up Table' data files). I downloaded some free LUT profiles (.cube file format) which I imported into Power Director and tried a few different ones before settling on one called 'FG_CineCold'. This profile toned down the hot greens of my raw GoPro footage and gave the final movie an overall more subdued 'cinematic' feel (it's all a matter of personal preference, but I liked the effect).
Here's my 'corrected' movie clip...
Next: I'll try reconfiguring my GoPro with some advanced settings to see whether I can improve the quality of my raw footage.
Something I've been asked to do for one of my hobbies is to video some of the methods, to be exact - how I do some of my scale model making. But, I've been putting this off as I've never been quite sure how best to video some tabletop work - a la Blue Peter - given that a lot of my models are quite small.
But, I've decided it's best just to film some stuff and see what works. I can adjust my technique accordingly. So here's my first test footage...
Yes, it's all a bit thrown together, but this clip does give me some useful information.
EQUIPMENT:
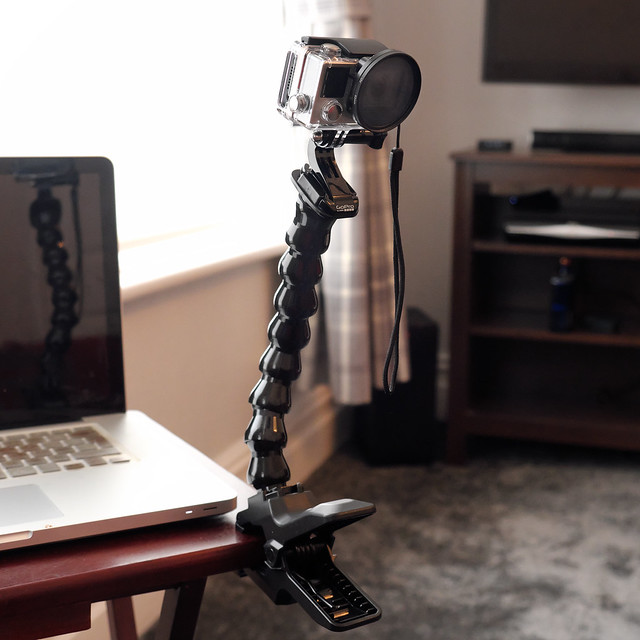
Camera - I'm using my fixed focus GoPro Hero 4 Black. Stand - The GoPro is attached to a clamp with articulated 'gooseneck' arm (about a 30cm long). Lighting - Just one small LED desk lamp. Sound - Just the GoPro's internal mic (hence the hiss)!
Not very high-tech. But you have to start somewhere.
My goal was to find out how close the GoPro could focus - as it is a fixed focus camera - and to see if I could get it close enough so that the viewer could make out the small model parts that I work with.
Also, I wanted to experiment with the best angle and position for a single camera without it getting in the way of what I am doing. I thought the 3/4 view, looking down on my work area, would be best as I wouldn't block the view of the objects being worked on but this does mean I occasionally have to turn the objects if I want the viewer to get a clear view of the work.
GoPro 4 mounted on articulated 'Gooseneck' clamp.
At this point, I am not bothered about sound as I am undecided whether I shall add a voice over narrative in post. It might be easier that way so I can cut down mistakes and follow a script.
CONCLUSIONS Well, it's not horrendous! The good thing about the GoPro 4 is I have several filming resolutions to choose from (including 4K if I want). The major downside is the fixed focus, the GoPro's minimum focus range is about a foot (30cm) and anything closer than that is blurry.
This is a bit of a pain as I may want closer shots to show some of the small components and assemblies (perhaps as close as 10-15cm). But, for a wider overview of my work area, the GoPro is adequate.
The other main concern is - as always with video - the lighting. I am going to have to set up something a bit more like a mini-studio, with at least two lamps giving even illumination from either side of the bench to eliminate any shadows. OTHER OPTIONS To focus in closer, I have the option of either using my main video camera - the Fuji X-T2 - or my little Logitech Web Cam. The Fuji might be a little overcomplicated, although the quality of footage would be superb, and it seems like a bit of a sledgehammer to crack a nut sort of solution.
The Logitech web camera seems a little more flexible and suited as it has a very good auto-focus system - that can focus very close to the lens - and wouldn't take a lot of space on my desk. Additionally, I would have the ability to monitor the footage via a computer screen, which would help to make sure I have small objects in focus.
I think my next test will be with the Logitech (and let's see if we can improve the lighting).
Above is a sample screen from the footage I took on Sunday with my GoPro. This is pretty much a typical example of the quality of exposure I got (4k, wide angle). Very disappointed - so didn't even bother to cut an edit - but I think I know what's wrong, so it's back to square one again.
To be fair, it was actually one of those miserable grey December days that we get in Yorkshire. The sky actually did look like that, and everything else did look a little bit flat as a result, but not this washed out!
Although you do expect to do some correction in post - mainly to compensate
for the 'GoPro bend' that the camera's extra wide angle lens produces the
vignetting caused by the filter is still a bit annoying.
Here's a screen shot I took of one of the movie frames - which I colour adjusted
in Photoshop - to illustrate the sort of exposure and contrast (and perhaps sharpness)
I was actually hoping for. I know the GoPro is capable of this in the right
circumstances and with the right settings.
The problem seems to have been to do with some of the fiddling about I did in the GoPro's advanced settings (ProTunes), as I adjusted the ISO and the colour set-up in order to try and get a flat colour profile so I could grade the colour in post...But I didn't expect it to turn out this flat!
The other issue was the very obvious vignetting, which was caused by the 52mm filter adapter I added to the GoPro's lens. Unfortunately, in 4K mode you cannot adjust the lens mode to anything narrower than 'wide', which may account for it picking up the edges of the filter. I suspect this filter adapter was really made for 1080p footage (where you can set the 'lens'- field of view - to 'narrow').
Not to be disheartened, I have readjusted the GoPro's settings and bought an alternative lens protector and I will try again. While there is nothing I can do about the miserable grey skies we are getting at the moment, I hope I can make the other colours - and contrast - in the movies look a little more vibrant in future.
The official GoPro Protective Lens. £20 for a pack of two from Amazon.
I'll try out the 52mm filter again in 1080p, just to see if it is the ultra-wide 4K that they are incompatible with. A bit annoying, but my fault for not researching the product thoroughly enough before buying it, Lesson learned.
Typical! Just getting all set for my first GoPro shoot for a long while and guess what? I couldn't remember the camera's WiFi connection password, Which I need to remotely view my footage!
Luckily, humans being humans, this is a common issue and so there is plenty of help available on YouTube. Here's a tutorial I found most helpful (there are a few that aren't so clear)...
...I get the feeling - knowing me - that this won't be the last time I need this, hence posting this up!
One other note - Since I first got my GoPro I have changed mobile phones. I no longer have an iPhone and now have a Samsung Android phone, so I was worried whether there was a comparable GoPro app for my new phone. Short answer: Yes, there is and it's as good as the iPhone version!
GoPro Hero 4 Black filming Settings
Having sorted that slight 'technical issue' I thought I'd double check my filming settings in the GoPro. I knew I wanted to shoot in 4K at 24 frames per second, but was unsure what other settings I could adjust. The good news is that the Hero 4 includes a range of advanced filming settings which it calls 'Protunes', these are things like ISO adjustment, sharpness and colour profiles. Again, I found a couple of videos that explains these settings...
There are actually a lot of similar videos like these on YouTube and I strongly suggest you watch four of five to get a feel for what will work for you. Filming settings are somewhat subjective, but you need to now what each will effect so that YOU can make an informed decision about where to start. Even then, only experience will tell you what will be YOU'RE preferred settings.
Finger's crossed for Sunday's shoot - just some family Christmas fun, but I desperately need to the practise with the camera.
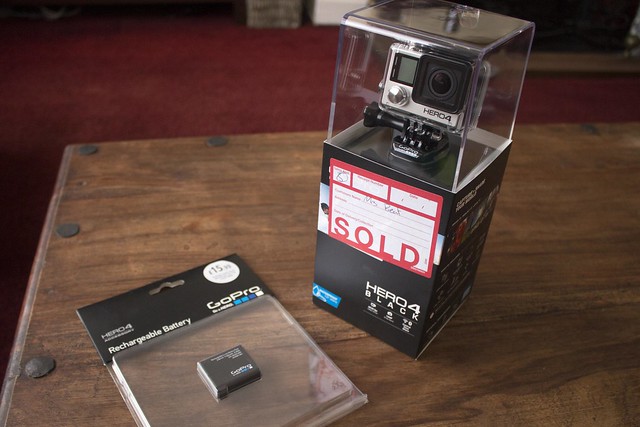
This post is a little bit of a cheat, really. I actually bought these items at the beginning of September, however, due to my unexpected hospital stay and subsequent recovery period, I have only just gotten around to unboxing these gadgets!
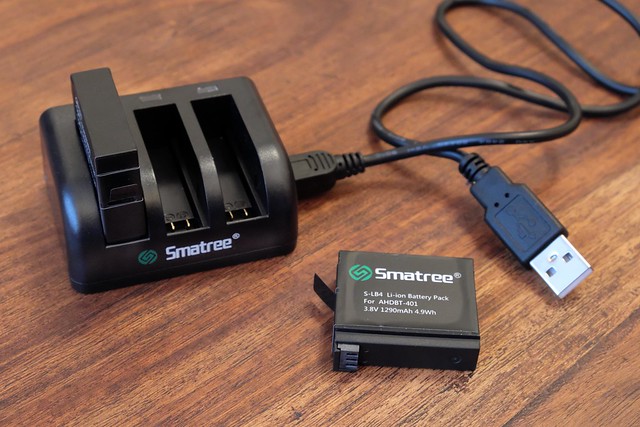
GoPro Hero 4 Black Batteries
I wanted some spare batteries for my GoPro, but didn't like the idea of paying the £15 a piece price tag of the official GoPro ones. So I read a few reviews of third party batteries and plumped for the Smartree alternatives...
For the very same price as just one official GoPro battery, you get two batteries and a three battery USB charger! These 3rd party batteries come highly recommended, some user's actually claim that they are superior to the original GoPro ones.
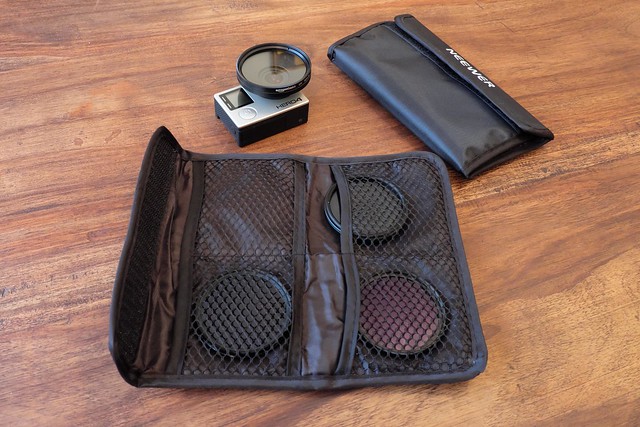
GoPro Filter Adapter and Filters
Because I sometimes like to use my GoPro without the accompanying clear plastic protective case (for example, mounted on my gimbal), I do worry about accidently scratching the GoPro's lens.
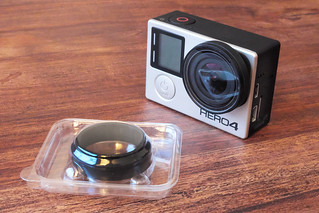
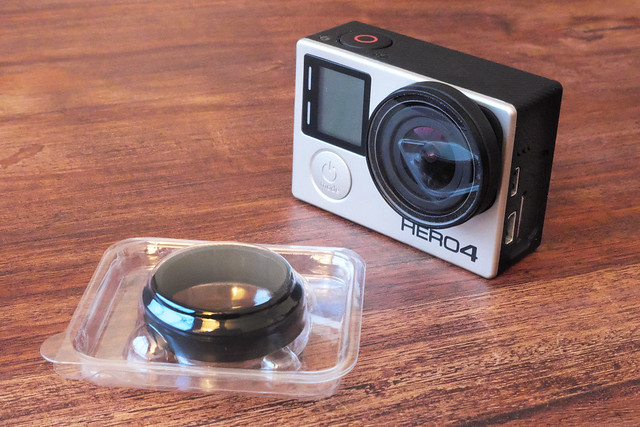
For this reason, I sought out a means to attach a UV filter - as I have done with my full sized cameras - to give the lens an extra pain of protective glass. I found Neewer 52mm Black Metal Filter Adapter and filter set on Amazon for just £11.09...
The set comes with the circular adapter which slips on to the GoPro lens plus a wallet containing a UV filter and selection of ND filters (very useful on very sunny days).
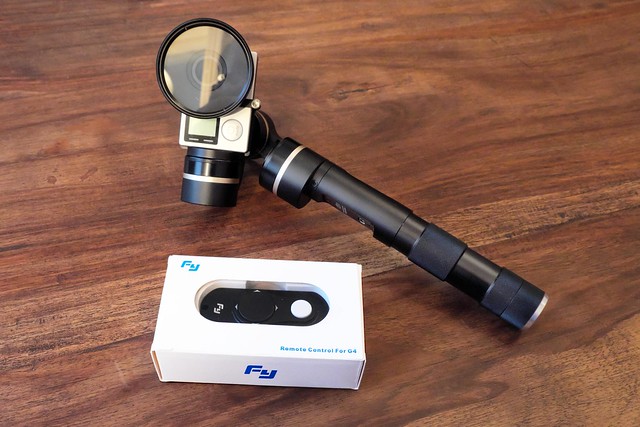
Remote Control for the Feiyu-Tech FY-G4 Gimbal
Although I principally want to use my gimbal as intended - as a handheld stabiliser for my GoPro - as there are a couple of scenarios where I may want to operate the gimbal remotely. Feiyu-Tech produces a couple of different remote control units, there is a wireless one (£25) and a wired version (£14). I chose to buy the wired one, as I am a fan of 'low-tech' for reliability reasons...
The remote allows you all the same movement options as the normal gimbal control, but also adds the ability for you to remotely pan and raise and lower the camera by means of a 'D pad' button. How this might be useful will become clear with the next addition to my inventory...
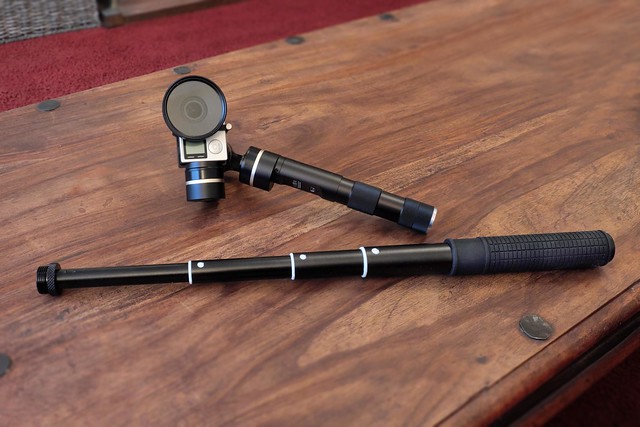
FY-G4 Gimbal Telescopic Extention Pole/Handle
A useful technique while filming with a gimbal is to be able to raise the camera up quite high, in this way you can achieve a sort of poor man's crane effect. Indeed, the Feiyu-Tech G4 Gimbal kit comes with a pair of carbon-fibre rods, which screw together and attach to the bottom of the gimbal to allow you to raise it to greater heights.
However, carting about a couple of short poles with your camera kit and then having to stop and assemble them is a wee bit of a pain. So, I found a Neewer 28"/70cm Handheld Telescopic Extension Rod (£6.99) that gives you that extra height when you want it, but then collapses down into a convenient handle accessory when you don't...
Now, here's where the remote control comes into play...
Unfortunately, the switch to turn the G4 gimbal on is located inside the base of its handle and this is where you screw on any extension pole - making it impossible to operate with a pole attached. And so, unless you turn the gimbal on before you attach the extension (and then keep it turned on), the remote control is the only way to get full control of your gimbal, including the ability to switch it on and off, with a pole in place.
I think that, if you have an extension pole then, the remote is practically a mandatory additional purchase.
I'll be testing all of these 'new' items over the next coming weeks.
Because I'm interested in covering events - particularly conventions - where you will be doing a lot of floor-walking and shooting on the hoof, I have invested in a handheld gimbal (a gyro/servo-stabilised hand-held camera mount).
I went with the Feiyu FY-G4 3 Axis Handheld Gimbal Brushless Handle Steadycam Steady Camera Mount for Gopro...
Now, I was thinking about buying the cheaper Osmo all-in-one camera and gimbal - which looks fantastic - but, at the end of the day, the GoPro Hero 4 Black camera is far superior quality (and more flexible in use) that the Osmo's built in camera. For me, it was worth the extra expense so that I could then be able to detach the camera and use it for other kinds of work.
Initial tests with the FY-G4 gimbal and GoPro
I need to put a disclaimer in here to make you aware that my impatience got the better of me! There is a certain amount of preparation, learning and practise one should do before the gimbal and camera are put into use...But I couldn't wait and did some testing straight 'out the box'! So please take this into consideration.
Important note: The gimbal needs to be calibrated in order to work as intended with your GoPro - I did not do this so the camera was not exactly balanced correctly in the following test videos.
Test 1: The difference a gimbal makes...
In this test, I just wanted to see how a gimbal like the FY-G4 smooths out hand-held filming while walking around. So, in this video, the first half is shot with me just holding the GoPro camera in my hand while walking and the second half of the video is footage with the gimbal attached...
Yes, this is a very quick and dirty experiment, but I think it demonstrates the difference between unstabilized footage and stabilised footage adequately enough. I was pleased. Test 2: A longer example of the FY-G4 in use with added slo-mo
In this next clip, I tried some different movements - some pans and changes in height and orientation - just to see how smooth I could get the shots...
After doing these initial bits of filming you soon realise that there is a knack to using a gimbal (and how important proper calibration is). My first attempts to 'float' the shots were too fast and my changes in direction too sharp at times.
You have to train yourself to glide your arm movements and you must 'dampen' the beginning and ends of your movements so that your slowly increase your momentum into a movement and then decrease your momentum towards the end of a movement. In this way, you should get a smoother transition through the camera travel/sequence.
Like most things, practise makes perfect!
That said, I'm very pleased with these initial tests.
I don't know if I mentioned this, but I recently gave up my job (essentially for life/work balance reasons) and while I am just enjoying a little 'holiday' at the moment - while I decide what I am going to do next - there is one small regret I have. When I left my job I had to hand back the department's GoPro Hero 3+ action camera. :(
Well, after much consideration, I decided I would miss this little camera option too much and went out and bought a new GoPro. I also took the opportunity to upgrade to the latest GoPro Hero 4 Black version...
As part of my videography strategy, I am focusing on mobility and 'run and gun' types of shooting and, therefore, I am trying to build a lightweight and compact kit. The GoPro fits this philosophy and will provide me with both the flexibility to do shots that I might not be able to do with whatever (heavier) 'A' camera I choose and also a convenient little 'B' cam.
The GoPro has a large variety of shooting modes - including 4K at 30 & 24 fps in ultra-wide angle - which will compliment my shooting style. But' at the same time, it won't add too much extra weight to my camera bag.
The next couple of weeks will be dedicated to experimenting with this little camera and working out just what I can do with it. Looking forward to this! :)