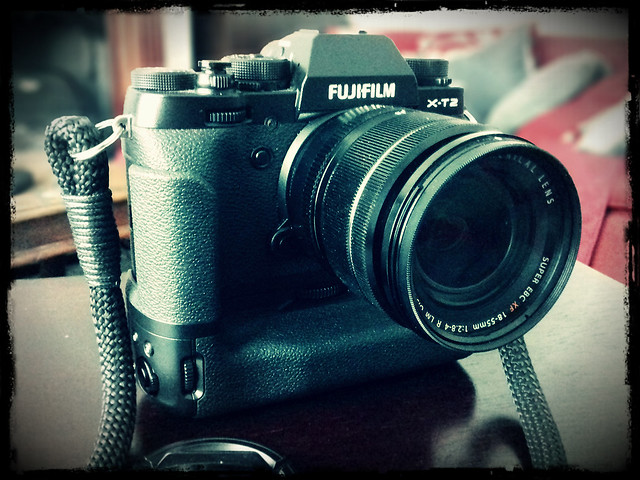
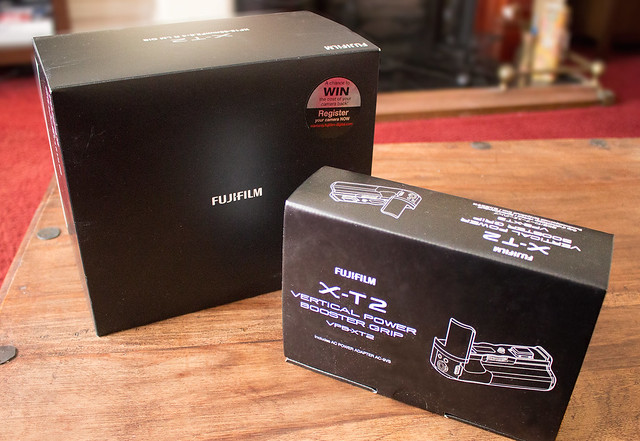
I finally managed to save the cash needed to buy the additional propriatory batteries required to run the Fuji X-T2's PoweGrip...
This really opens up my moviemaking and offers me new challenges. Although I could film in 4K before the limitations of just having one battery meant some very short outings (which very soon became a bit of a pain). The prospect of some longer experiments and learning sessions is quite exciting.
Ironically, while it's taken me quite a while to save up for these two extra Fuji batteries I had no sooner congratulated myself than I heard that Duracell has produced what are rumoured to be good quality alternatives to the Fuji NP-W126S shielded batteries at just £20 a piece!
Ah, well...I wouldn't be happy buying these alternatives until I read first-hand reports about their performance anyway. Still...Typical!
I started to write this journal entry, but it turned into a long rambling discussion about F-LOG versus Film Simulations. (Spoiler alert...It's a case of horses for courses! But I will cover this in more depth later down the line.) The position I find myself in at the moment is that I do not have an external 4K recorder (and cannot afford one), so I am limited to just recording vanilla unadulterated video or video treated with one of Fuji's integral Film Simulation modes (which can both be recorded onto an internal memory card).
As I said, it's a matter of personal preference as to which route you take, but in my case, the inclusion of Fuji's Film Simulation 'styles' was a principal reason I bought the X-T2. But, for those who are not familiar with Fuji's Film Simulations, they are 'what they say on the tin', they are digital simulations of analog film stock to give your digital photos or videos an analog 'look'...
Although the above clip is principally aimed at stills photographers, these stylistic simulations are just as applicable to video recording. In fact, they take a lot off the shoulders of the videographer who likes to spend more time playing with his camera than they do in post fiddling about with colour grading (which is a bit dark art).
Certainly, this is why I was attracted to the X-T2, I loved the look of some of the simulation modes and didn't (yet) want to caught up in the quagmire of tinkering for hours with software sliders.
Above: Some examples of the Fuji Film Simulations as used to film video. Here the simulations are further tweaked in conjunction with the X-T2's internal settings to make the end results even more unique.
So, Which Colour Simulation?
OK, having laid out my reasons for wanting to use Fuji's Film Simulations (with the caveat that once I'm a bit better off and a bit more experienced I would like to try out F-LOG via an external recorder and then applying LUTs in post) which simulation do I think is best? Well, once again, this isn't quite straight forward as Fuji never intended a photographer to just use one of its film types, you use which film type is most suited to your subject matter. And this is how it is with their film simulations too.
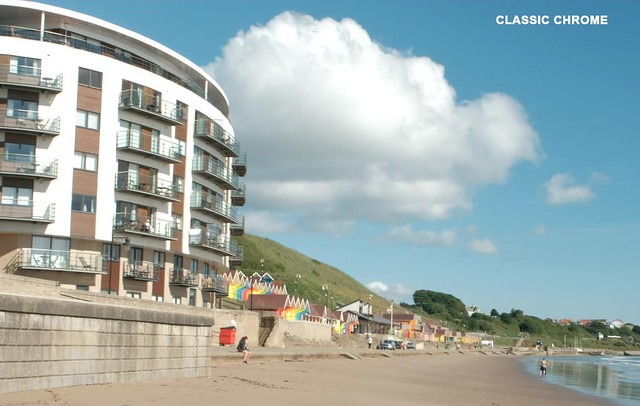
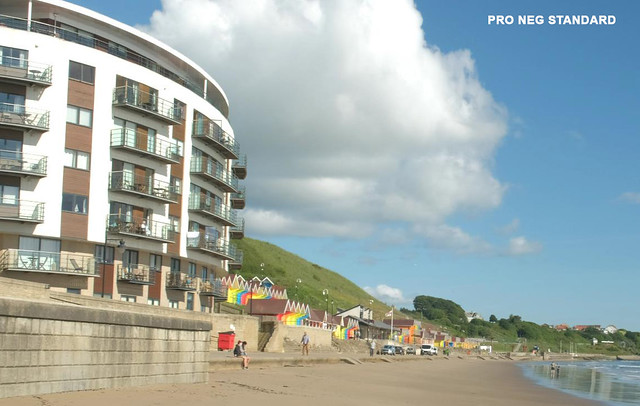
So, I tried out some experiments with the various types to see which suited my personal visual preferences - using some tips from other X-T2 videographers - and narrowed my initial favourite modes down to Classic Chrome, Pro Ned Standard and - as a wild card - Astia (which is a bit more saturated and pops the colours more).
Here are some screen grabs from the sequences I took in the three film simulation modes...
The differences are quite subtle but they are enough to have emotional relevance, creatively speaking. For example, I am drawn to Classic Chrome - it is slightly nostalgic in its colour reproduction reminiscent of Kodak's legendary Kodachrome (ironic that Fuji should reintroduce this film look).
For me, Kodachrome is indicative of my father's photos from my childhood holidays - which is probably why I am drawn to it, and I don't think I am the only one as the 60s and 70s 'look' of the film reproduction is a popular visual trope among the Hipster generation. Its retro slightly faded character exudes a comforting nostalgia...
As expected, Pro Neg Standard came in as a close second, which isn't very surprising as I did my homework first before I narrowed my interest down to the three film simulations that I tested.
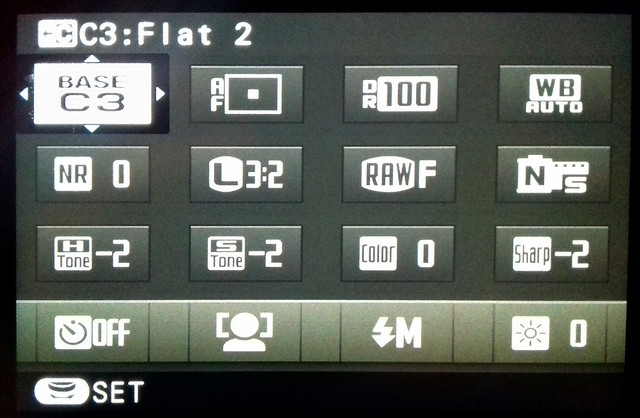
The advantage that Pro Neg Std. has over Classic Chrome is that it appears to have just a little more dynamic range (there a little more information in the shadows and the highlights). This makes this simulation the closest - with a little tweaking of the camera settings - to a flat output suitable for further colour grading in an editor.
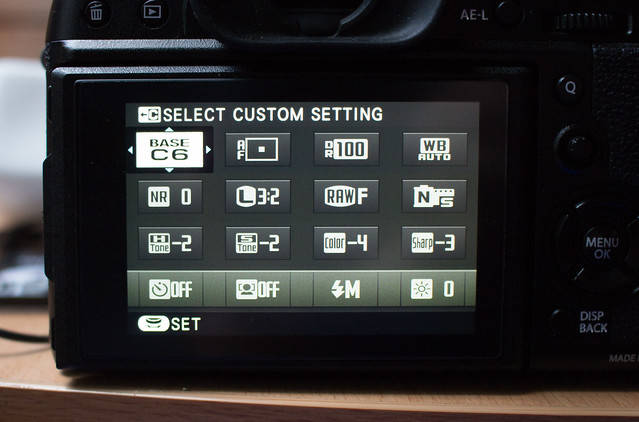
The 'Q' (Quick) menu custom function set I have for my 'Flat 2' profile. This custom setup gives my Pro Neg Std (N-S) a little flatter look by toning down the Highlights (-2), Shadows (-2) and Sharpness (-2).
Finally, Astia is a bit of fun. It's a bit too saturated for my tastes and as you can see from the above screen grab it's output is somewhat reminiscent of holiday postcards. I find it a little insincere and superficially 'pretty' (so we can knock that one off the list).
Conclusion
Well, as much as I favour Classic Chrome, I won't be using it for everything. But it may well be my default go-to mode. It's a rather nice feature of the Fuji system that I have several film 'looks' I really like baked into the camera by default, rather than me having to make these simulations up myself via long sessions of colour grading or by trawling the internet for an elusive LUT that does a similar job.
Above: Here's a very short example of how the Fuji Pro Neg Standard Film Simulation
footage I shot can be further modified using colour presets in PowerDirector 15. It's
sort of a poor man's instant color grading, but the end results are pleasing enough.
More time to film, less mucking about in post! (Though, in time, it will be interesting to see if the novelty of film simulations wears off and I whether I begin to find this system constricting. We shall see.)
Zed ProMedia have done an interesting video test of the X-T2's battery longevity when filming 4k video. It's the sort of methodical technical test that I find interesting so I am posting it up for reference...
When you start reading about mirrorless cameras and 4k video - whether they be Panasonic, Sony or whatever - it won't be long before you start hearing about overheating issues and the length of time that you can film before the camera cuts off. In fact, one of the criticisms that was levelled at the X-T2's specs was that it could only shoot 10 minutes of 4k video at a time (by adding the booster grip you can increase this to 30 minutes).
That this is being seen as a major issue by some people seems a little funny to me, as I rarely shoot sequences that go beyond a few minutes at a time, even when interviewing. Of course, there are times you may want to keep on rolling, but for very long sequences - certainly beyond 10 minutes - I prefer to use a video cam with an internal hard drive.
Anyway, that's an argument for another time...
What is pertinent - however you prefer to shoot - is battery longevity and whether overheating is a serious and persistent issue with the X-T2. This video seems to conclude that overheating isn't, but that there are some glitches with using multiple batteries together via the booster grip (hopefully, this will be addressed in a firmware update).
As for me, I am restricted to just the one battery at the moment (spares are at the top of my wish list), and until I buy a couple more using the booster grip isn't possible, so I can't confirm or replicate the findings of this video test. But what I will say is that during my recent tests with the X-T2, I have found it positively eats battery capacity, especially when you make use of the WiFi facility.
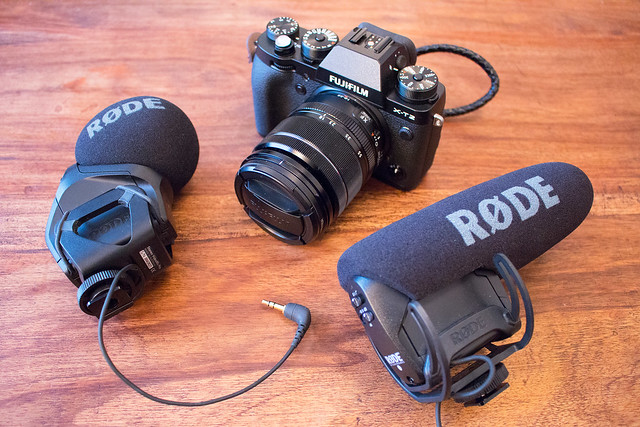
Rode VideoMic Pro and Stereo VideoMic Pro
Moving on from setting up and using a lapel microphone - which is great for set-piece interview situations - I now want to look at a couple of microphones that are ideal for fast-moving and minimal kit shoots (or 'run and gun' situations, as they are known).
An area of videography that interests me is the documenting of events, like conventions and festivals. These can be very challenging for the lone filmmaker as you have to minimise the amount of equipment that you are carrying so that you are mobile and responsive to the events around you - and bear in mind that you will likely working in the midst of crowds of people - but, at the same time, you have to carry the right equipment to capture what you need. A tricky juggling act.
Event and convention work can incorporate two quite different formats of filming, the capture of general ambience and the more focused interview. Trying to do this with, more or less the same kit (as you don't want to be continually unpacking and setting up new kit), is possible thanks to excellent quality compact gear like the Rode VideoMic series of microphones.
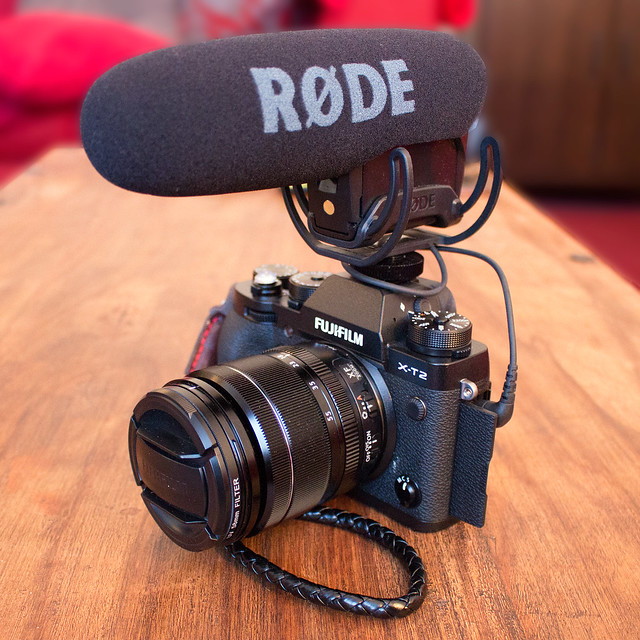
These mics are camera mounted - via the hotshoe - and are light-weight but have become something of an industry standard among DSLR/mirroless camera videographers.
The Rode Stereo VideoMic Pro
The stereo mic, as you can imagine, is (to quote Rode themselves) 'ideal for recording music, and the atmospheric ambience essential in building a realistic audio scene.' In other words, the SVMP is good at sucking in the atmosphere of a scene, giving your audience a sense of the excitement of a dynamic event.
This is very well illustrated by this video review of the SVMP which was done by Fenchel & Janisch...
The Rode VideoMic Pro
While the SVMP is all about the general audio scene-setting, the VideoMic Pro is a more focused 'shotgun' type of microphone designed to capture a specific sound from a specific spot (like interview dialogue). While you can - as the above video illustrates - 'do' interviews with the SVMP (thus getting away with just the one mic) you have to be really close to your subject to get good quality dialogue, but you still pick up lots of incidental sound as well. The VMP is designed to cut out (or, at least, minimise) this incidental sound.
He's a little review of the VMP, along with an
As with the setup of the Lavalier mic & iRig Pre-Amp - which I covered in my previous post - there is a trick to getting the best quality sound and that is to minimise the in-camera recording volume while, at the same time, turning up the mic's 'boost' to enhance the signal. In effect, the VMP's built-in +20db 'boost' setting is doing the same job as the iRig Pre-Amp did with the Rode Lavalier microphone.
Here's an example of my set-up for the VMP, showing the quality of the sound in it's 'raw' format (straight from the mic and camera) and also an example of the same setup but with the audio further enhanced in 'post' (using Audacity software)...
Notes on audio test video
The above video sample was made under the following conditions and with these settings:
I find that 5 feet - or less - is roughly the optimal distance from camera to subject when using the Rode VMP. Also, for the best result in combination with your DSLR/mirrorless, you have to apply the +20db boost if you want an acceptable volume level to play with in your edit.
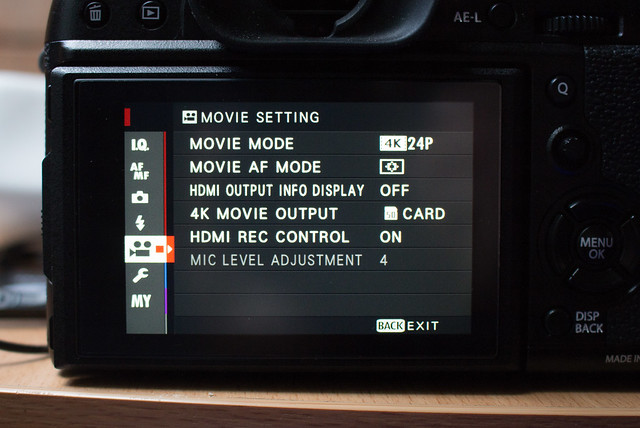
The quality of the recording via the VMP is, in my opinion, a tiny bit 'tinny' and even with the cameras audio levels reduced down to 5 (25%), there is some noticeable hiss - as you can hear in the first half of the sample. (I have knocked out the hiss in the second half, using Audacity.)
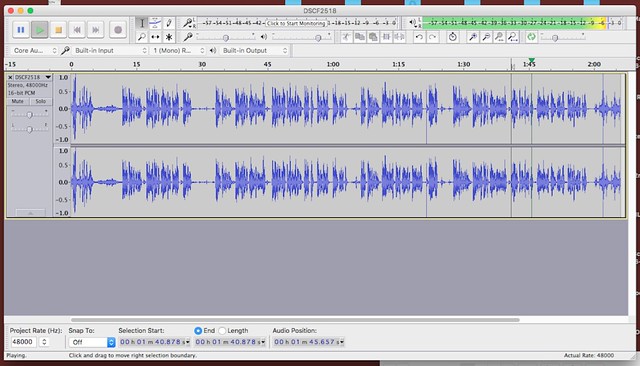
I undertook some very rudimentary sound editing in Audacity. I am told that
the ideal audio level from a recording should top out at about -6 to -3db top.
You can see the db level top right of this screen, and my max recording level
is just going into this range (yellow/orange).
I prefer a 'warmer' or slightly more bassy audio dialogue, but I guess I could rectify this were I a bit more experienced in audio editing in post. Still, I have heard worse (on some YouTube 'video experts' channels even)!
Still, while the result was not as good as the recording that I got from the Rode Lavalier mic, it is adequate - especially when you consider the convenience of having an all in one camera/mic package. This is ideal for a run and gun video shoot as you have no detached mics or wires (or wireless packs) to worry about or set up. You just frame your subject and go!
I'd also say that it is very much an improvement over the cameras feeble built-in microphone. It's also a terrific way to get a reasonable quality audio recording backup even if you are using a separate mic/sound recorder setup.
Which brings us to the subject of my next posting in this series - setting up and testing an external audio recorder (which is thpreferreded choise of many videographers).
I had to force myself to post this first video test of my Fuji X-T2 as I am far from proud of this initial attempt at filming. Everything that could have gone wrong did go wrong on this shoot and, basically, I discovered that I hadn't recovered from my illness as much as I thought I had - my heart (and body) just wasn't in it and I was forced to give up after just 15 minutes.
However, there is some learning value to the few useable clips I did shoot, so I relented and decided to post the clip. It's definitely not a particularly interesting clip, and neither is it well shot (my hands were shaking like leaves in the wind throughout the shoot) but it does serve as useful reference for some things I thought I'd try out...
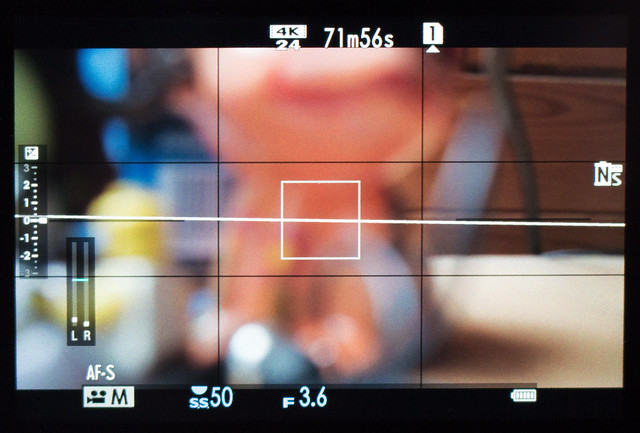
A positive note: I should add some positives here, as this all sounds a bit negative. I actually did get a couple of things out of this experiment; it was great to actually have some pieces of raw 4K footage to practice my editing workflow with and I was also pleased with my ISO camera settings. I simply left the camera's ISO dial on'A' (Automatic) and it did a very good job, the video you see above is a pretty true reflection of the natural light on that day as it was gray and overcast. Normally I would choose a manual ISO setting, but the auto setting impressed me (so it's not all bad)!
Footage Notes
Equipment:Fujifilm X-T2 mirrorless camera and Rode Stereo VideoMic Pro. No tripod. Location notes: Peasholm Park, Scarborough, Weather was overcast.
Purpose of shoot: To test and practice 4K filming process and workflow and to try out a simulated 'flat' colour profile setting. I also wanted to see what handheld footage would look like and how much the Fuji's lens stabilization would assist me to take steady footage.
Microphone settings: No 'dead cat' attached (despite it being a windy day) so turned on the high-pass filter and set the gain setting to +20dB boost. I also set the Fuji's in-camera audio levels to about 25% so that - in combination with the mic's gain boost - I would (hopefully) minimise hiss.
Camera settings: Basic camera settings for 'film look' video were - Shutter speed 1/50th, frames per second 24, ISO auto. I used auto-focus ('S') on the X-T2 rather than manual, just for simplicity sake.
X-T2 tip: Some people have been scratching their head and wondering how to set 1/50th fps using the shutter speed dial (as the settings on the dial go ...15...30...60...125..., etc). First, select '15' on your dial, then use the back command dial wheel to adjust the fps up to '50'. Yes, I wish Fuji had included a 50fps setting on the main dial too!
Simulating a 'Flat' colour profile: In its review of the X-T2 DSPhotoBlog.com suggests a method of creating a sort of faux-FLOG using custom settings: "Without the FLOG you can still get a pretty flat looking video. You switch to the Pro Neg Hi Std Film simulation and set the shadows and highlights to -2, color to -4 and sharpness to -3 or -4."
Post edit software: CyberLink PowerDirector 14 on Windows 10 PC.
File information: Format - MP4 (.mp4). Resolution - 4K, 4096 x 2160. Size - 576MB.
Postscript - why a 'flat' colour simulation?
I mention that I one of my goals for the shoot was to try and create a faux-FLOG, to understand why it helps to understand what FLOG (Fuji's version of LOG) is:
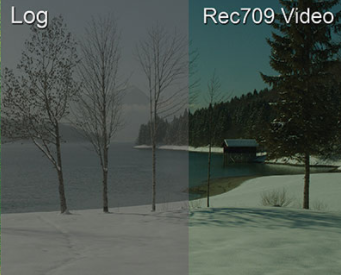
"In a nutshell, recording using a LOG picture profile or curve preserves more of your image’s dynamic range and tonality by redistributing the digital exposure value representations over the entire value set using a preset logarithmic function." [BHPhotovideo.com]
Er, or, simply put, it's all about preserving as much exposure information as you can in your footage so you can play around with exposure and colour grading in post without losing detail. It's kind of like a video version of still photography's RAW file format.
For example, if you shoot a piece of footage that is too contrasty (blowing out highlights) you can never recover any detail in those highlights in post. LOG footage is often called 'flat' or 'neutral' and looks a bit wishy-washy and grey, that is because it tries to retain detail information in all areas - shadows. midtones and highlights - so you can access those details later when editing and correcting colour and exposure.
"Log isn’t Raw; it’s video. However, it’s a special way of capturing that maximizes the tonal range of a sensor." [Blog.abelcine.com] Now, unfortunately, the Fujifilm X-T2 cannot record LOG internally* - you have to record Fuji's LOG format to an external recorder via the HDMI output. This is a wee bit expensive to do at the moment and I can't afford one of these external recorders, so I am having to cheat and simulate a 'poor man's' flat file.
My test video above show the result of this attempt, which is another reason that it looks a little 'grey' and washed out. I used some settings suggested in a post on DSPhotoblog.com to sort of buff up the detail in shadows and highlights. It's not the same as a proper LOG recording, but it will allow me some latitude when trying to colour grade and adjust exposure in post.
*There are a lot of rumours that Fuji might add internal LOG recording to the X-T2 via a firmware update at some point.
Now I am recovering from my illness I am turning my attention back to all those projects I had on the go before my unexpected visit to hospital! Chief among those was starting to learn about my new Fujifilm X-T2 mirrorless camera.
One of the problems I am having as someone who is new to the Fujifilm 'ecosystem' is that, because the X-T2 is so new, there aren't a lot of YouTube tutorials regarding 'set ups' (I guess everyone is in the same boat at the moment and just finding their way about). I hope tat will change, but in the meantime, I am having to rely on X-T1 tutorials to give me information on some of the control fundamentals.
The first thing I wanted to learn about was how to check and update my new camera's firmware. As a newly released camera I can imagine there may be an initial flurry of firmware updates as user feedback highlights any issues with the new camera, so I thought it best to be prepared. Luckily, there is a very informative YouTube tutorial by JC Photography which takes you through the Fuji firmware update process...
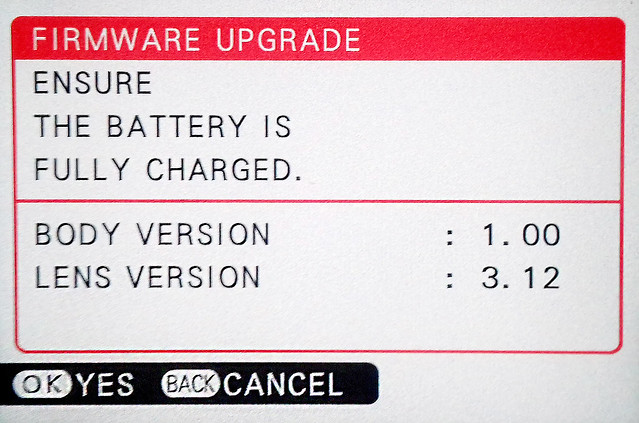
I couldn't actually find this process mentioned in the X-T2 manual, so this video is very welcome even if it is intended for the XE-1/X-T1 Fuji cameras. I next checked on the Fuji firmware site to see if there is an update available, but my firmware version (1.00) is the current release. You can check your Fuji camera version availability here: Fujifilm Global - Digital Camera Firmware.
My current X-T2 firmware menu looks like this...
I did some searching and, apparently, there is rumoured to be a firmware update release on the 8th of November (1.10), so I will let you know how I got on then (fingers crossed).
Won't make much of this other than to mention that, after all the excitement of waiting for the release of the Fujifilm X-T2 camera on the 8th of September I was rushed into hospital on the very same day and have only now recovered enough to feel like opening my purchase!
I went for the X-T2 'kit' set plus the vertical power grip - which I felt was indispensable if you are serious about making video with the X-T2. The kit consists of the camera body and XF18-55mm 'kit' lens. Now I emphasise the word 'kit' because the term has all sorts of perceived implications for photographers, not all of which are usually good.
The term 'kit lens' seems to have come to imply some sort of compromise or skimping on equipping one's self, the included kit lens usually being had at a discount and usually considered to be a budget 'starter lens', included just to get the ball rolling. And yes, cost was a consideration in my case because I was right on the outer edge of my budget (I had originally wanted to buy an additional Fujinon prime lens).
But, as it turns out, the reviews of the Fijinon XF18-55mm Lens have been mainly positive, with many commenting that it is one of the best 'kit' lenses on the market. Here's a comprehensive review of the lens by Ken Rockwell: Fuji XF 18-55mm f/2.8-4 OIS
Now, at this point, having just cracked open the box I don't feel I can write any sort of meaningful 'first impressions' - as this would involve some intensive testing - but what I wanted to say even at this early point is some comments on quality and feel.
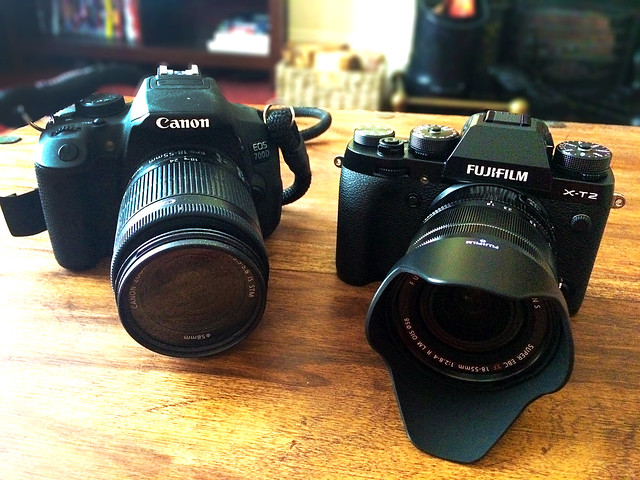
Now, my start in the world of DSLRs was with the wonderful Canon 700D 'entry level' camera and I cannot praise it highly enough, it allowed me to do things that my work's very expensive dedicated video camcorder couldn't do. From vastly improving the quality of my video footage, to opening the door to the 'cinematic look' and excellent low-light performance the 700D has been a revelation.
But, as an entry level camera my Canon camera had it's limitations (which were very quickly reached). But aside from technical limitations the camera itself is plastic and doesn't inspire a lot of confidence when used in professional situations. I was ready - I felt - for something that not only included a brace of advanced video-making features but that was also a lot more solid.
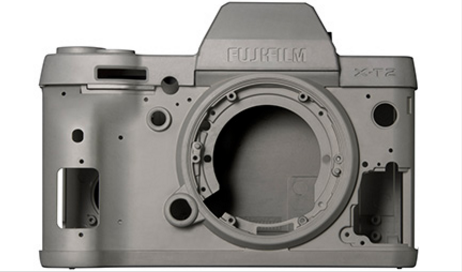
Right out the box I am convinced that the Fuji X-T2 is that camera. The build quality is impressive, being constructed from magnesium alloy, and it exudes the impression of what I imagine a 'professional' camera should feel like. This feeling of solidity was further reinforced when I handled the 18-55mm kit lens, it made my Canon's equivalent kit lens feel like a toy!
This all adds up to a good start as far as I am concerned and not just because - as a Scot - I feel like I have gotten my money's worth (how many times have we bought expensive gear and then found our stomachs sinking as we have felt that flimsy and insignificant touch of plastic), but because the heft of this camera makes me feel I have reached a new level in my videographic experience...Play time is over.
Going from one camera 'ecosystem' (my newly learned piece of jargon) to another can be rather frightening. I have only just started to become conversant with my Canon's menu, button and dial system, so starting again - from scratch - with the X-T2's plethora of dials and 'retro' (manual-centric) philosophy is going to be a big learning curve. So I thought I would look around to see if I can do some preparation before my X-T2 arrives.
I came across a video on YouTube by Tony Northrup in which he gives a very nice tour and explanation of Fujifilm's X-T1 camera and it's settings, and while the X-T2 will add some new features and settings I *think* a lot of the main functions will be the same...
This seems like a good introduction to the Fuji 'way' of doing things (Fujidō if you will)! And I'm glad I check this out prior to my new camera arriving as after watching the video I realized that my new camera will definitely challenge me (which is what I want).
As usual, I guess, I will be leaning heavily on the crutch of 'Auto' to begin with, but I do want to make headway into the wacky world of manual settings. And it seems Fujifilm has its own way of doing manual!
At least I now have a general idea of how some of the major features can be accessed!
As part of my search for my next camera, I am comparing footage examples from the two contenders. I'm trawling through YouTube and studying examples created by the Sony A7 series cameras and the new Fujifilm X-T2, and today I have been looking at some nicely nostalgic looking X-T2 output...
Having acquainted myself with the technical attributes - advantages and disadvantages - or either make of mirrorless camera (with special attention to video features), I'm interested to see how these cameras can be used creatively.
There are all sorts of photographers and videographers each wth their own set of criteria on which they base their ownership of a particular camera, a camera that suits one user may be completely wrong for another despite it's professed technical advantages. This is what I am trying to assess at the moment, which camera best suits my specific set of creative preferences.
The above movie - by Palle Schultz using the Fujifilm X-T2 - interests me because it is reminiscent of a slightly 'retro' effect evocative of old Super 8 colour cine footage. This was partly created by using the X-T2's built-in 'Classic Chrome' film simulation mode, partly through the use of an old Voigtländer 35mm F/1.4 manual lens and partly through some colour grading in 'post'.
There's been a bit of a hiatus on 'Plan B' for a while now...This is been because of a bit of a real-life change (I've taken voluntary redundancy) AND - in part due to that - I've chosen to reinvest some of my redundancy money back into some improved videography equipment.
The principal contributing factor to the lack of post has then been my search for my next movie-capable camera!
Now, I had been writing a post about this process - but, to be frank ('hello Frank'), the convoluted post I was working on just kept getting longer and longer and messier and messier as I looked at the various camera platforms...
SO, I've decided (now I am towards the end of my quest) that this short movie kind of condenses where I am at the moment. The finalists in my search for a new camera are...
Note: The one thing this video does not take into consideration - which is very important - is the quality of the footage that these two cameras are capable of producing. To assess that, you will still need to rake through all the video on YouTube that I have been watching that shows sample output. Good luck!
[I won't be buying the camera until September so there is one caveat - that is that the new Panasonic GH5 is due to be announced then. SO things may still change!]