 |
| The head mount is a cheap and cheerful way to get 'eye level' perspective footage of what you are seeing. It has it's uses, as long as you don't mind looking a bit silly (plus it's a bit wobbly)... |
 |
| A GoPro 'Over-the-shoulder' mount. This on's a bit over the top...Get it? :) |
...However...This ring mount is over £30 (yeah, for a small plastic ring mount - and that's supposing you can find it) so I did a search round YouTube for a cheaper DIY option and bingo...
Now, the above movie shows the gimbal mount attaching to a chest harness, but I want my gimbal/GoPro combo to attach to a backpack shoulder strap instead (giving that head-view feel). Luckily, there are several specific mounts available to do that; I went for the STUNTMAN Pack Mount - Shoulder Strap Mount for Action Cameras...
So, now I have both the backpack mount AND a way to attach my camera rig to the mount. Sorted.
Making my DIY Gimbal Rig
Following the instructions given in the video I've included above I proceed to modify my GoPro bar mount. These are dead cheap and I think came free with my original GoPro purchase anyway, so no great loss (I've never actually used it before)...
Step One - Modify the GoPro Bar Mount
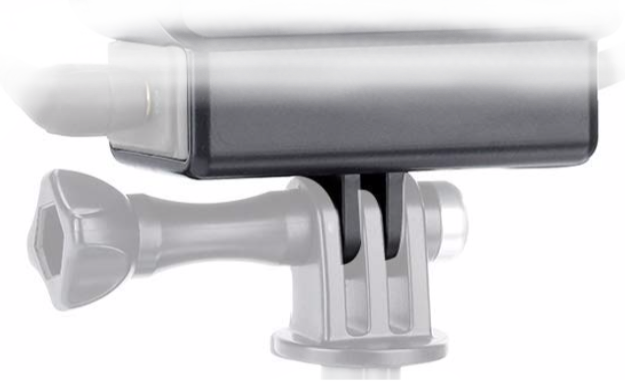
The GoPro Handlebar Mount does exactly what you might expect, it allows you to attach a GoPro to the handlebar of a bike or any other horizontal bar for that matter. But in this case we want to reverse it's use, we want to use it to hold the gimbal handle and attach the mount to the backpack mount. This raises a little problem related to the GoPro attachment system...
 |
| GoPro attachment prongs. |
Well, if we reverse the use of the bar mount we would be trying to attach a 'female' point to another 'female' point which won't work because of the integrated locking nut. So, we have to remove one of the prongs (the one holding the nut) so that it becomes a 'male' attachment point!
Result...My bar mount with a sex change! ;)
Step Two - Attach the Gimbal to the Bar Mount
First things first, I had to find a GoPro mount for a backpack shoulder strap, as mentioned above - after a spot of research - I went for the Stuntman Pack Mount. At £30 it's not the cheapest but it was highly recommended and especially rated for it's sturdiness...
The mount attached to my Lowepro Tahoe BP150 backpack strap very easily and I was very please with how secure the mount seemed to be (the velcro fixing straps seem to have a non-slip rubber material which grips the strap nicely). I mounted the pack mount on the left strap as I am right handed so thought this would mean that the camera would not be jostled as much...
There is plenty of articulation so I can adjust how close of far, high or low, the camera and gimbal is on my chest and - of course - I also have the option to mount the GoPro without the gimbal to make the whole thing more compact if I wish.
Having tested the attachment of the bar mount to the pack mount it's time to try fitting the gimbal to my contraption...
It fitted nicely and was tight and secure...I like it when a plan comes together! I guess the only downside is that you have to unscrew the whole thing if you then want to use the gimbal as normal (would have been great to have had some sort of 'quick mount' system which unclipped quickly, but you can't have everything).
So, all that's left is for me to reattach the bar mount and gimbal back on the backpack and put the backpack on to see how comfortable it is to wear with the extra weight on the left hand strap...
...OK, not the best photo, but I'm not used to trying to take a selfie! :)
Right away, I noticed that the gimbal want to try and point slightly to the right, so I will have to turn it slightly to the left in the mount to compensate. The tilt doesn't matter - of course- because the gimbal will self level itself.
I will have to experiment with the best mode to set the gimbal to in this arrangement, whether that be 'fixed forward' looking or 'follow me' tracking, etc. But that will be the next stage in this experiment, a live test.


No comments:
Post a Comment