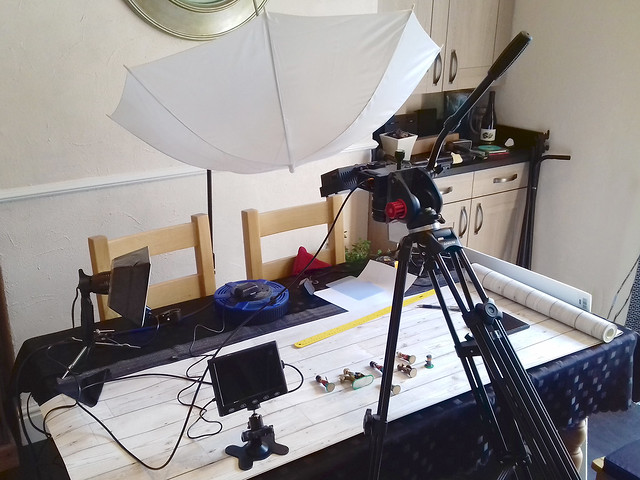
To do this I will lash up a make-shift camera rig using my tripod and other bits and bobs - just so I can work with the various bits of equipment and work out the ideal arrangements for the final frame layout. For this test I requisitioned the wife's dinning room table (temporarily - I was told)...
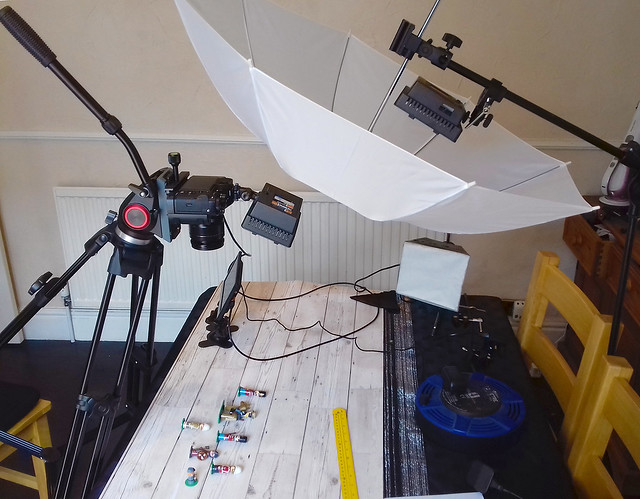
Excuse the shoddy snap, hopefully you can make out what's going on here. I've just tipped up my video tripod so that I get a top-down perspective with my camera and set up various types of lighting to try out.
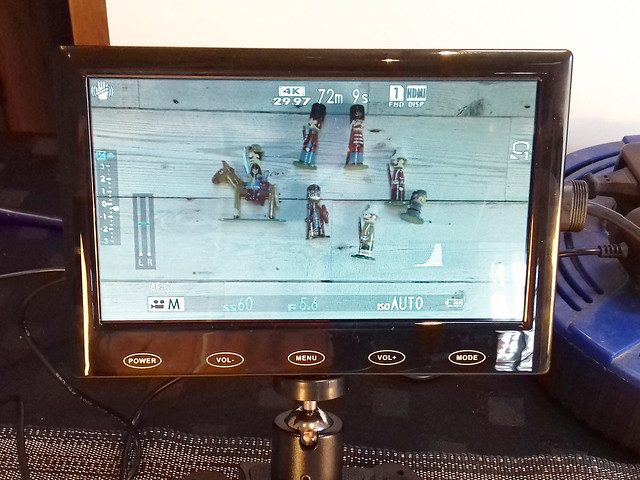
One lesson learned straight away even at this early stage was the benefits of having some form of field or preview monitor so you can keep an eye on camera settings, focusing and framing.
Even if my Fuji XT-2 had a flip and swivel screen it wouldn't be entirely suitable for monitoring tabletop tutorial filming and so a separate preview monitor is recommended. A proper video feed monitor - with all it's bells and whistles - is probably overkill in this situation (although good to have if you can afford one) so I bought a very cheap (£30) 7 inch LCD HDMI monitor for the job.
The addition of a preview monitor means I can sit down - as I would be in a filmed tutorial situation - and work with my tabletop objects with the monitor still in my line of sight, but just out of frame.
This little screen still shows me my cameras main settings - including histogram - and is just sharp enough so I can check focusing. The downside is that colour rendition isn't accurate and it doesn't have the focusing and hand other assist features that a real field monitor would. But, for £30 I'm not complaining.
Conclusions
Despite the messy lashed together set-up, I had a very productive session and made lots of notes. My dinning room 'video lab' also had the added benefit of being right next to our kitchen so I was able to replenish my mug of tea without going to far!
1. Camera Height: The first issue I got to grips with was the camera height. I decided to stick with my Fujinon 18-55mm zoom to give me some flexibility in framing shots and testing relative proximities between subject and lens.
In the end I settled on my camera being about 1.5 feet (44cm) from the table - to lens - and my zoom set around 20mm.
2. Focus Setting: Because I will be shooting tabletop tutorials and, so, move from wide shots to closeups quickly I decided to set my camera to continuous auto-focus with the point of focus centre biased using the zone AF mode. Yes, there will be a little focus searching when I move from table distance to 'close-up' (about 7 inches from the lens), but this is the least 'fussy' way of doing things to begin with.
3. Lighting: You can never have enough light, and although I think my test proves this point it also proved that it's a particular sort of light that I am short of.
Because my models are glossed - with varnish - strong harsh lighting is not helpful as it produces very aggressive reflections. I, therefore, need defused lighting so as not to create too many bright highlights on my subjects and by doing so lose detail.
My current problem is that I only have one LED lamp which can generate enough illumination when defused - my Neewer 304 LED lamp (and I had that turned up to max) - so I will have to buy another so I have the level of control that I am after.
I used a umbrella to create the soft light I wanted, but this is also a problem as this is far too large and cumbersome to be suitable for my overhead table frame concept. I may, therefore, have to make some sort of compact soft box and try that out (more experiments)!
4. Camera settings: Funnily enough, my shooting settings were perhaps the least of my problems as the XT-2 is such a great camera that it didn't take long to settle on some working settings (although that isn't to say they won't be modified as I gain more experience).
The one thing that did have me scratching my head was what video recording mode to shoot in; FHD (1080) or UHD (4K)? And, also, what flavour of either of these resolutions - 24fps, 30fps or 60fps.
Although I am aiming at 1080HD output for YouTube, I did - initially - fancy FHD 60fps for reasons of detail, but then decided upon 4K and downscaling to FHD so I have the flexibility to crop, zoom and animate within my editing software.
Result...
A wee bit soft and a touch dim causing the loss of some of the details
in the shadow areas...More light needed!
-------------
Anyway, this was all very sloppy and a lot of 'guesstimation', but it got me a starting point. I can refine my technique with practice. Most importantly, I have the data I need to start making my overhead camera frame.
No comments:
Post a Comment