But let's not bemoan lost opportunities and move on...
While I had originally had some ambitious ideas for film projects, I've had to scale these down to suit my new work schedule. But one thing that struck me is that I was missing a trick, somewhat, in that I had overlooked a interesting video opportunity on my 'own doorstep'.
Tabletop Filming
I am a pretty active craftsperson and modeller and I already blog a lot about these activities. However, I had often thought that text description and even still photographs do not adequately illustrate some of the techniques and processes that I use to produce some of my creative projects - filming the work would be far more effective.
Funnily enough, I had already started to explore the idea of filming my small hobby work table on this blog in a post I simply entitled 'Videoing Tabletop Tutorials' back in March 2017. But, this was a very simple attempt to capture my workspace using my GoPro Hero 4 camera and actually created more questions than it answered about focusing, lighting, camera angles and the ability to do close-up shots.
My conclusion at the time was that the GoPro was perhaps not the best camera for this purpose - being fixed focus with a minimum focus distance of about 30cm. I think I was going to try either my mobile phone camera or my Logitch webcam next, as they both have very responsive auto-focus systems which would be great for close-ups (but I didn't get round to it).
A More (Semi) Professional Approach
Obviously, the above experiment was very rudimentary to get me on my way towards finding a suitable solution to filming tabletop hobby activities. But, now I want to look more seriously into devising an effective means of recording craft and modelling work.
I did some research online and discovered that there is, actually, a purpose-built camera rig specifically designed for tabletop film-making - it's called an Overhead Camera Platform...
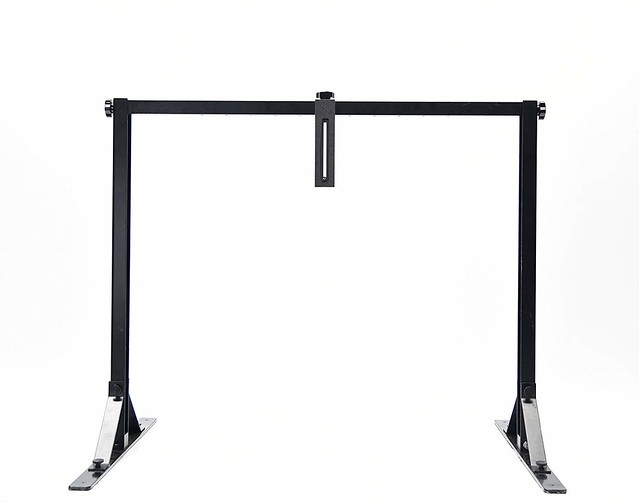 |
| This upside-down 'U' shaped from sits on a tabletop and is adjustable for height... |
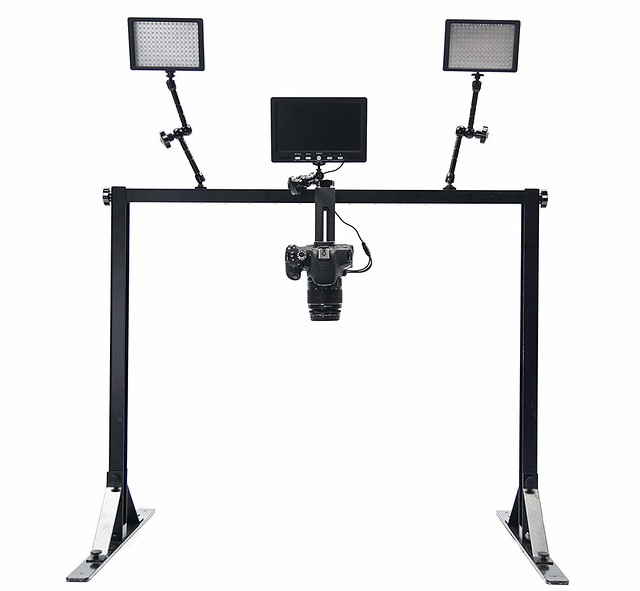 |
| Camera equipment can then be clamped to the frame to allow for 'top-down' filming of tabletop subjects. |
Now, there are alternative solutions used by videographers - including cranes and also using a downward facing mirror - to capture tabletop scenes, but all of these require space (preferably a small studio) or money...And I have neither.
So, what I need is a more 'professional' approach but which comes with a budget price-tag and that will fit the constraints of my cramped workspace. Something that will sit on my workbench.
I've looked around for some DIY overhead rigs on YouTube and found a couple of options, here's a pretty good bargain basement rig idea...
Or, here's an alternative method for making a DIY overhead rig with some in-depth tips about how to set up your camera and the lighting...
SO... I now have a plan, a cunning plan, the first part of which is to design and make my own home-brew overhead video platform and then to shoot some tests. As it happens, my wife found something in our attic that might make a good cheapo rig...
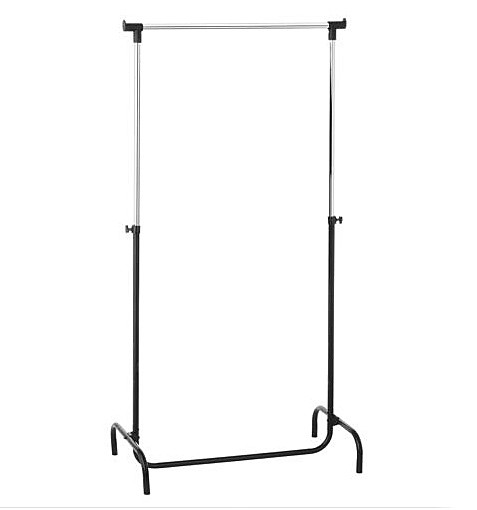
It's one of those clothes hanger rails, we've had one disassembled in storage for ages (in fact it was a bit rusty) and we were about to take it to the recycle dump...But I have an idea I could make a tabletop rig from it.
In part 2 of this post I get to work modifying my clothes rail with the help of my trusty Dremel tool!
No comments:
Post a Comment