Wednesday, 8 August 2018

Tabletop Filming Redux - Part 2

Before I get down to the actual DIY bit of my Overhead Camera Frame I have to do some tests to establish dimensions for the frame (appropriate minimum height from table) as well as getting some ideas about camera settings and lighting.

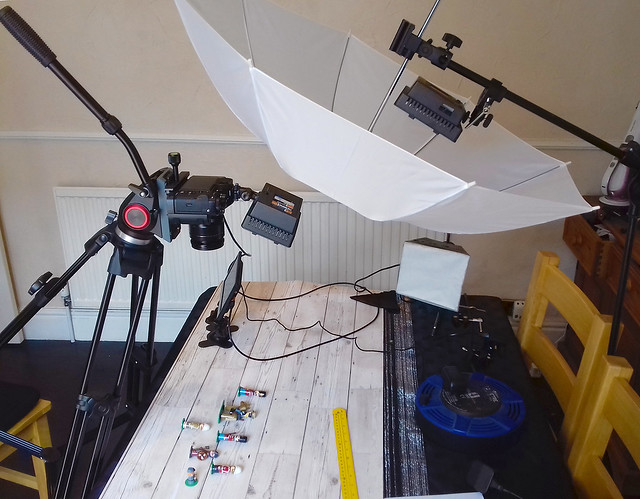
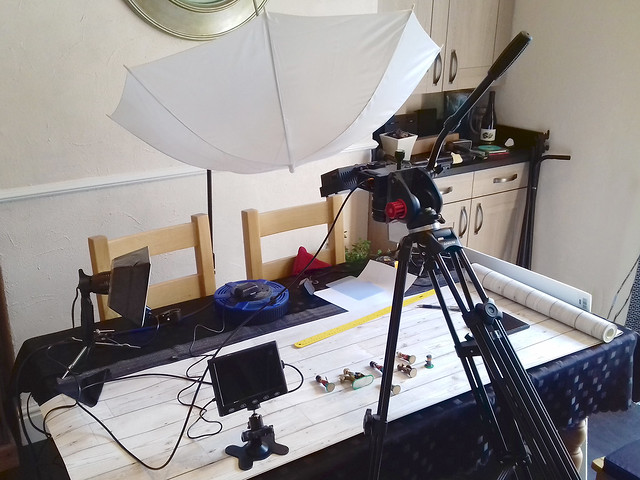
To do this I will lash up a make-shift camera rig using my tripod and other bits and bobs - just so I can work with the various bits of equipment and work out the ideal arrangements for the final frame layout. For this test I requisitioned the wife's dinning room table (temporarily - I was told)...


Excuse the shoddy snap, hopefully you can make out what's going on here. I've just tipped up my video tripod so that I get a top-down perspective with my camera and set up various types of lighting to try out.

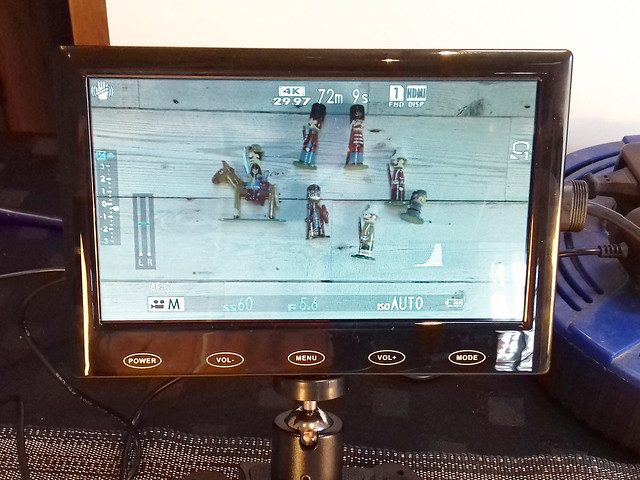
One lesson learned straight away even at this early stage was the benefits of having some form of field or preview monitor so you can keep an eye on camera settings, focusing and framing.


Even if my Fuji XT-2 had a flip and swivel screen it wouldn't be entirely suitable for monitoring tabletop tutorial filming and so a separate preview monitor is recommended. A proper video feed monitor - with all it's bells and whistles - is probably overkill in this situation (although good to have if you can afford one) so I bought a very cheap (£30) 7 inch LCD HDMI monitor for the job.

The addition of a preview monitor means I can sit down - as I would be in a filmed tutorial situation - and work with my tabletop objects with the monitor still in my line of sight, but just out of frame.

This little screen still shows me my cameras main settings - including histogram - and is just sharp enough so I can check focusing. The downside is that colour rendition isn't accurate and it doesn't have the focusing and hand other assist features that a real field monitor would. But, for £30 I'm not complaining.


Conclusions
Despite the messy lashed together set-up, I had a very productive session and made lots of notes. My dinning room 'video lab' also had the added benefit of being right next to our kitchen so I was able to replenish my mug of tea without going to far!

1. Camera Height: The first issue I got to grips with was the camera height. I decided to stick with my Fujinon 18-55mm zoom to give me some flexibility in framing shots and testing relative proximities between subject and lens.

In the end I settled on my camera being about 1.5 feet (44cm) from the table - to lens - and my zoom set around 20mm.

2. Focus Setting: Because I will be shooting tabletop tutorials and, so, move from wide shots to closeups quickly I decided to set my camera to continuous auto-focus with the point of focus centre biased using the zone AF mode. Yes, there will be a little focus searching when I move from table distance to 'close-up' (about 7 inches from the lens), but this is the least 'fussy' way of doing things to begin with.

3. Lighting: You can never have enough light, and although I think my test proves this point it also proved that it's a particular sort of light that I am short of.

Because my models are glossed - with varnish - strong harsh lighting is not helpful as it produces very aggressive reflections. I, therefore, need defused lighting so as not to create too many bright highlights on my subjects and by doing so lose detail.

My current problem is that I only have one LED lamp which can generate enough illumination when defused - my Neewer 304 LED lamp (and I had that turned up to max) - so I will have to buy another so I have the level of control that I am after.

I used a umbrella to create the soft light I wanted, but this is also a problem as this is far too large and cumbersome to be suitable for my overhead table frame concept. I may, therefore, have to make some sort of compact soft box and try that out (more experiments)!

4. Camera settings: Funnily enough, my shooting settings were perhaps the least of my problems as the XT-2 is such a great camera that it didn't take long to settle on some working settings (although that isn't to say they won't be modified as I gain more experience).

The one thing that did have me scratching my head was what video recording mode to shoot in; FHD (1080) or UHD (4K)? And, also, what flavour of either of these resolutions - 24fps, 30fps or 60fps.

Although I am aiming at 1080HD output for YouTube, I did - initially - fancy FHD 60fps for reasons of detail, but then decided upon 4K and downscaling to FHD so I have the flexibility to crop, zoom and animate within my editing software.

Result...


A wee bit soft and a touch dim causing the loss of some of the details
in the shadow areas...More light needed!

-------------

Anyway, this was all very sloppy and a lot of 'guesstimation', but it got me a starting point. I can refine my technique with practice. Most importantly, I have the data I need to start making my overhead camera frame.
Sunday, 5 August 2018

Arca-Swiss QR Mount

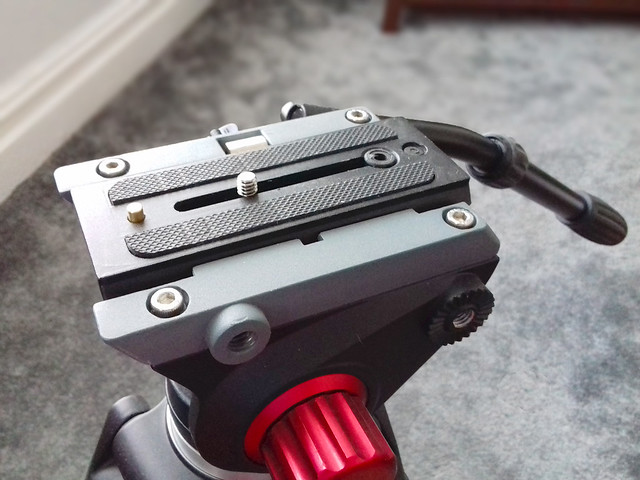
Do I *need* an Area-Swiss camera mount? Debatable, but attaching my DSLR camera to the video plate that comes with my Andoer video tripod has always niggled me. You see, the camera mount and  plate on my *video* tripod is designed for use - primarily - for a camcorder (naturally) and while it does accommodate a DSLR camera 'OK', I don't like the huge plate hanging off my camera...


Camcorders, being *long* - while DSLRs are *wide* - means that the mount plate on my tripod overhangs a very long way when I attach my Fuji XT-2. Again, this isn't a major thing and the plate attaches very securely, this is just one of those things that is - randomly - irritating to me! :)

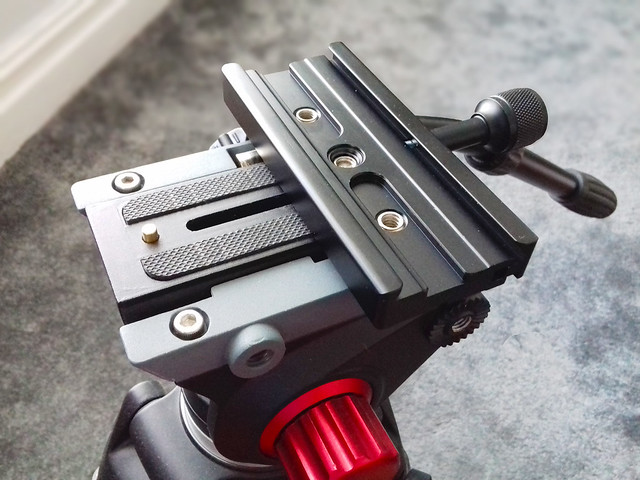
The Arca-Swiss QR mount is design for photo-cameras and mounts using a rail that runs the width of the bottom of the camera or camera cage (I have a cage). This then attaches to my video mounting plate converting the long video mount to a wide photo-camera mount...

Fotga QR-120 Clamp Adapter For Quick Release Arca-Swiss plate.


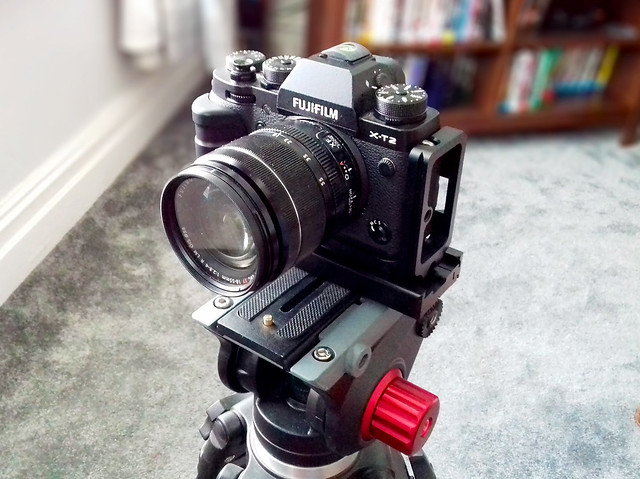
So what? Well, the Area-Swiss system now being integral to my camera - thanks to the rail at the bottom of my camera cage - I no longer have to have a mount plate screwed to the bottom of my camera. I simply slide my camera into the Area-Swiss 'clamp' which is attached to my tripod mount.

3rd party 'L' grip for Fuji XT-2 camera with integral Area-Swiss rail.

This means I can very quickly whip my camera in and out and never have to worry if I left the tripod mounting plate on the desk at home or in the pocket of my other jacket. I also no longer have a very long video tripod mounting plate sticking out from under my camera.

As I say, these are small - not make of break - issues. But I feel better I have this sorted now. :)


I bought the camera's 'L' grip a while back to give my big hands a little extra purchase on the XT-2, the integral Arca-Swiss rail on the bottom was just an added bonus.

Thursday, 2 August 2018

Tabletop Filming Redux - Part 1

After a long hiatus - where I had to do some serious rethinking about the whole idea of my filming activities due to changes in work and life changes - I've concluded that my videography interests will have to be relegated to a 'hobby' rather than my original intention of exploring a small business.

But let's not bemoan lost opportunities and move on...

While I had originally had some ambitious ideas for film projects, I've had to scale these down to suit my new work schedule. But one thing that struck me is that I was missing a trick, somewhat, in that I had overlooked a interesting video opportunity on my 'own doorstep'.

Tabletop Filming
I am a pretty active craftsperson and modeller and I already blog a lot about these activities. However, I had often thought that text description and even still photographs do not adequately illustrate some of the techniques and processes that I use to produce some of my creative projects - filming the work would be far more effective.

Funnily enough, I had already started to explore the idea of filming my small hobby work table on this blog in a post I simply entitled 'Videoing Tabletop Tutorials' back in March 2017. But, this was a very simple attempt to capture my workspace using my GoPro Hero 4 camera and actually created more questions than it answered about focusing, lighting, camera angles and the ability to do close-up shots.


My conclusion at the time was that the GoPro was perhaps not the best camera for this purpose - being fixed focus with a minimum focus distance of about 30cm. I think I was going to try either my mobile phone camera or my Logitch webcam next, as they both have very responsive auto-focus systems which would be great for close-ups (but I didn't get round to it).

A More (Semi) Professional Approach
Obviously, the above experiment was very rudimentary to get me on my way towards finding a suitable solution to filming tabletop hobby activities. But, now I want to look more seriously into devising an effective means of recording craft and modelling work.

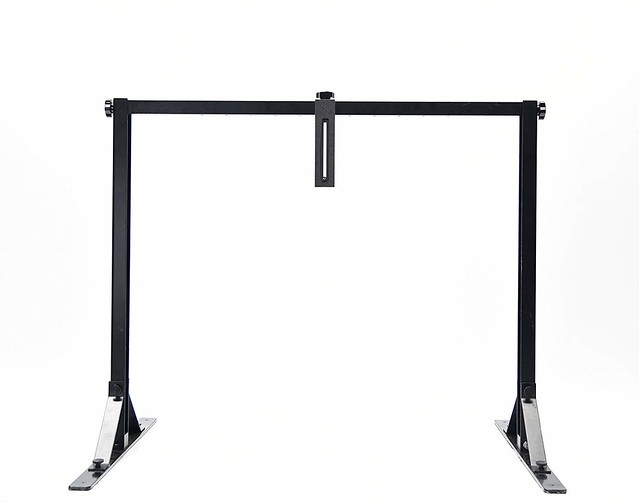
I did some research online and discovered that there is, actually, a purpose-built camera rig specifically designed for tabletop film-making - it's called an Overhead Camera Platform...

This upside-down 'U' shaped from sits on a tabletop and is
adjustable for height...
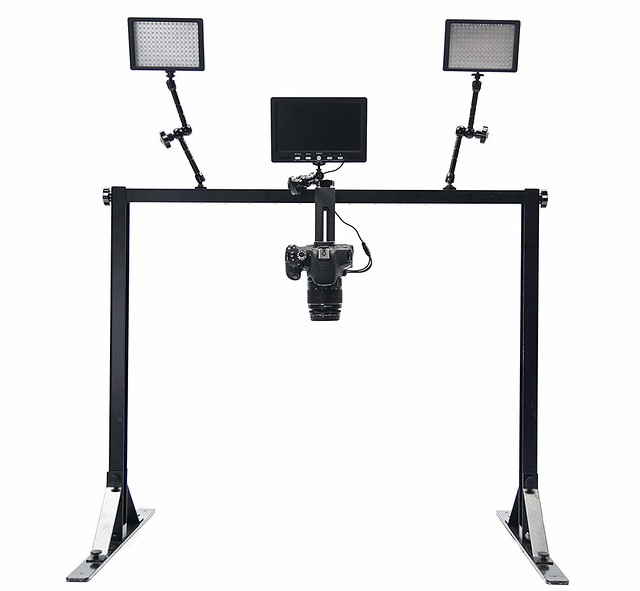
Camera equipment can then be clamped to the frame to allow
for 'top-down' filming of tabletop subjects.

Now, there are alternative solutions used by videographers - including cranes and also using a downward facing mirror - to capture tabletop scenes, but all of these require space (preferably a small studio) or money...And I have neither.

So, what I need is a more 'professional' approach but which comes with a budget price-tag and that will fit the constraints of my cramped workspace. Something that will sit on my workbench.

I've looked around for some DIY overhead rigs on YouTube and found a couple of options, here's a pretty good bargain basement rig idea...


Or, here's an alternative method for making a DIY overhead rig with some in-depth tips about how to set up your camera and the lighting...


SO... I now have a plan, a cunning plan, the first part of which is to design and make my own home-brew overhead video platform and then to shoot some tests. As it happens, my wife found something in our attic that might make a good cheapo rig...


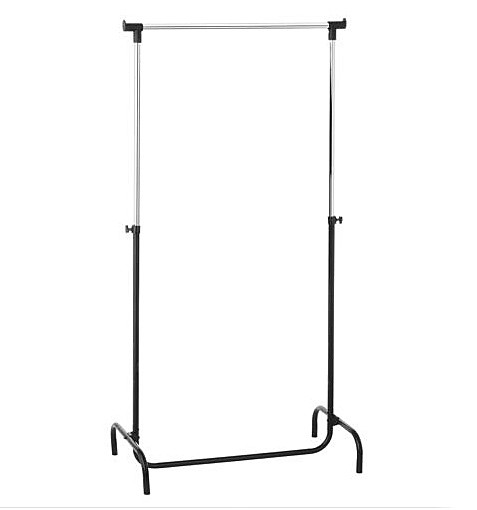
It's one of those clothes hanger rails, we've had one disassembled in storage for ages (in fact it was a bit rusty) and we were about to take it to the recycle dump...But I have an idea I could make a tabletop rig from it.

In part 2 of this post I get to work modifying my clothes rail with the help of my trusty Dremel tool!